
You can create an Airbnb wish list to save the homes you like while planning for your next vacation. This option comes handy when you have shortlisted all those beautiful homes and the time has now come to drop the coin.
Get $50 off Your First Airbnb Trip Sign up now.
1. How to create Airbnb wish list
STEP 1: When viewing a listing on Airbnb, you can click on the ‘Save‘ button next to ‘Share‘ button on the top right.
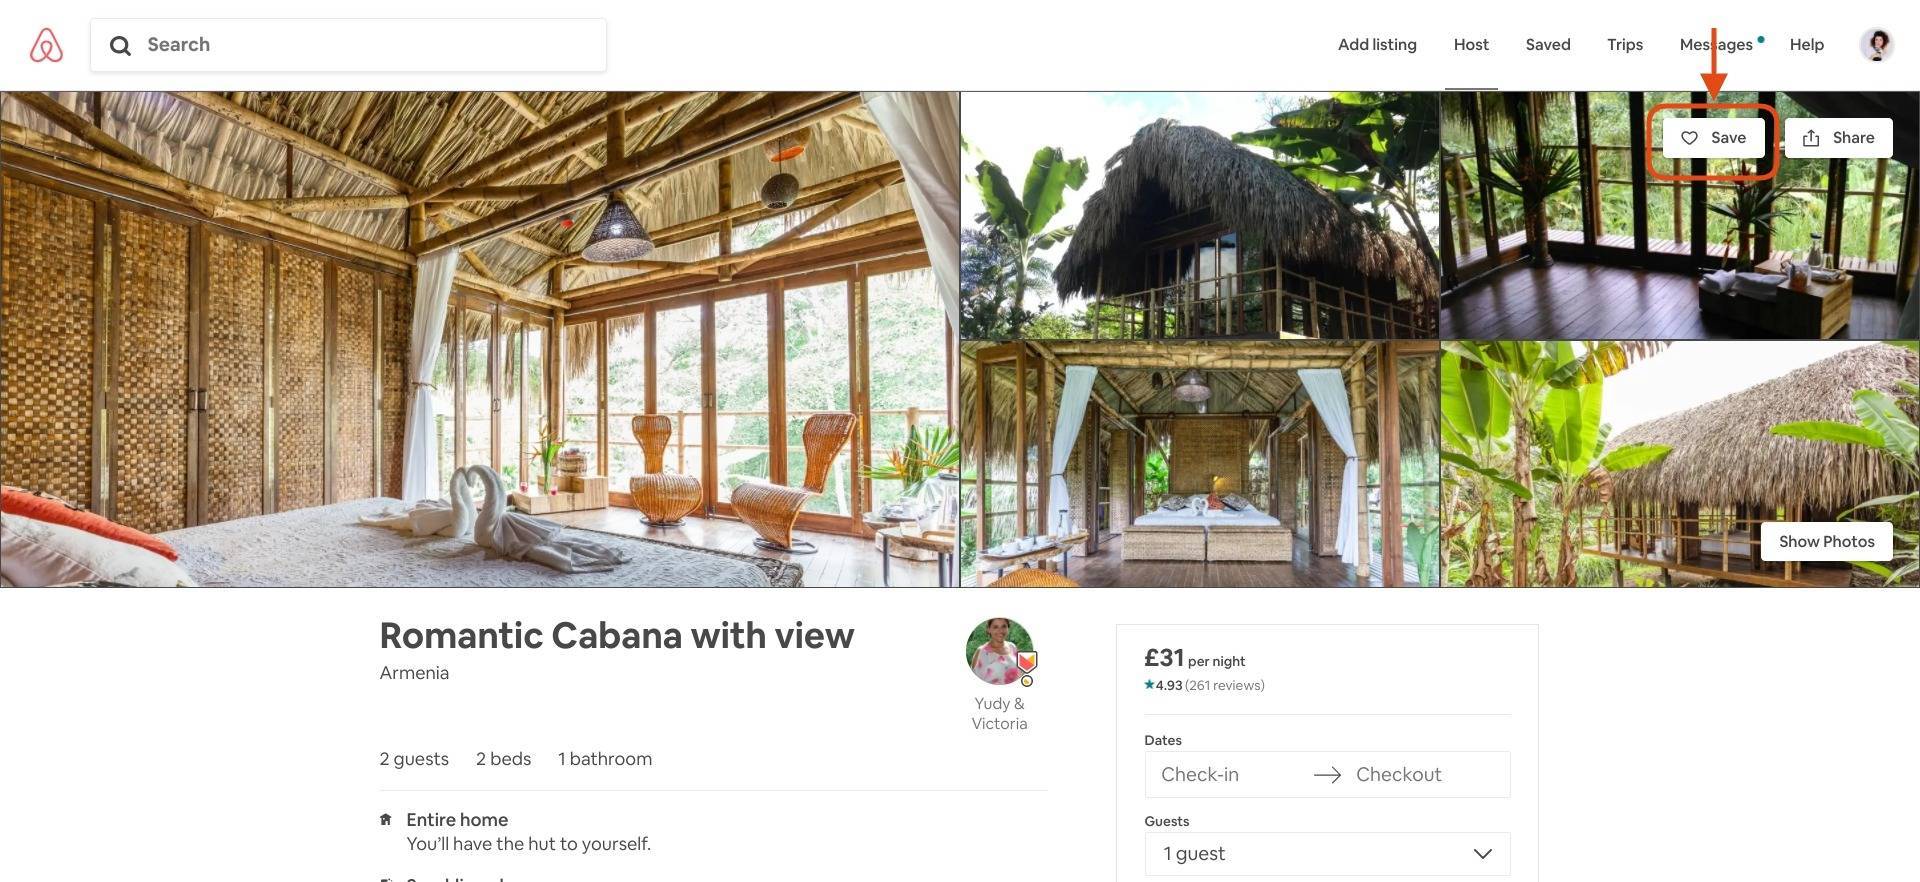
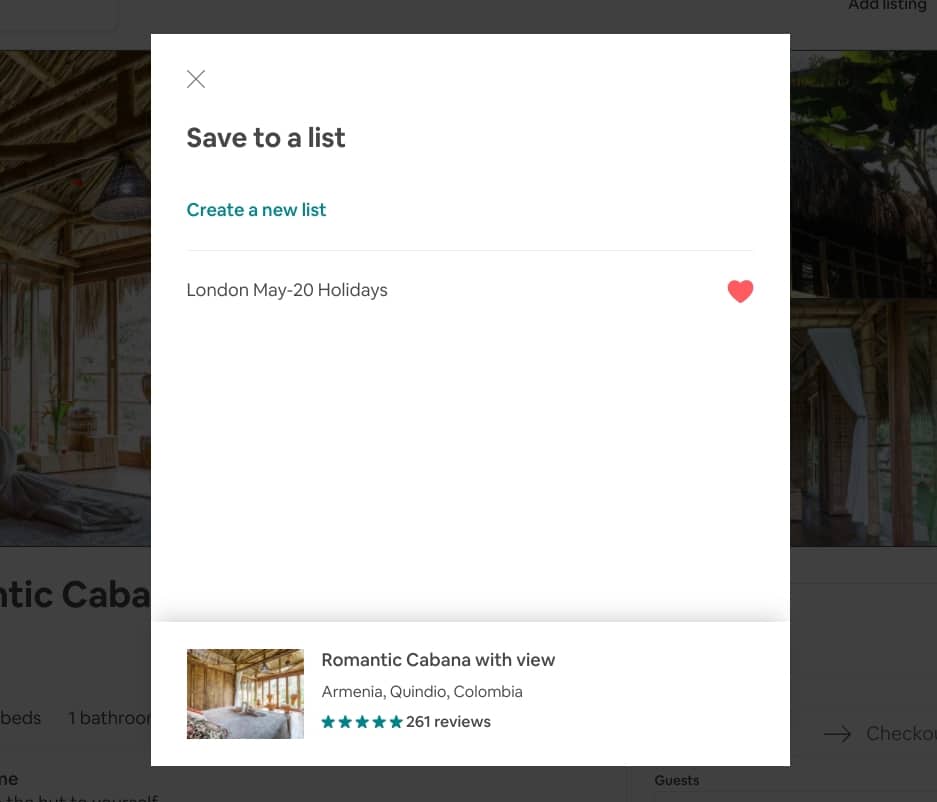
STEP 2: The next pop up screen will prompt you to choose the wish list in which you would like to save this listing.
If this is your first wish list, type the ‘Name‘ you wish to call this list for example ‘London May-20 Holidays’.
You can create as many wish lists as you want.
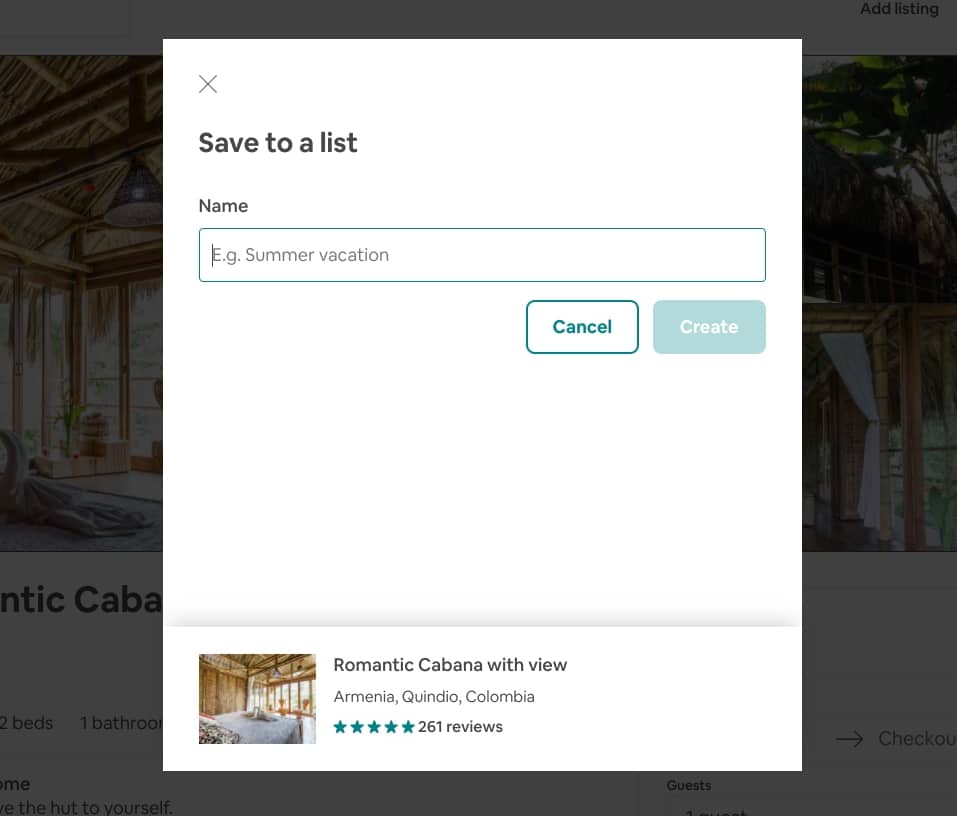
STEP 3: Click ‘Create‘ to save your wish list. Your Airbnb wishlist appears on the next screen.
2. How to find your wish list
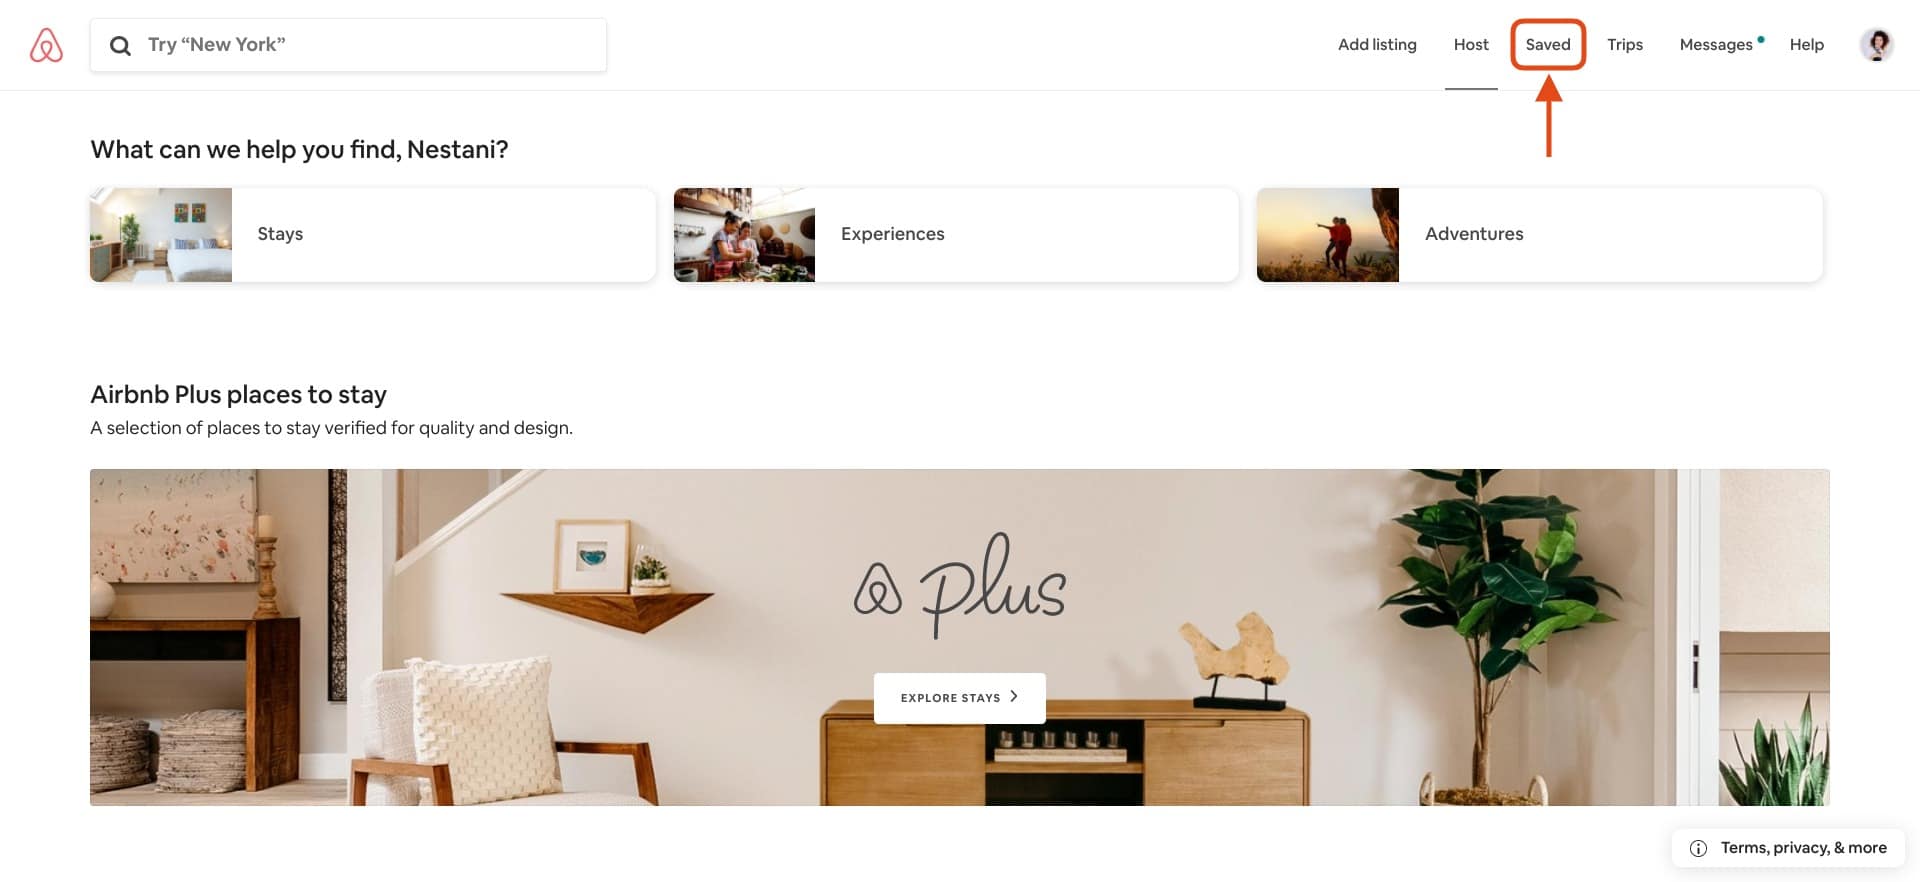
When you want to see all the homes you have saved in your Airbnb wish list, just click on the ‘Saved’ menu option in the top right.
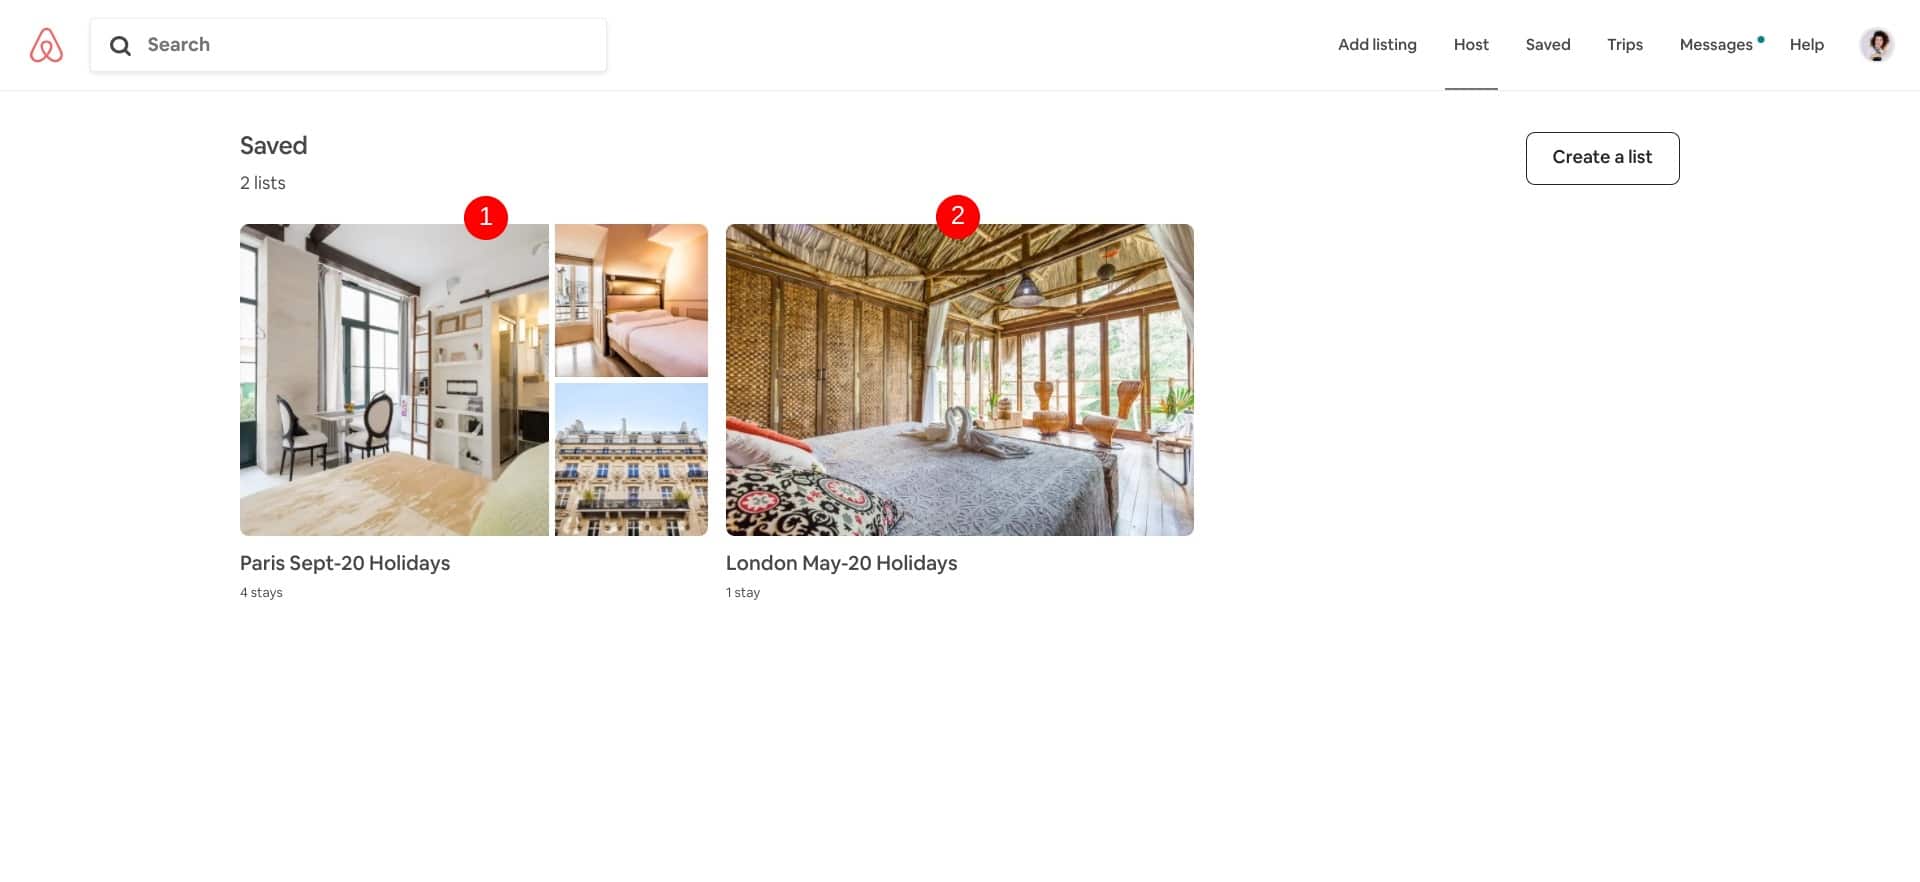
On the screen that follows you will be able to see all your Airbnb wish lists, and you can see the properties in each by clicking on the main photo.
3. How to edit your wish list
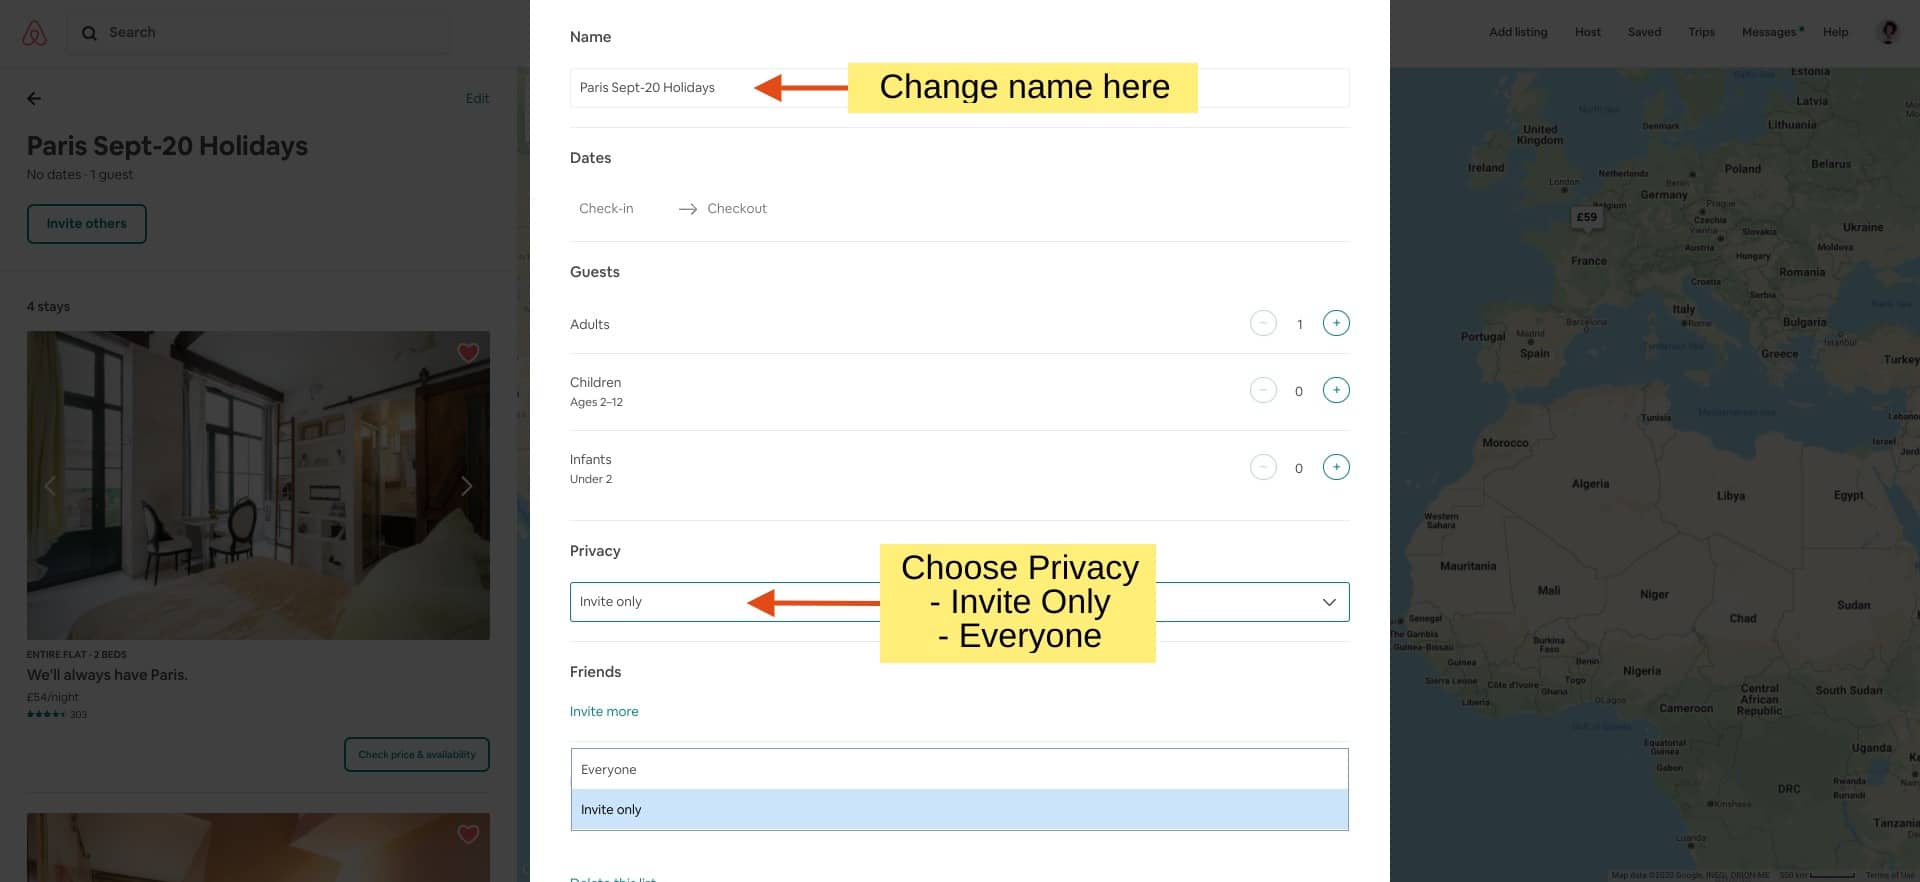
To make changes to your Airbnb wish list click on the ‘Edit‘ at the top of the list.
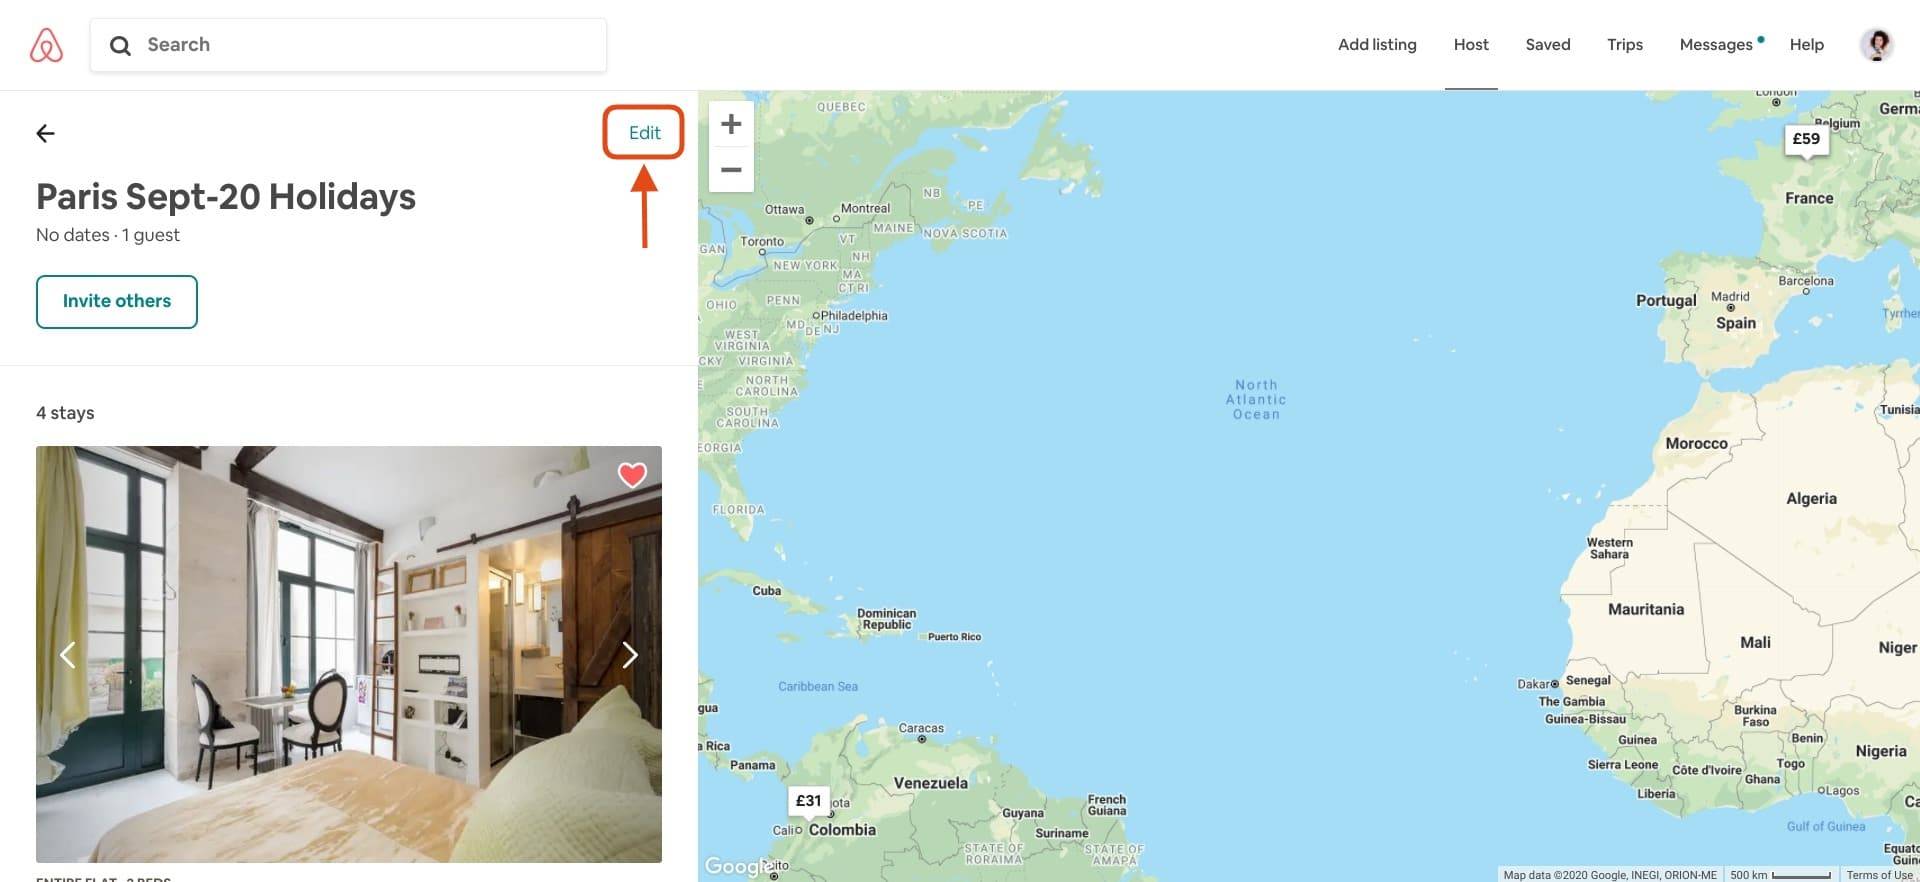
In the Edit screen that pops up will let you do a few key things.
- Change wish list name
- Choose privacy options
- Invite only
- Everyone
4. Share your Airbnb wish list
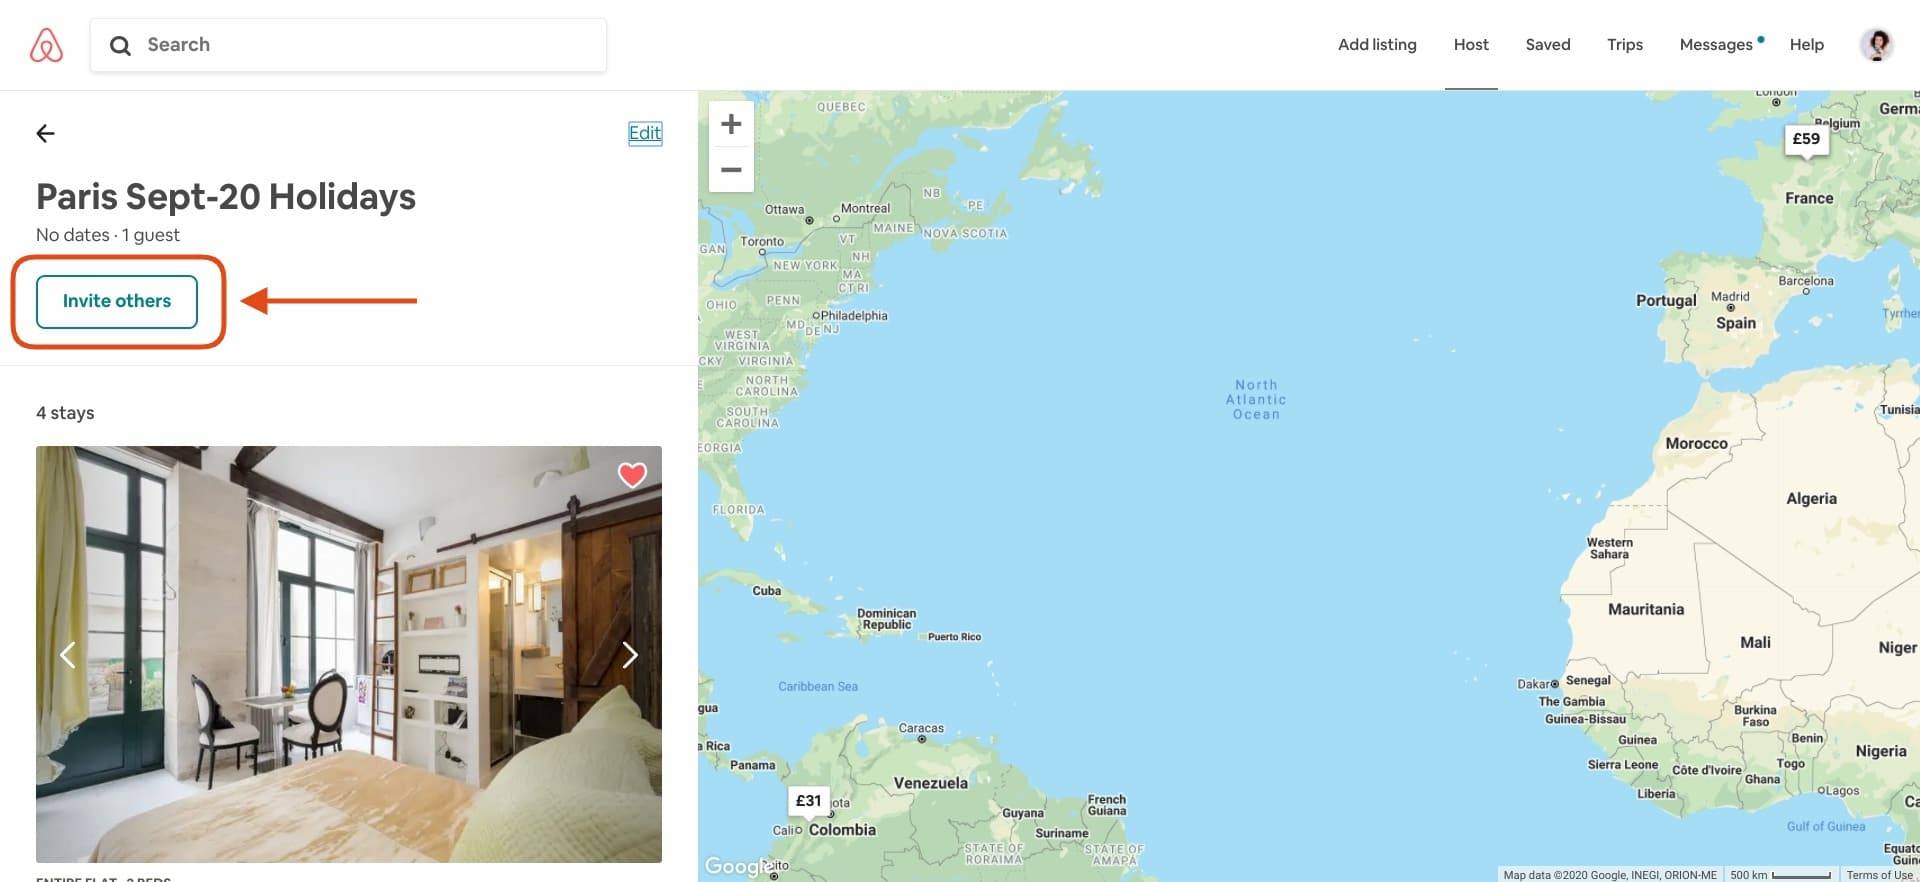
If you want to share your wish list with others, click on ‘Invite others‘ on the list page.
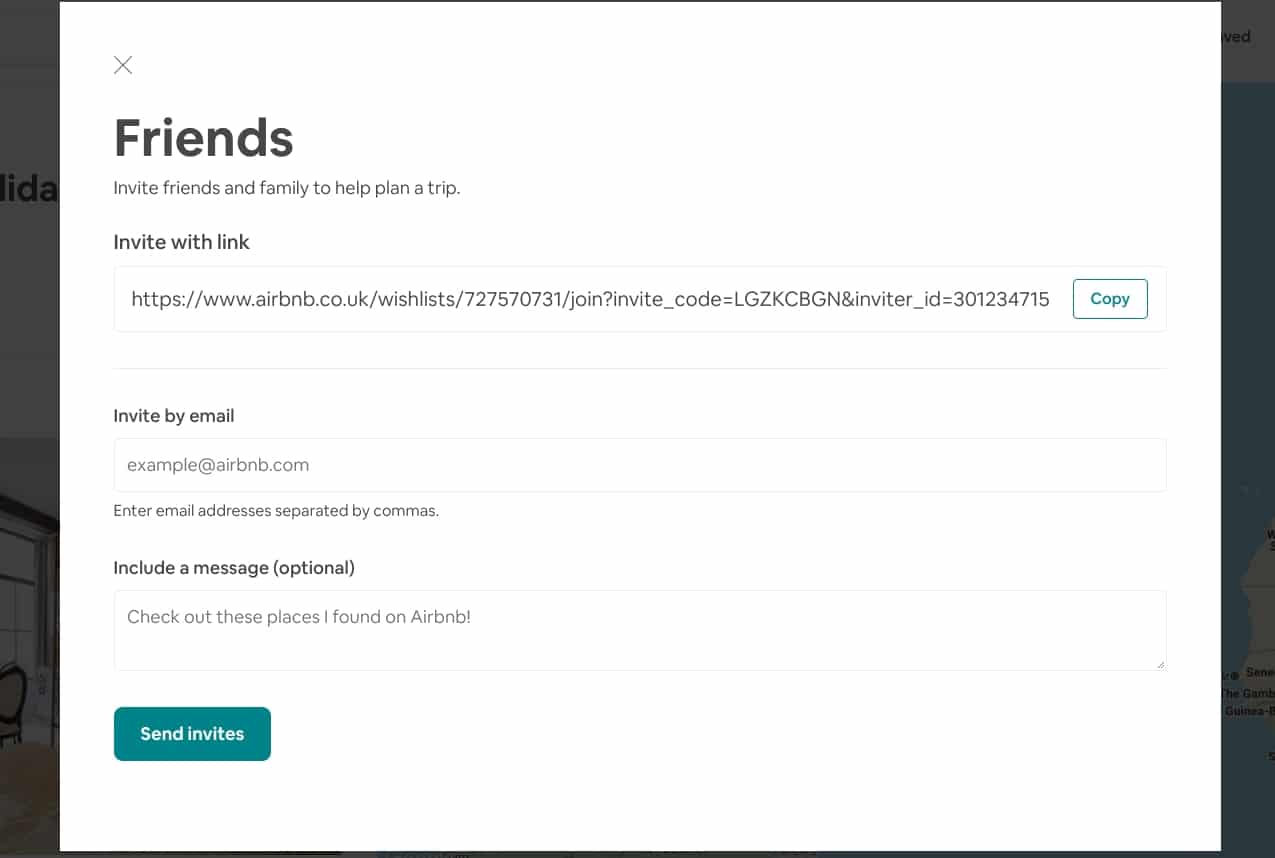
On the next sharing screen, you can either copy the invite link and share with your friends or families.
Alternatively, you can invite by email as well. Just type the email id of the other person and click ‘Send invites‘.
Are you looking for ideas to a write review of your Airbnb host? Read my post on Airbnb review examples.
See my video tutorial on how to view wishlist on Airbnb.


