Welcome to your go-to guide for enhancing your Airbnb hosting experience! Today, we’re diving deep into a fantastic tool called Charge Automation, designed to streamline the guest experience and boost your rental income. If you’re looking for actionable Airbnb hosting tips, you’re in the right place. Let’s get started!
Table of Contents
- Step 1: Understand the Importance of Pre-Check-In Processes
- Step 2: Collect Guest Details for Future Marketing
- Step 3: Customize Your Check-In Flow
- Step 4: Implement ID Verification for Security
- Step 5: Upsell Add-On Services for Extra Income
- Step 6: Create a Comprehensive Digital Guidebook
- Step 7: Setting Up Your Charge Automation Account
- Step 8: Connect Your Payment Gateway
- Step 9: Define the User Journey
- Step 10: Create Your Upsells and Guidebook
- Step 11: Automate Guest Notifications
- Step 12: Monitor Your Dashboard for Insights
- Frequently Asked Questions
Step 1: Understand the Importance of Pre-Check-In Processes
One of the first things you want to implement is a solid pre-check-in process. This helps gather essential information from your guests before they arrive, ensuring everything runs smoothly. Charge Automation allows you to generate a link for your property that you can send to guests, prompting them to complete their pre-check-in.
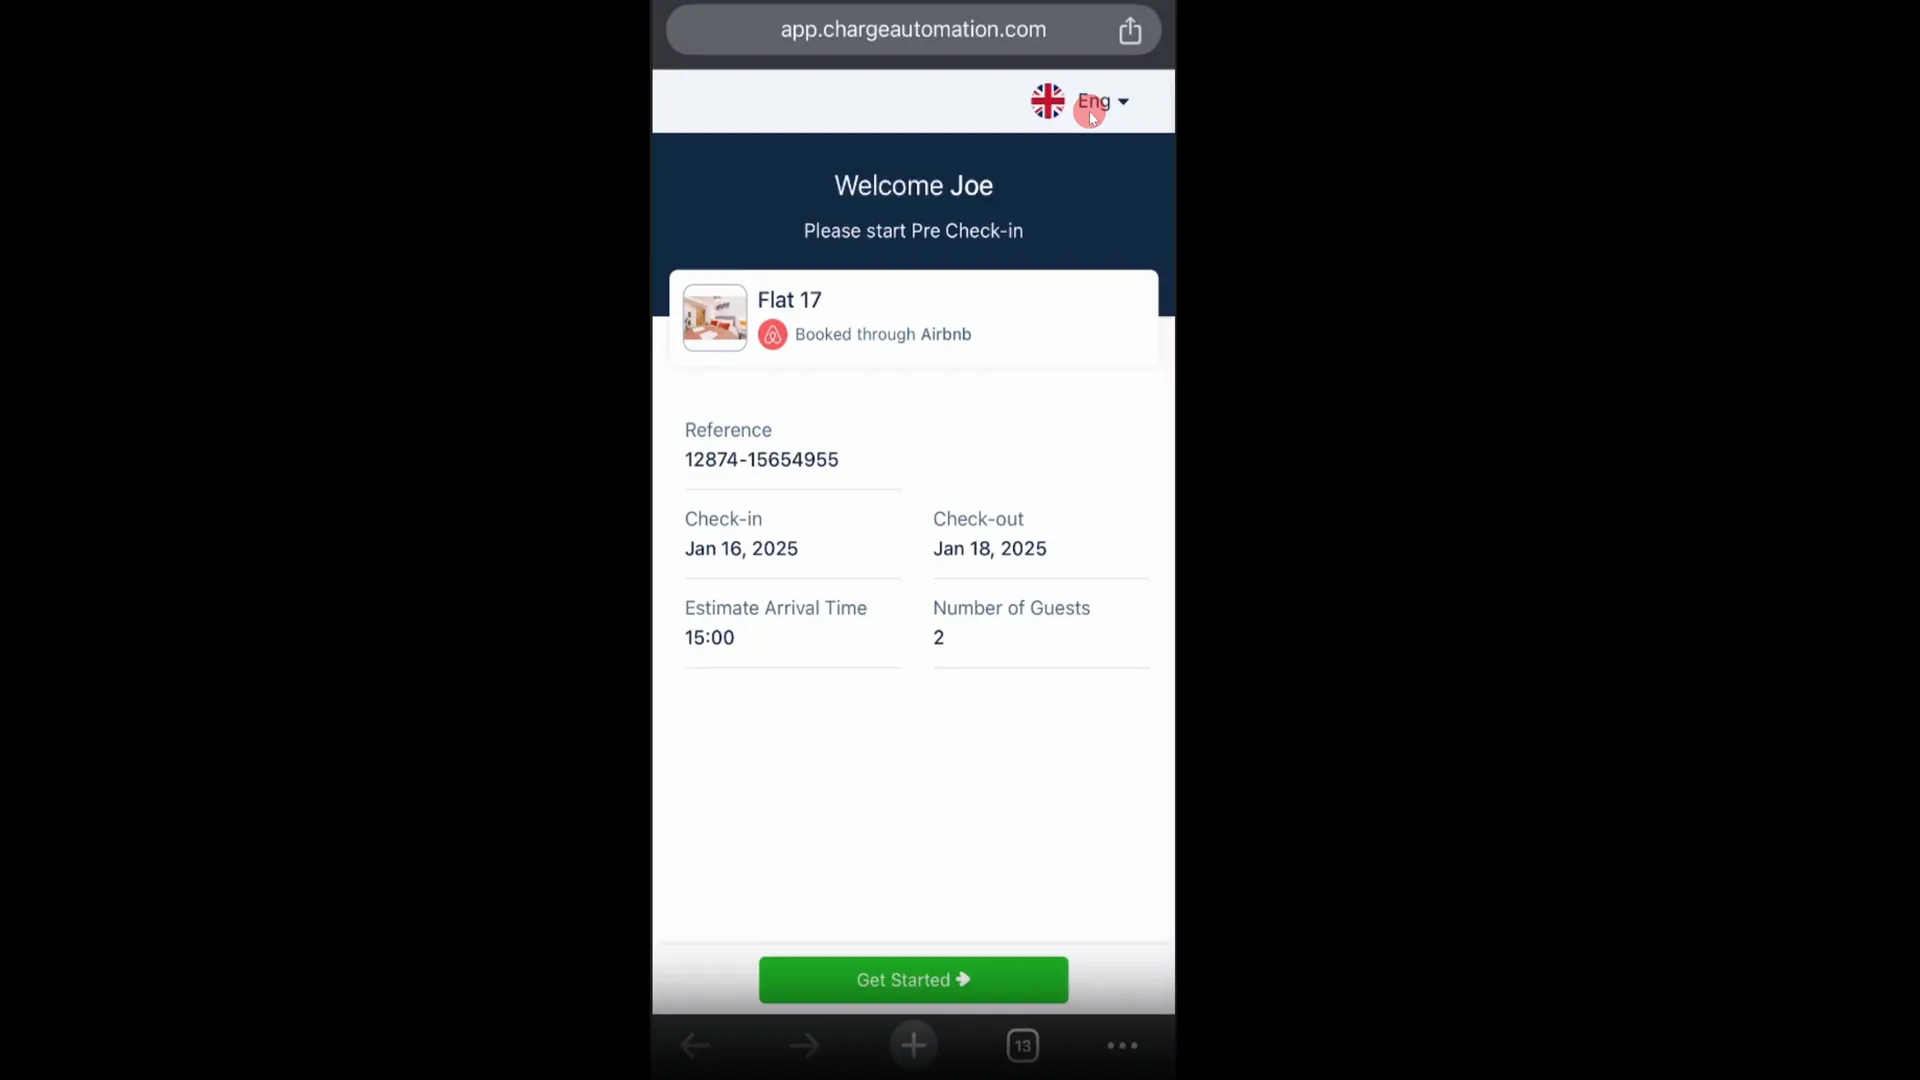
When guests click the link, they’re greeted with a user-friendly interface where they can provide their details, including their estimated arrival time and number of guests. This is crucial for planning and ensures that you have all the necessary information before their arrival.
Step 2: Collect Guest Details for Future Marketing
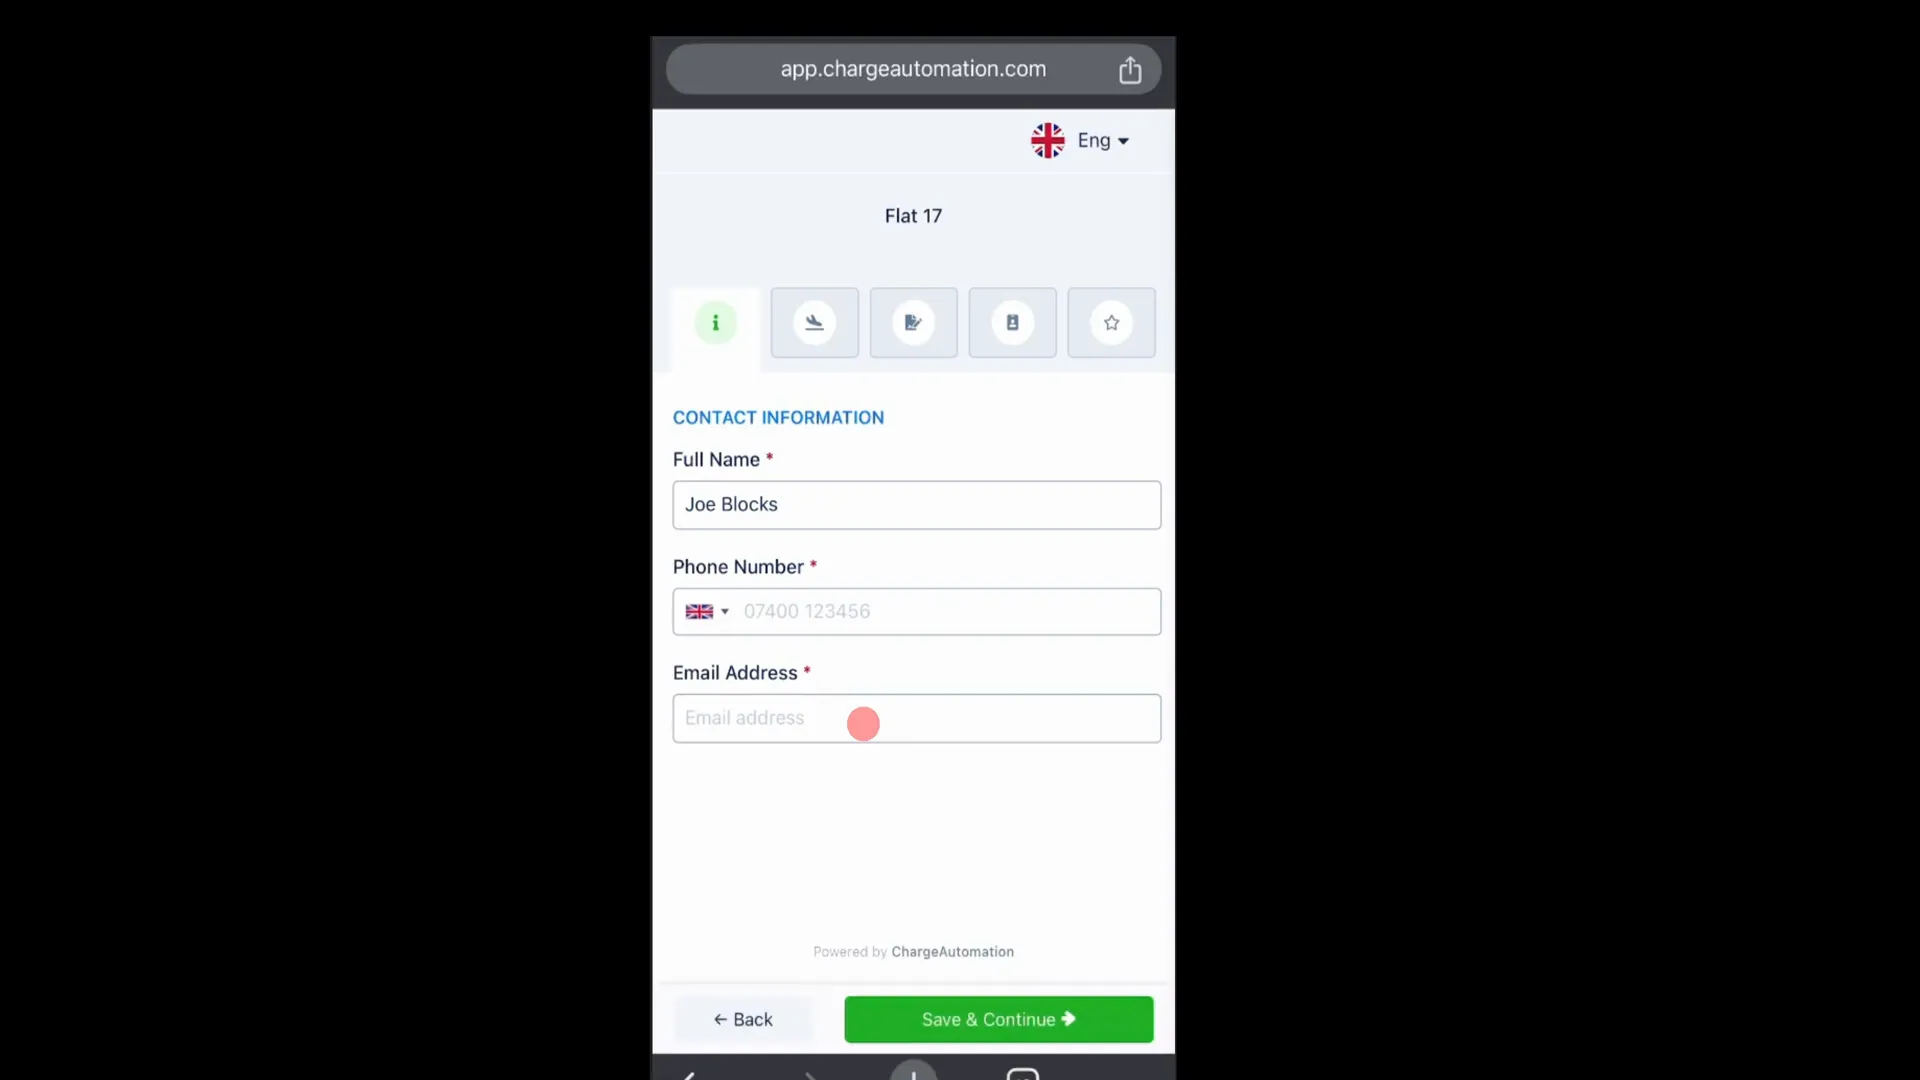
Once your guests start the pre-check-in, they’ll be asked to enter their contact information. This includes their name, phone number, and email address. Collecting this data not only helps with check-ins but also opens opportunities for future marketing efforts.
Having a database of guest information allows you to send promotions, updates, or even ask for feedback after their stay. This can lead to repeat bookings and increased income.
Step 3: Customize Your Check-In Flow
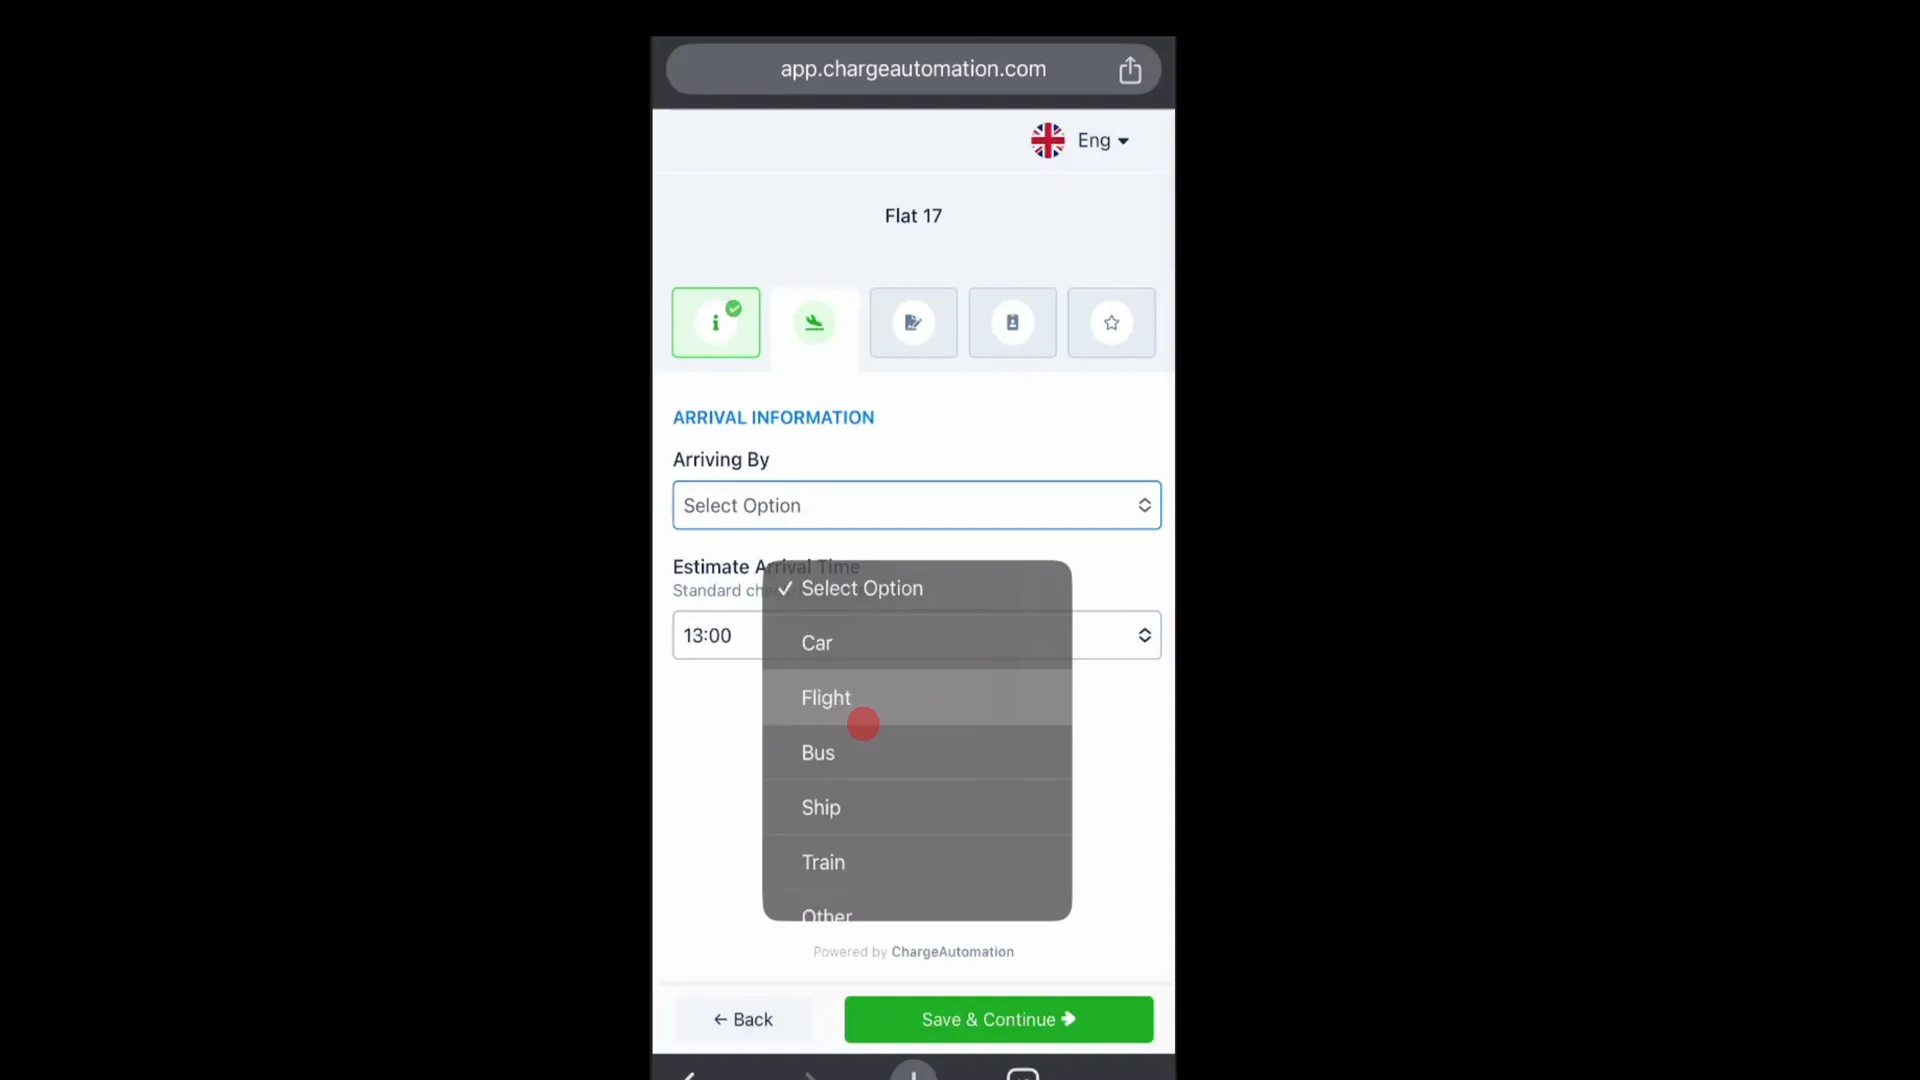
With Charge Automation, you can customize the entire check-in flow based on your preferences. You can ask guests how they’re arriving—be it by flight, car, or bus. For example, if they choose flight, you can request their flight number and estimated arrival time.
Remember, all these fields are optional, allowing you to tailor the experience based on what you deem necessary. This flexibility can enhance the guest experience significantly.
Step 4: Implement ID Verification for Security
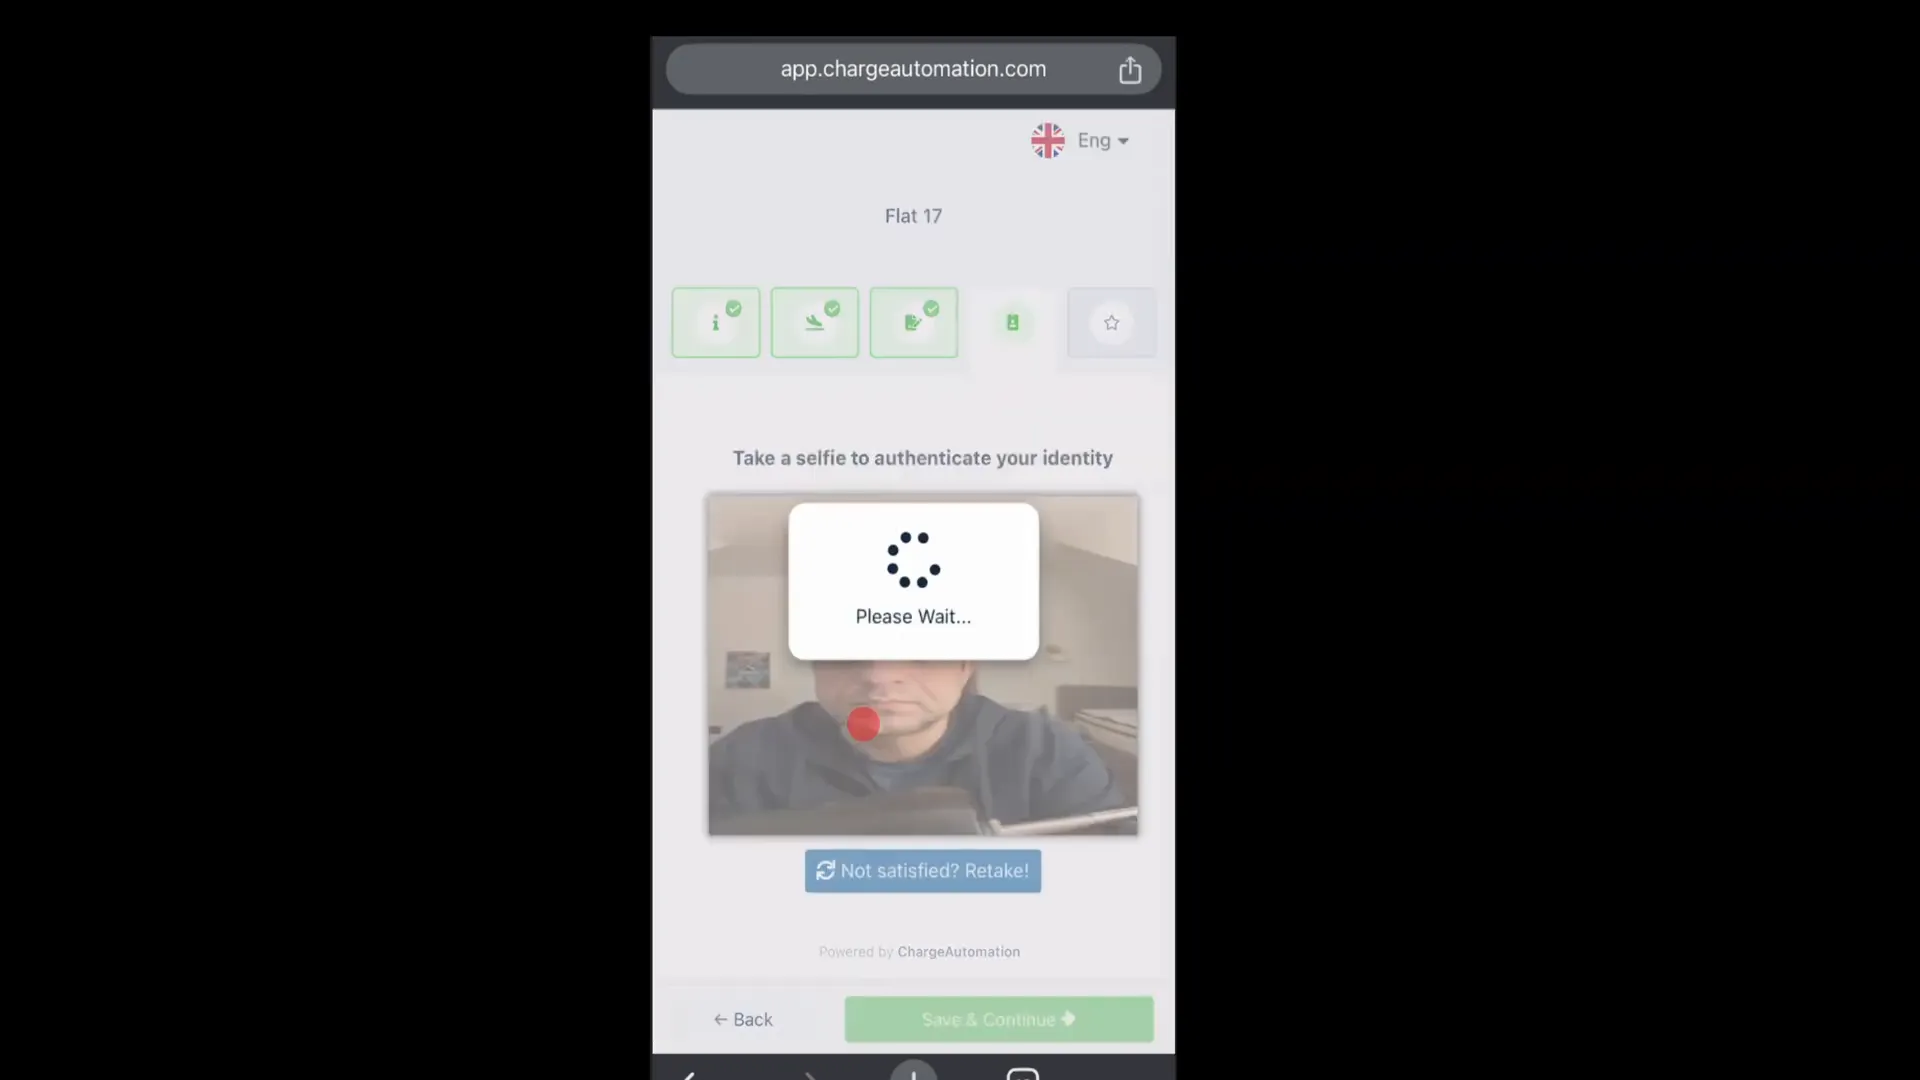
Another valuable feature of Charge Automation is the ability to request ID verification. Guests can upload a picture of their driver’s license or passport, which adds an extra layer of security to your hosting experience.
If you prefer not to use this feature, you can easily switch it off. However, having this option can help deter potential issues and ensure that you know who is staying at your property.
Step 5: Upsell Add-On Services for Extra Income
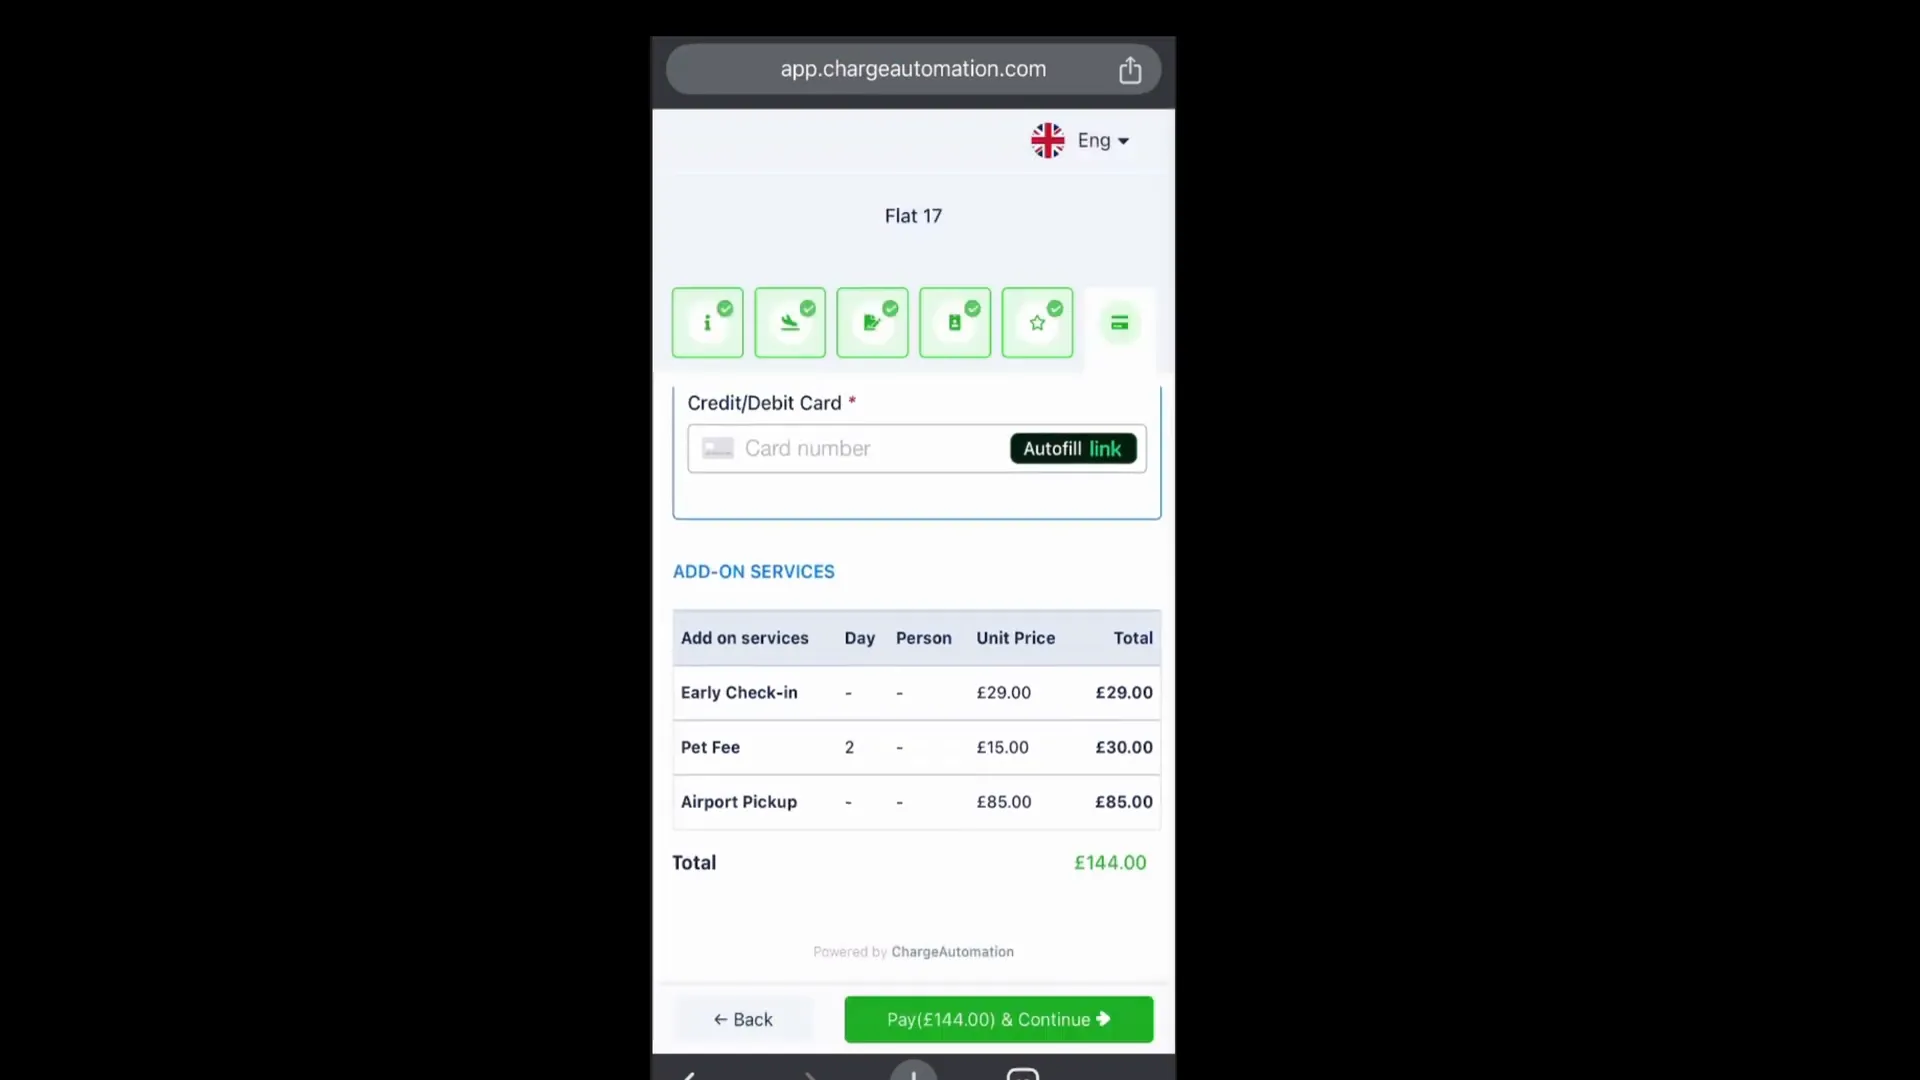
One of the standout features of Charge Automation is the ability to offer upsell services during the pre-check-in process. Guests can choose from a range of options like early check-in, late checkout, airport pickups, and more. This not only enhances their experience but also adds to your income.
For instance, if a guest wants to bring their pet along or needs an airport pickup, they can select these options at checkout. You’ll receive a request, and only when you accept it, will they receive a confirmation.
Step 6: Create a Comprehensive Digital Guidebook
After completing the pre-check-in, guests are directed to a digital guidebook containing all the information they need about your property. This can include Wi-Fi details, local restaurant recommendations, and how to access public transport. A well-crafted digital guidebook can significantly enhance the guest experience.
Guests can refer to this guidebook anytime during their stay, allowing them to find information without needing to contact you. This saves you time and provides them with a seamless experience.
Step 7: Setting Up Your Charge Automation Account
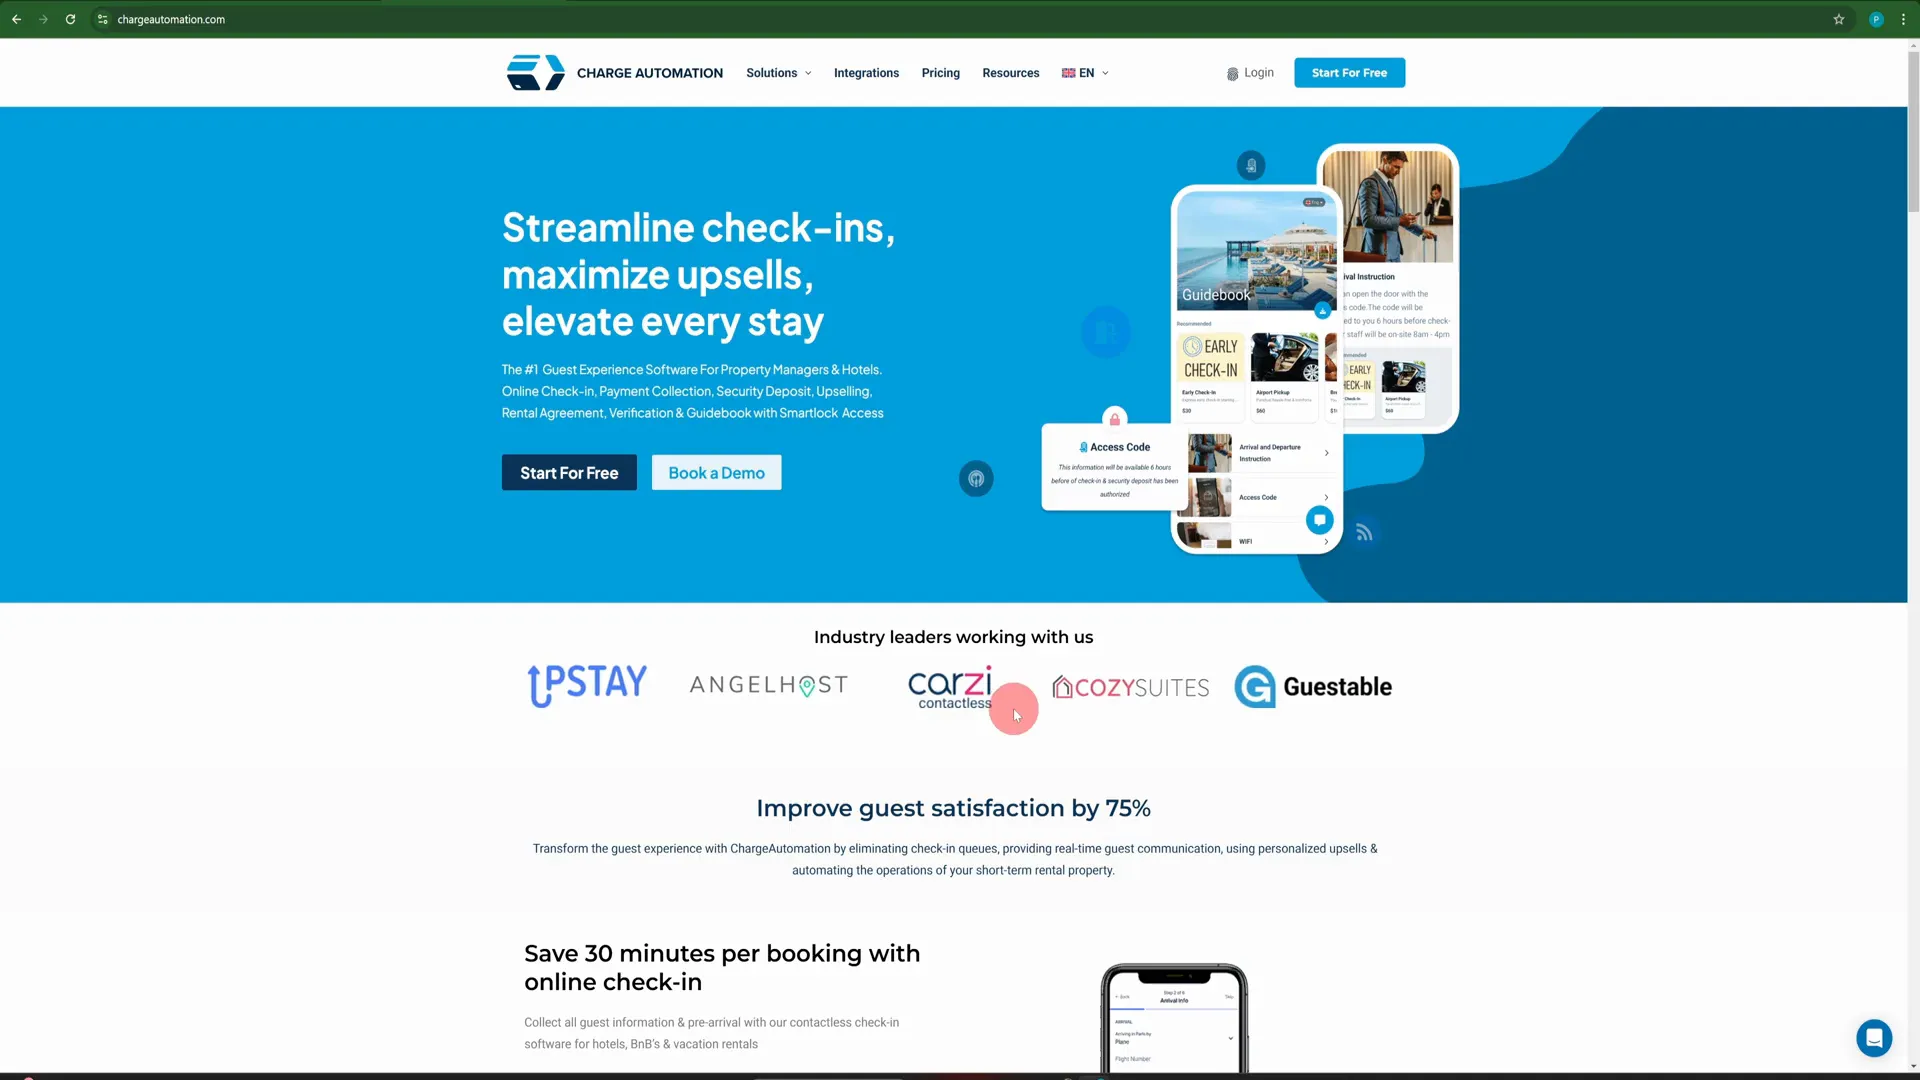
To get started with Charge Automation, click on the link in the description to access their website. The setup process is straightforward. You’ll begin by signing up and entering your details. You don’t have to input your current PMS (Property Management System) or the number of properties at this stage; just click the box and get started.
Step 8: Connect Your Payment Gateway
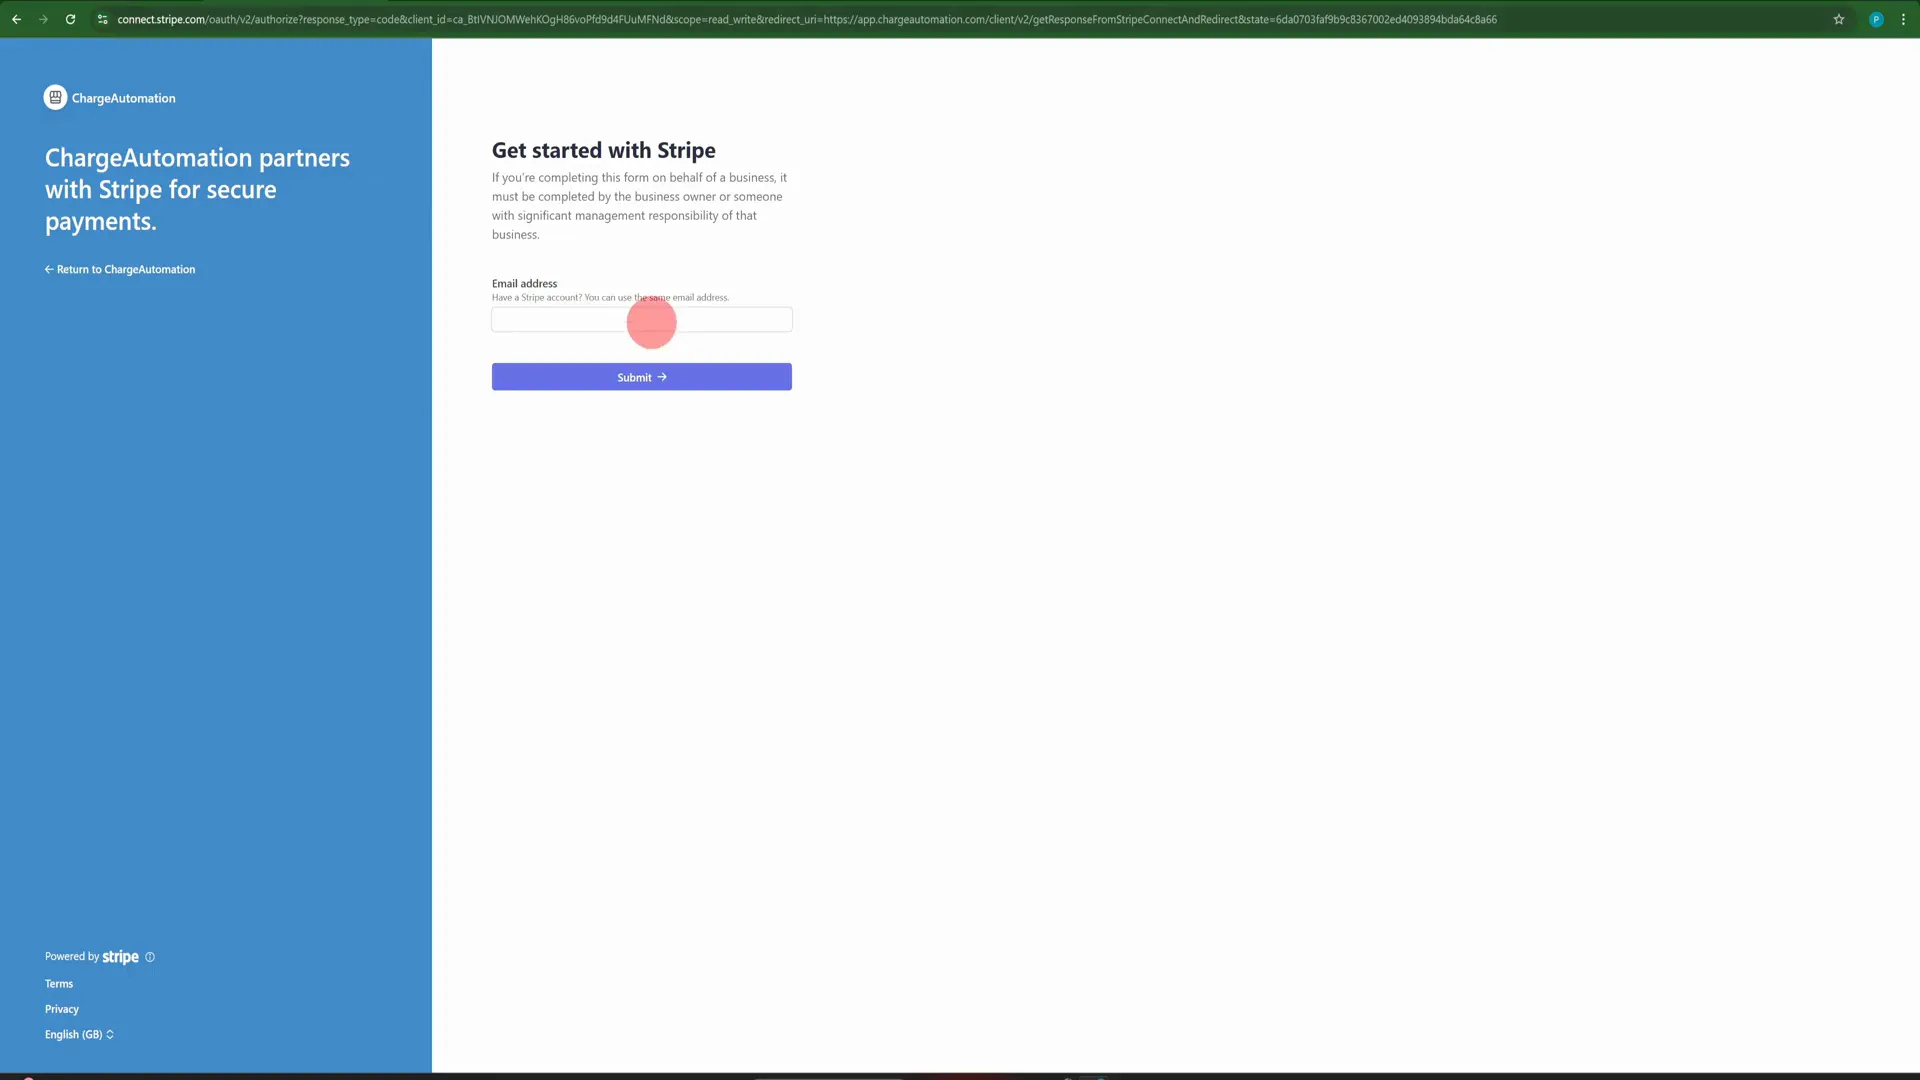
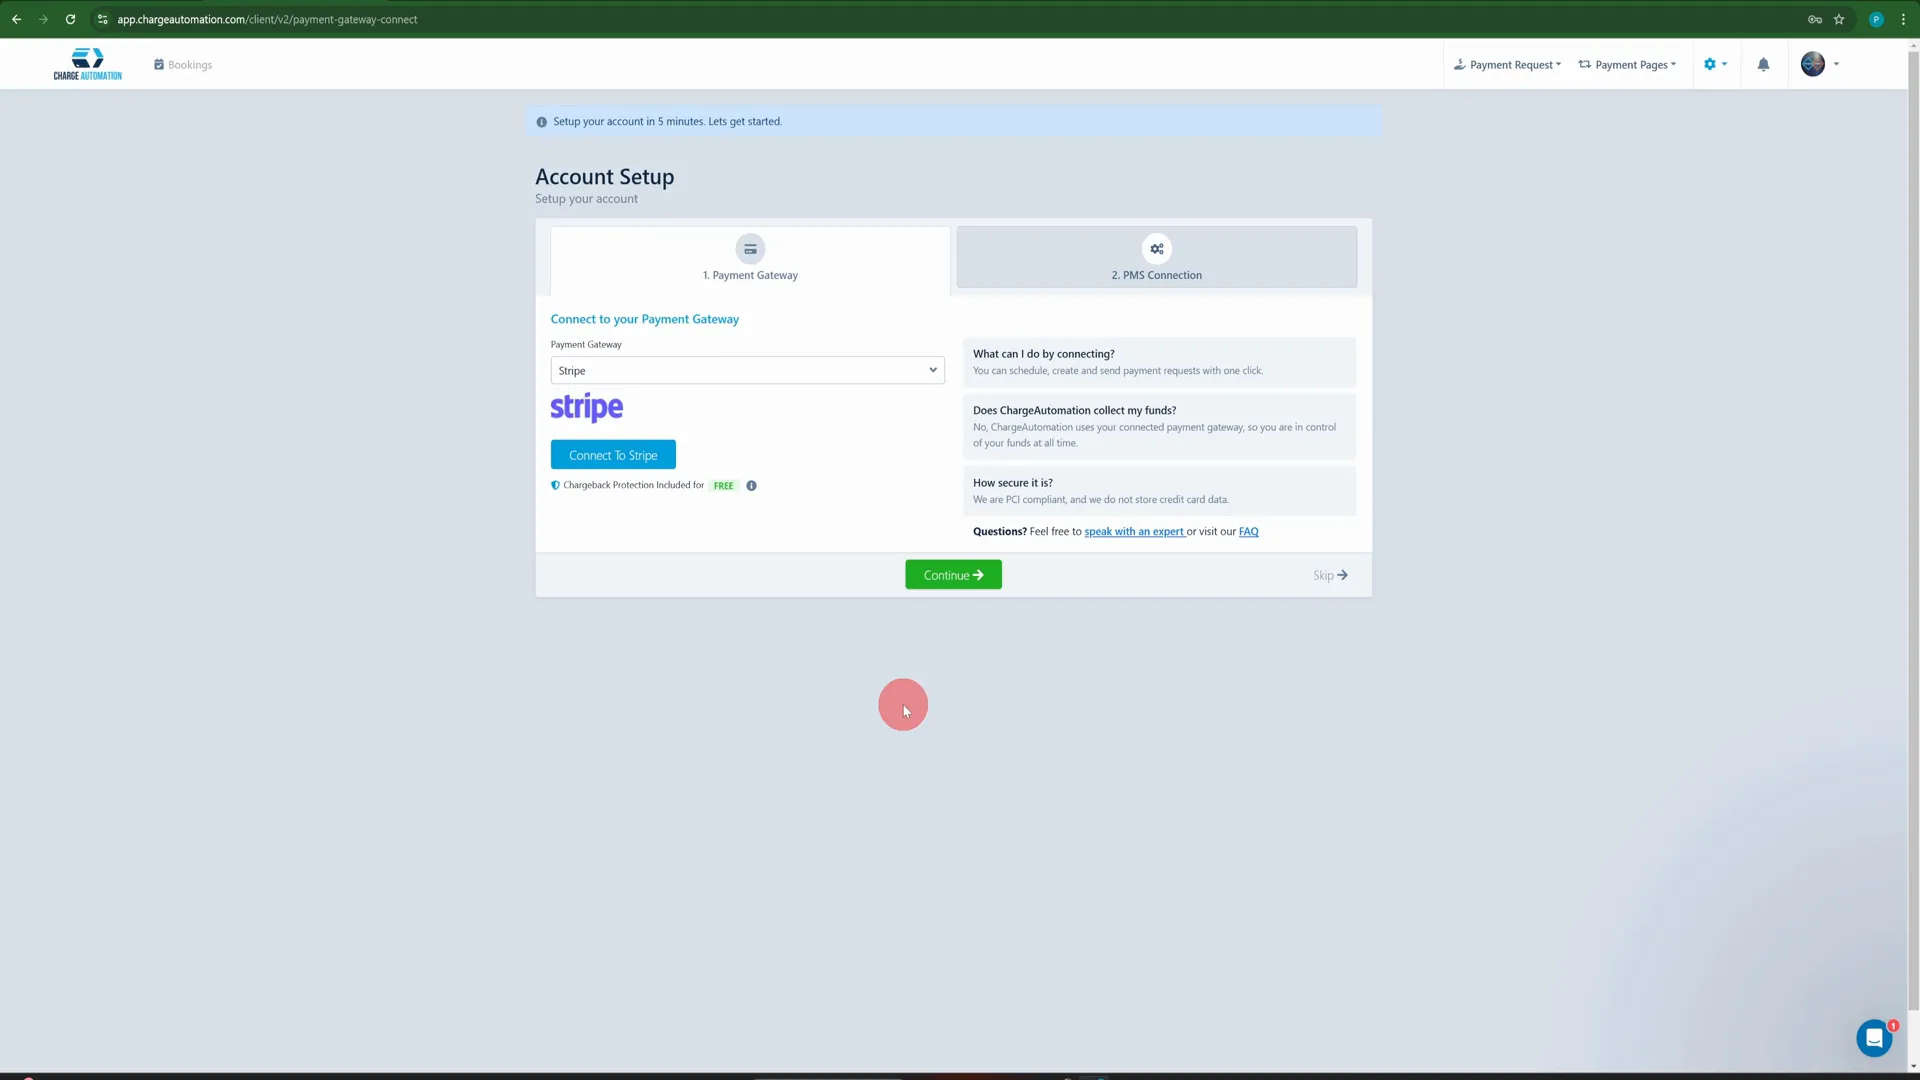
Once you’re logged in, the next step is to set up your payment gateway. This will allow you to receive payments from guests for any upsells they purchase. Stripe is a popular choice and is free to set up. Simply go to stripe.com and create your account.
Step 9: Define the User Journey
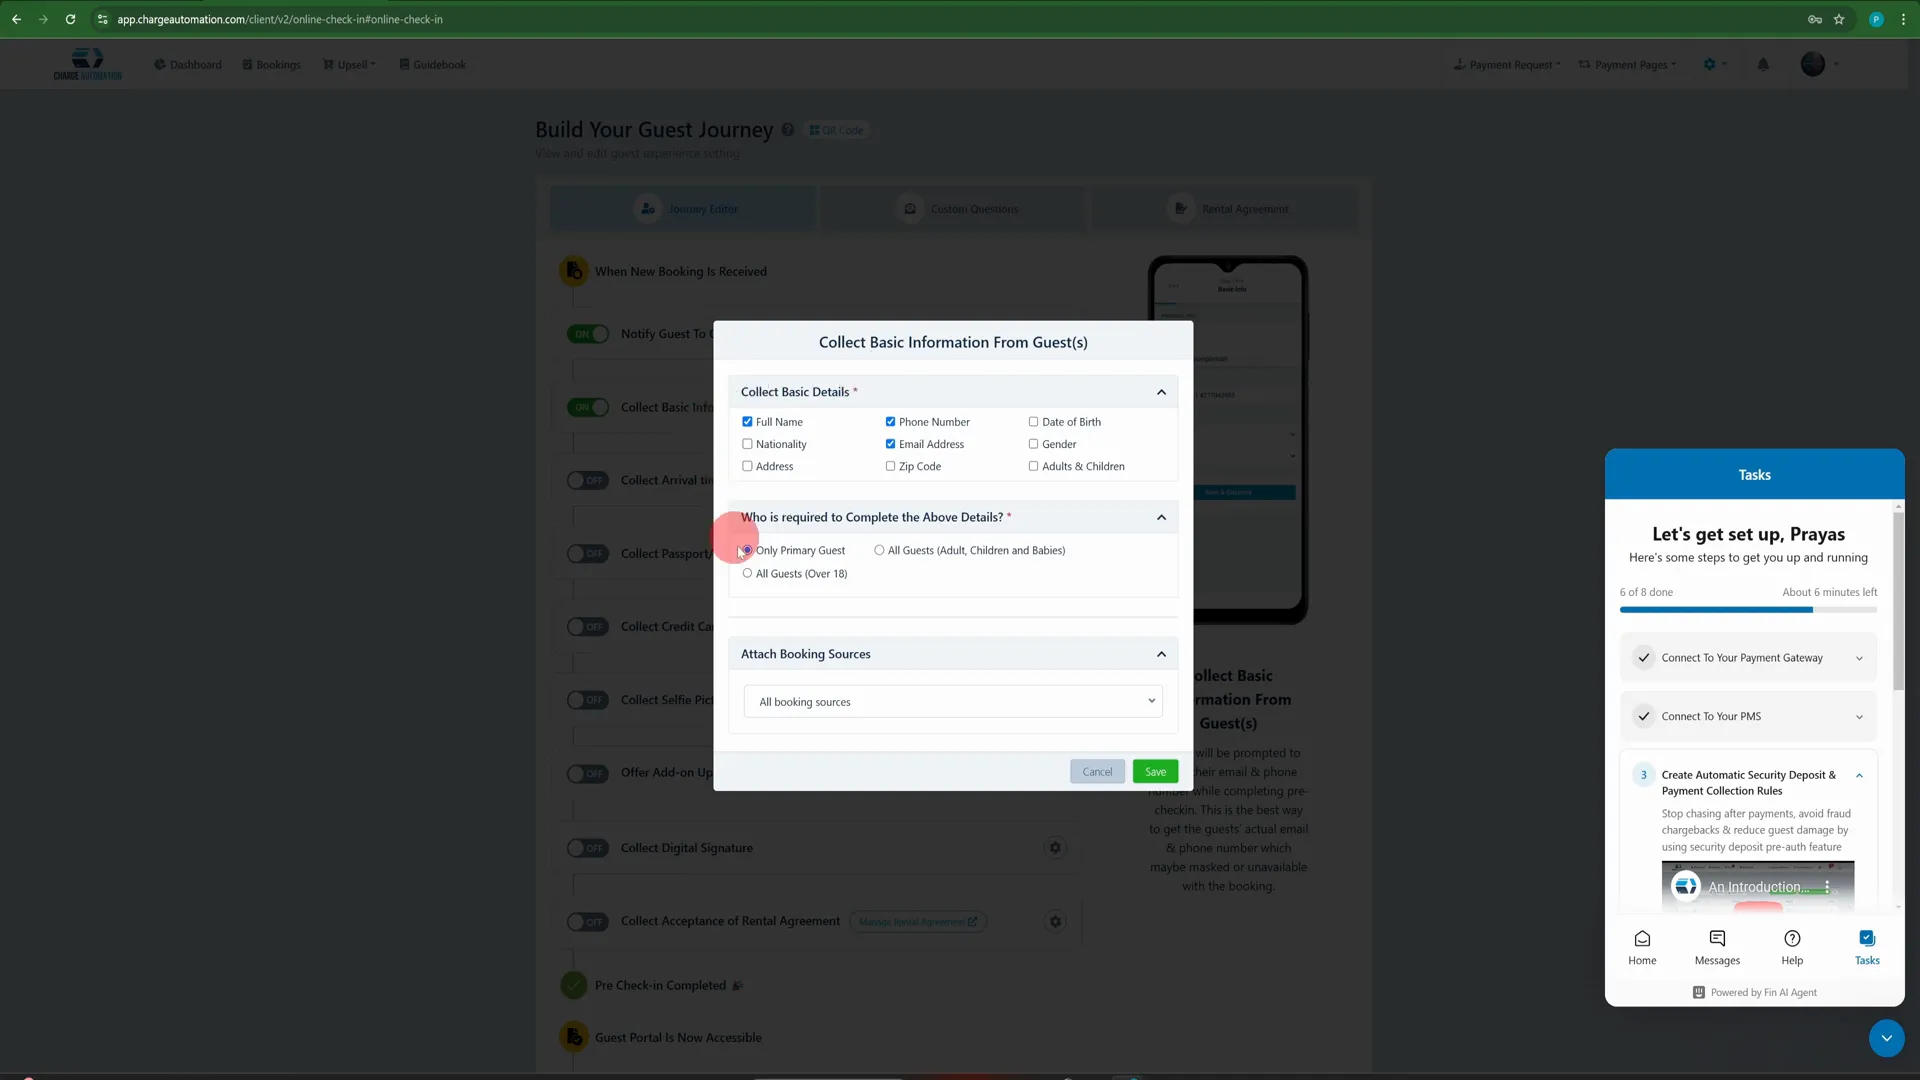
Now, we’re getting into the nitty-gritty of how your guests will interact with the pre-check-in process. Charge Automation allows you to define every step of the guest journey. You can choose what information you want to collect and how you want to collect it.
For example, you can choose to collect their gender, arrival time, or even a digital signature. This customization ensures that you capture the data that is most important to you.
Step 10: Create Your Upsells and Guidebook
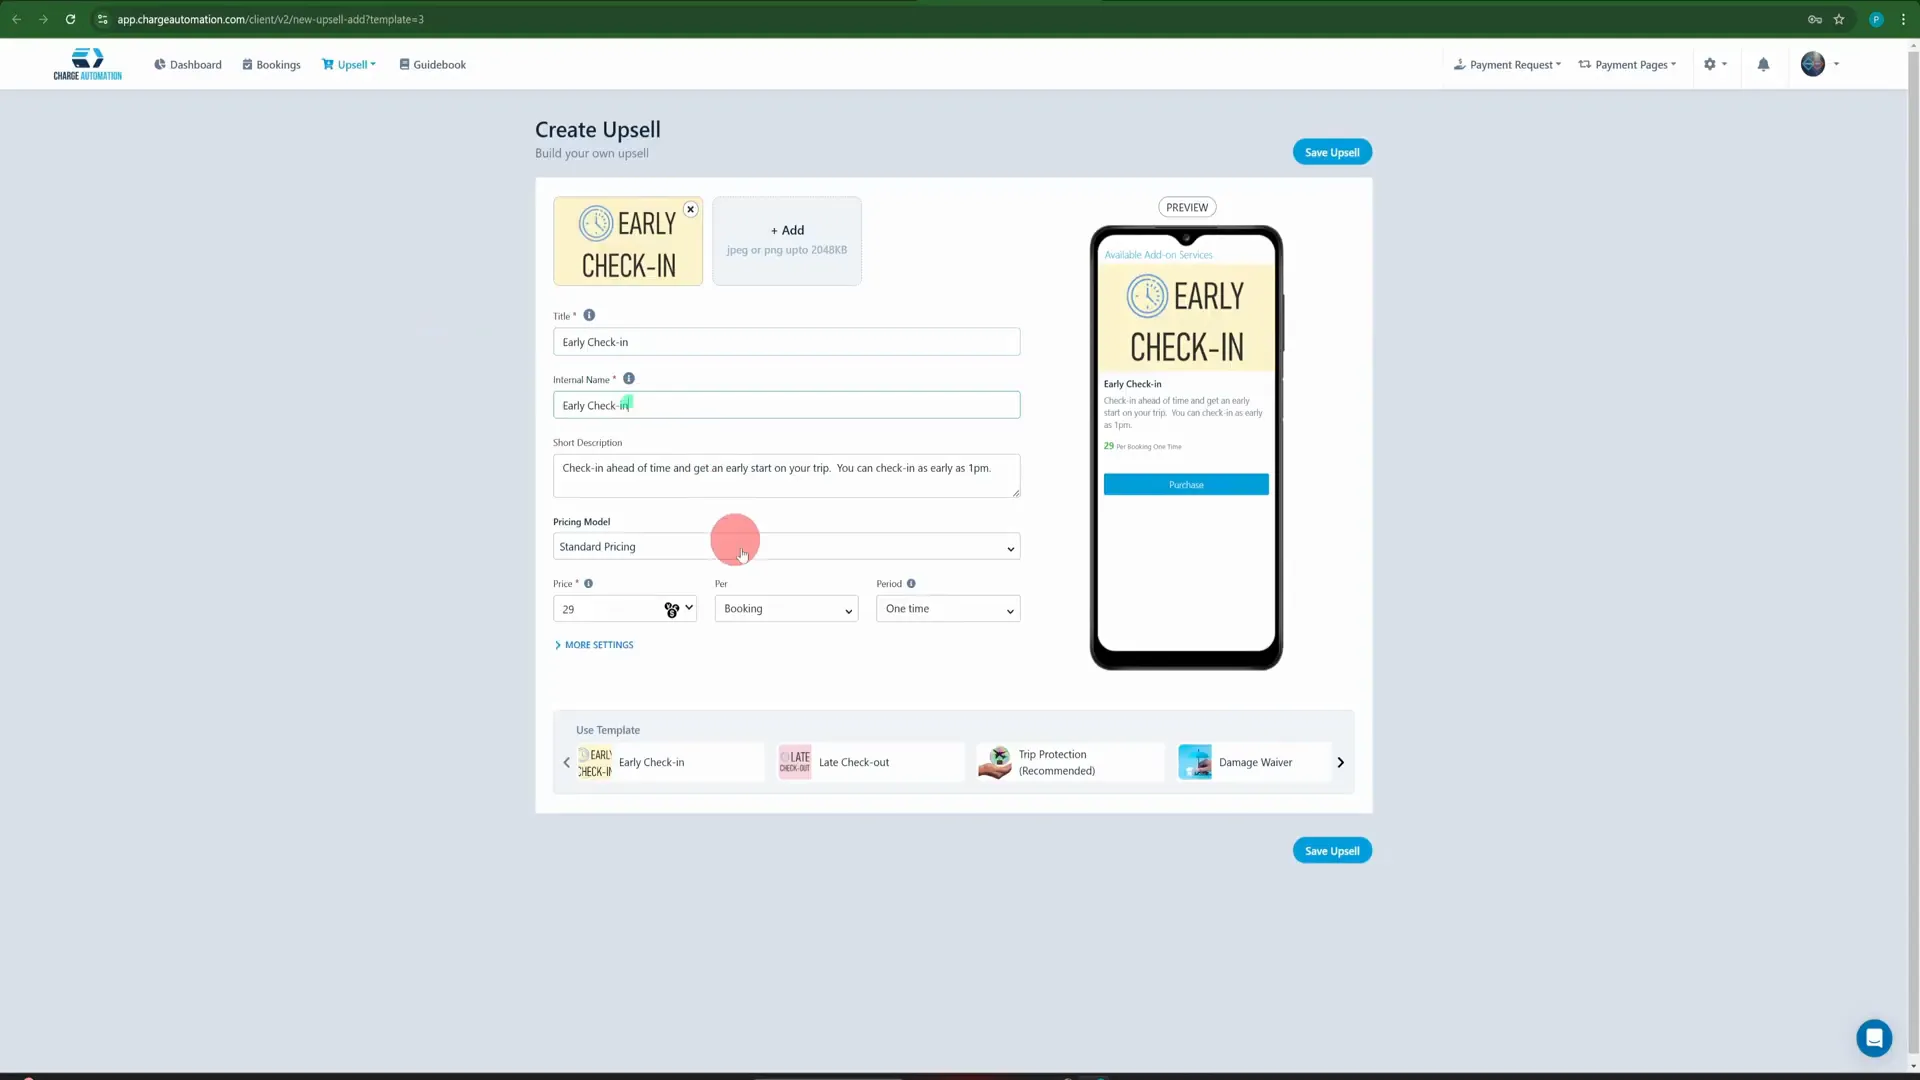
Next, it’s time to create your upsells and guidebook. You can easily create various upsell options, such as early check-in or welcome packs. Each option can include a description and pricing, allowing you to tailor your offerings to what your guests might need.
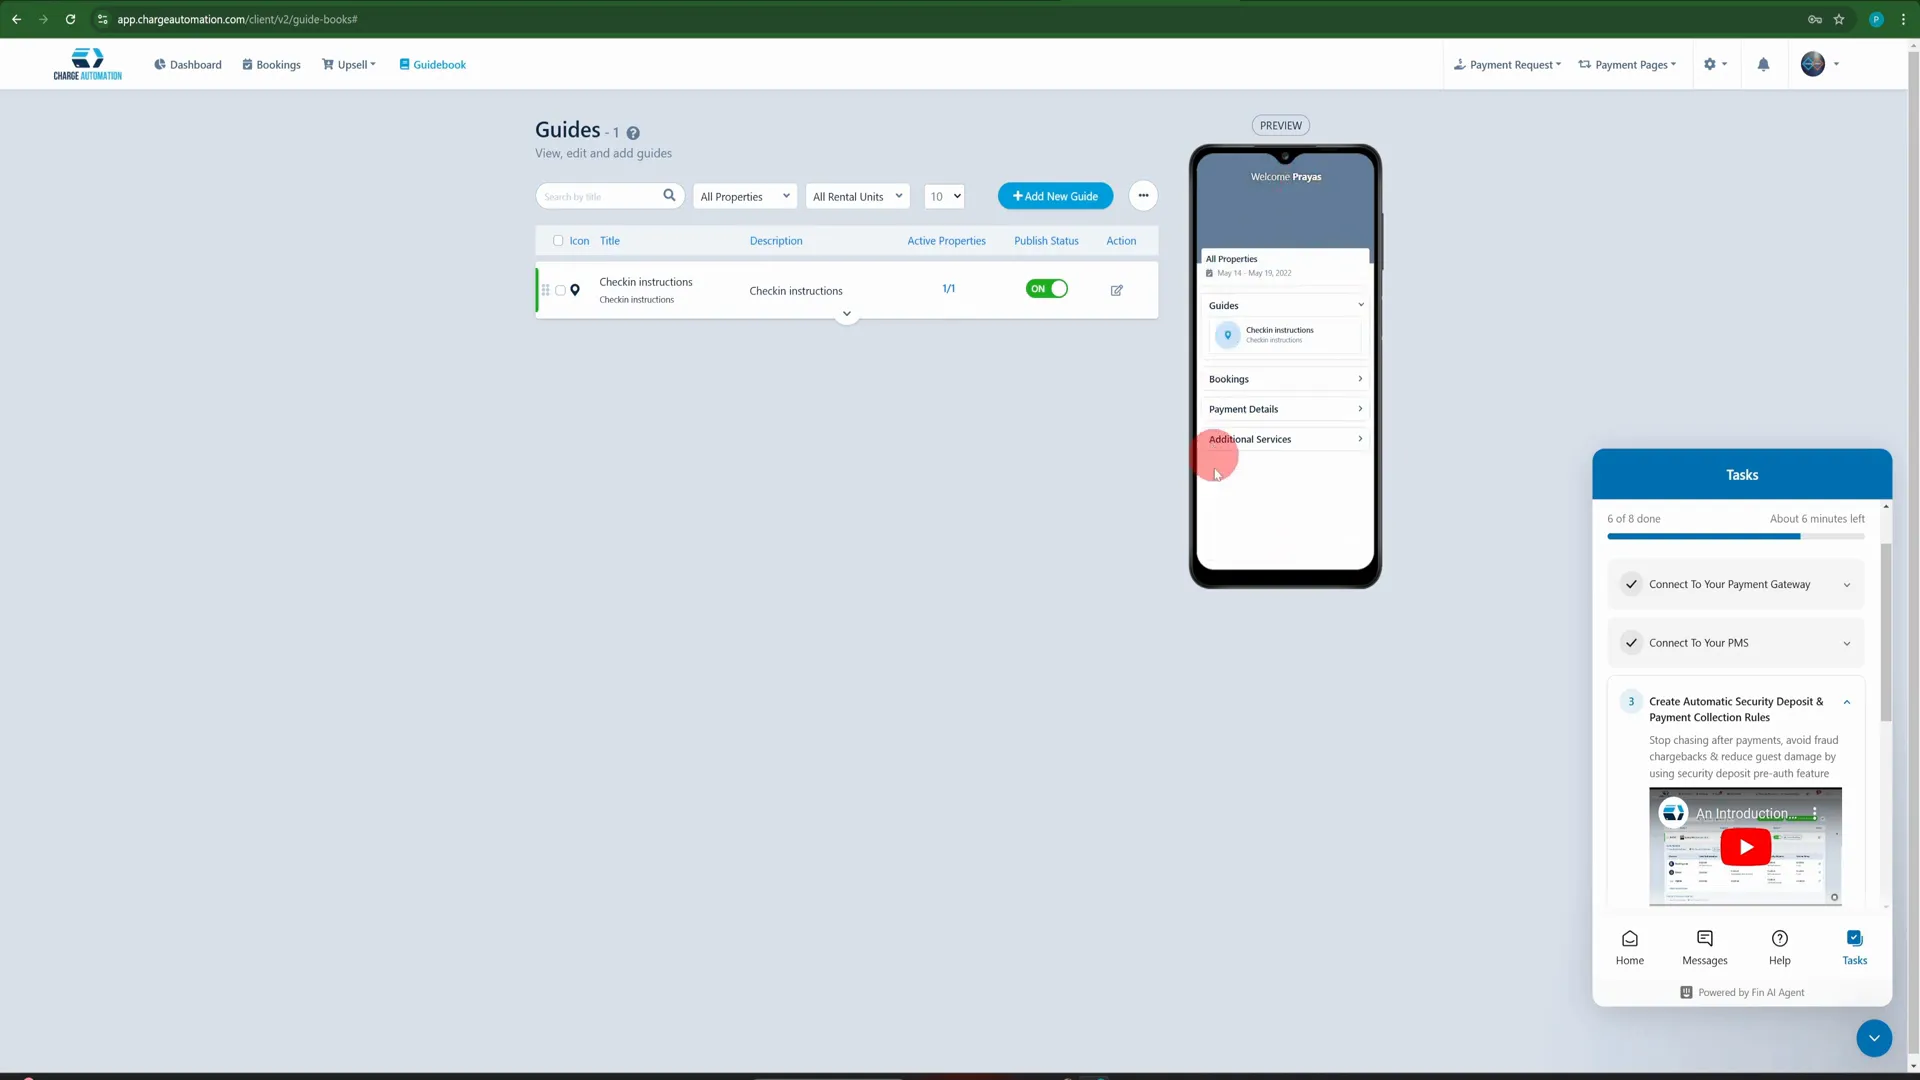
For the guidebook, add essential information like check-in instructions, local attractions, and any other details that will enhance the guest experience. The preview feature will show you how it will appear to guests, ensuring everything looks perfect before they see it.
Step 11: Automate Guest Notifications
To ensure your guests receive their pre-check-in link, you can automate notifications. You can configure when the notifications are sent, whether that’s immediately after booking or a few days before their arrival.
This automation helps keep your guests informed and engaged, which can lead to better reviews and increased bookings in the future.
Step 12: Monitor Your Dashboard for Insights
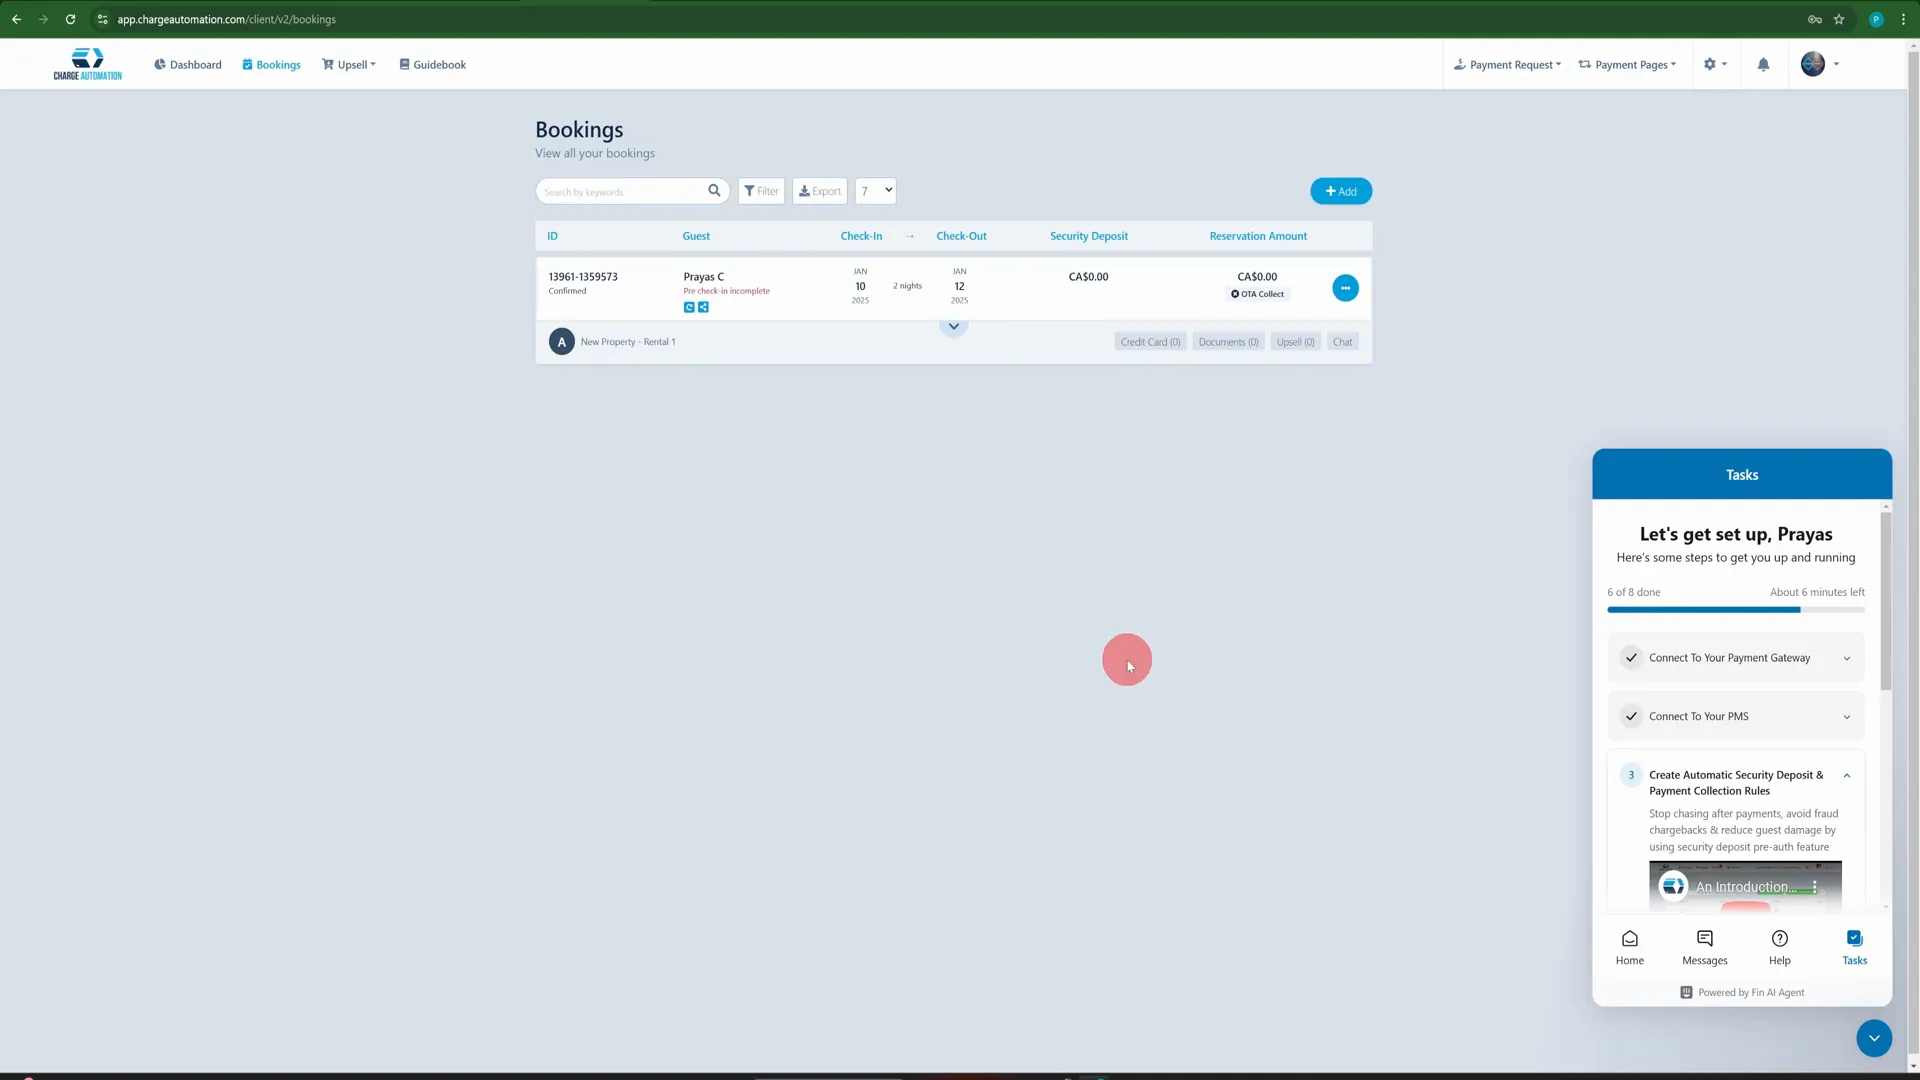
Lastly, Charge Automation provides a dashboard where you can monitor all guest activity. You can see how many guests have checked in, any upsell orders, and reservation payments. This insight allows you to make data-driven decisions to improve your hosting strategy.
Frequently Asked Questions
What is Charge Automation?
Charge Automation is a digital platform designed for short-term rental hosts to streamline guest check-ins, manage upsells, and provide a digital guidebook.
Is Charge Automation free to use?
Yes, Charge Automation offers a free plan where they take a percentage of any upsell revenue you generate.
How can I customize the guest check-in process?
You can easily tailor the check-in process by choosing what information to collect from guests and configuring the flow in Charge Automation.
Can I integrate Charge Automation with my existing PMS?
Yes, Charge Automation can integrate with a variety of Property Management Systems for seamless booking management.
In conclusion, implementing these Airbnb hosting tips with Charge Automation can significantly enhance your guest experience and boost your income. Start today and watch your hosting business thrive!
