How to Add Perfect Photo Captions to Your Airbnb Listing (Free AI Tool!)

Welcome to your ultimate guide on Airbnb Hosting Tips! In this post, we will explore a game-changing method to enhance your Airbnb listing by adding captivating captions to your photos. If you want your property to stand out and attract more guests, this is the place to start. Let's dive in!
Table of Contents
- Step 1: Access Your Airbnb Listing
- Step 2: Open Your Photos
- Step 3: Generate Captions
- Step 4: Paste the Caption
- Step 5: Repeat for Each Photo
- Step 6: Explore More Examples
- Step 7: Setting Up the AI Tool
- Step 8: Configure the Extension
- Step 9: Save Your Changes
- Step 10: Generate Captions Anytime
- Why Use Captions?
- Conclusion
- Frequently Asked Questions (FAQs)
Step 1: Access Your Airbnb Listing
To begin, log into your Airbnb account from your computer. Make sure to switch to the hosting mode, which will allow you to edit your listing. Once you're in the hosting section, navigate to your listing editor. This is where all the magic happens!
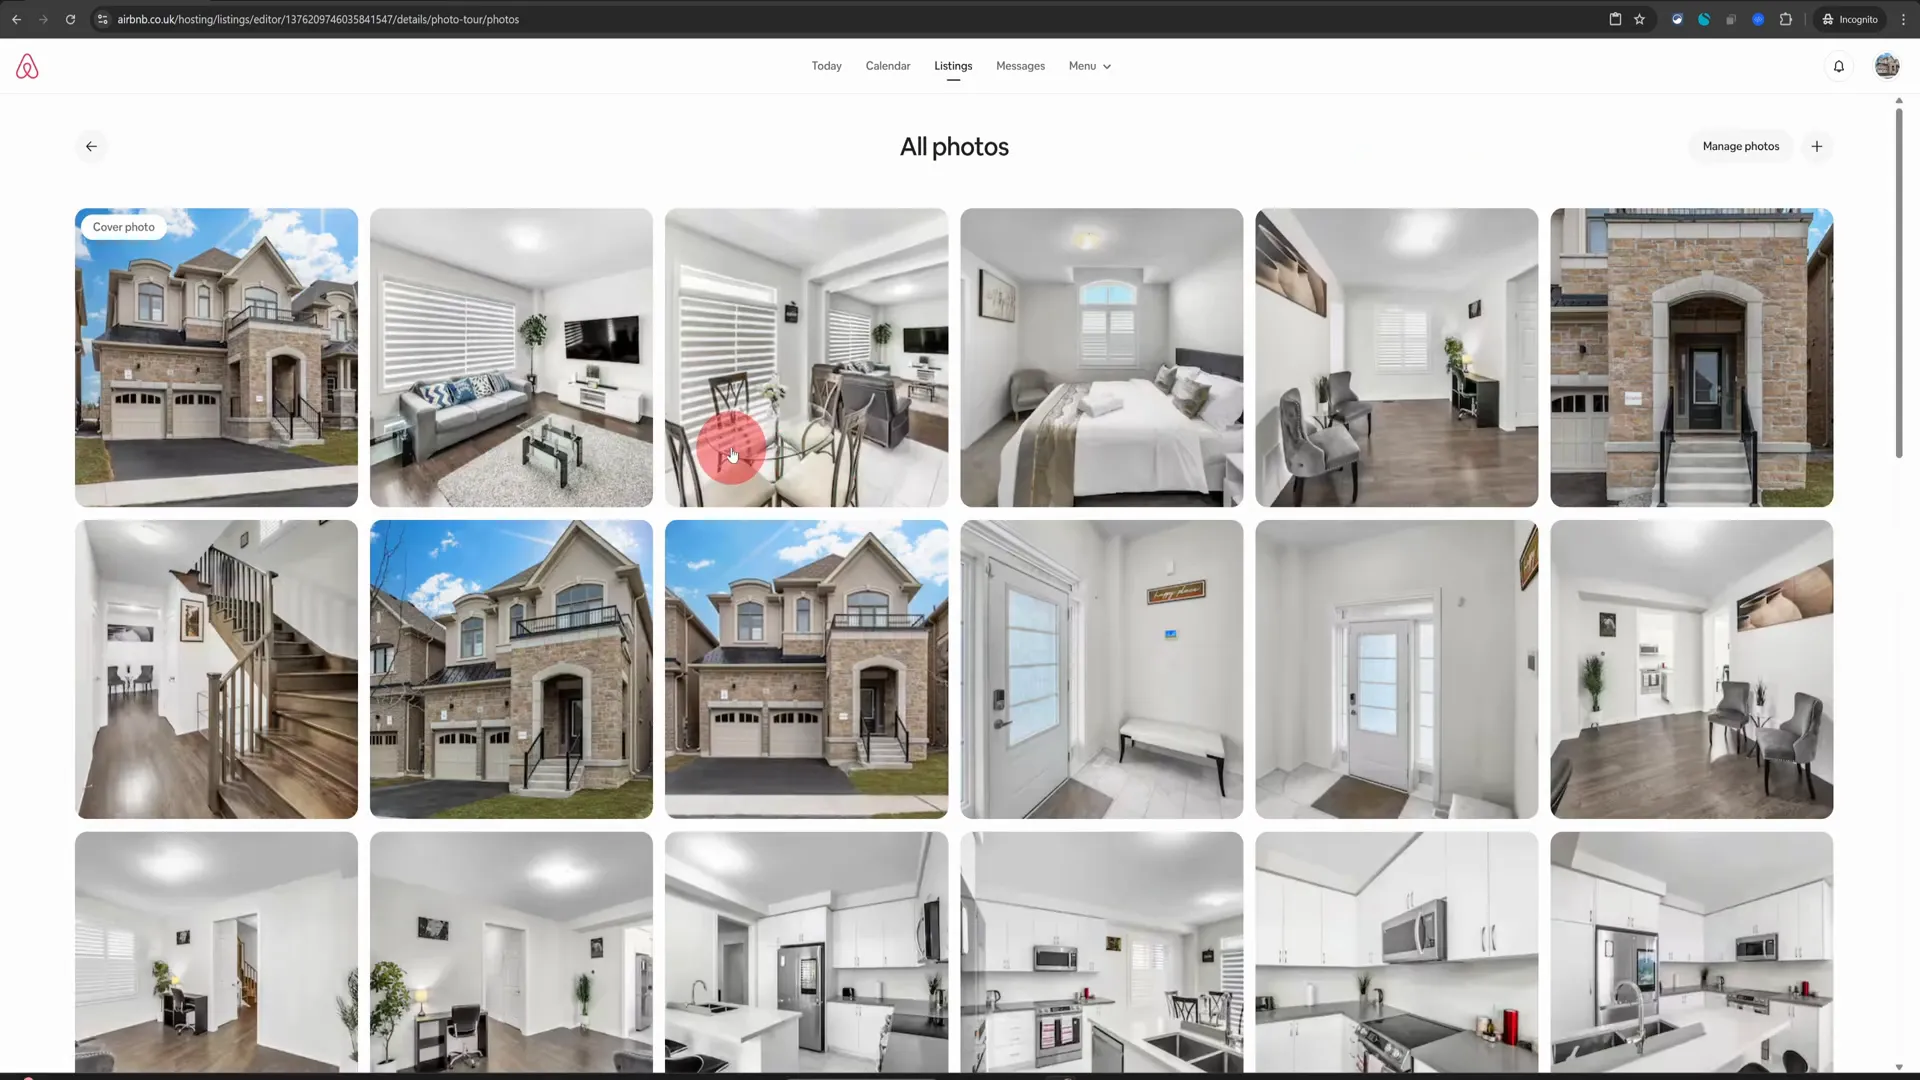
Step 2: Open Your Photos
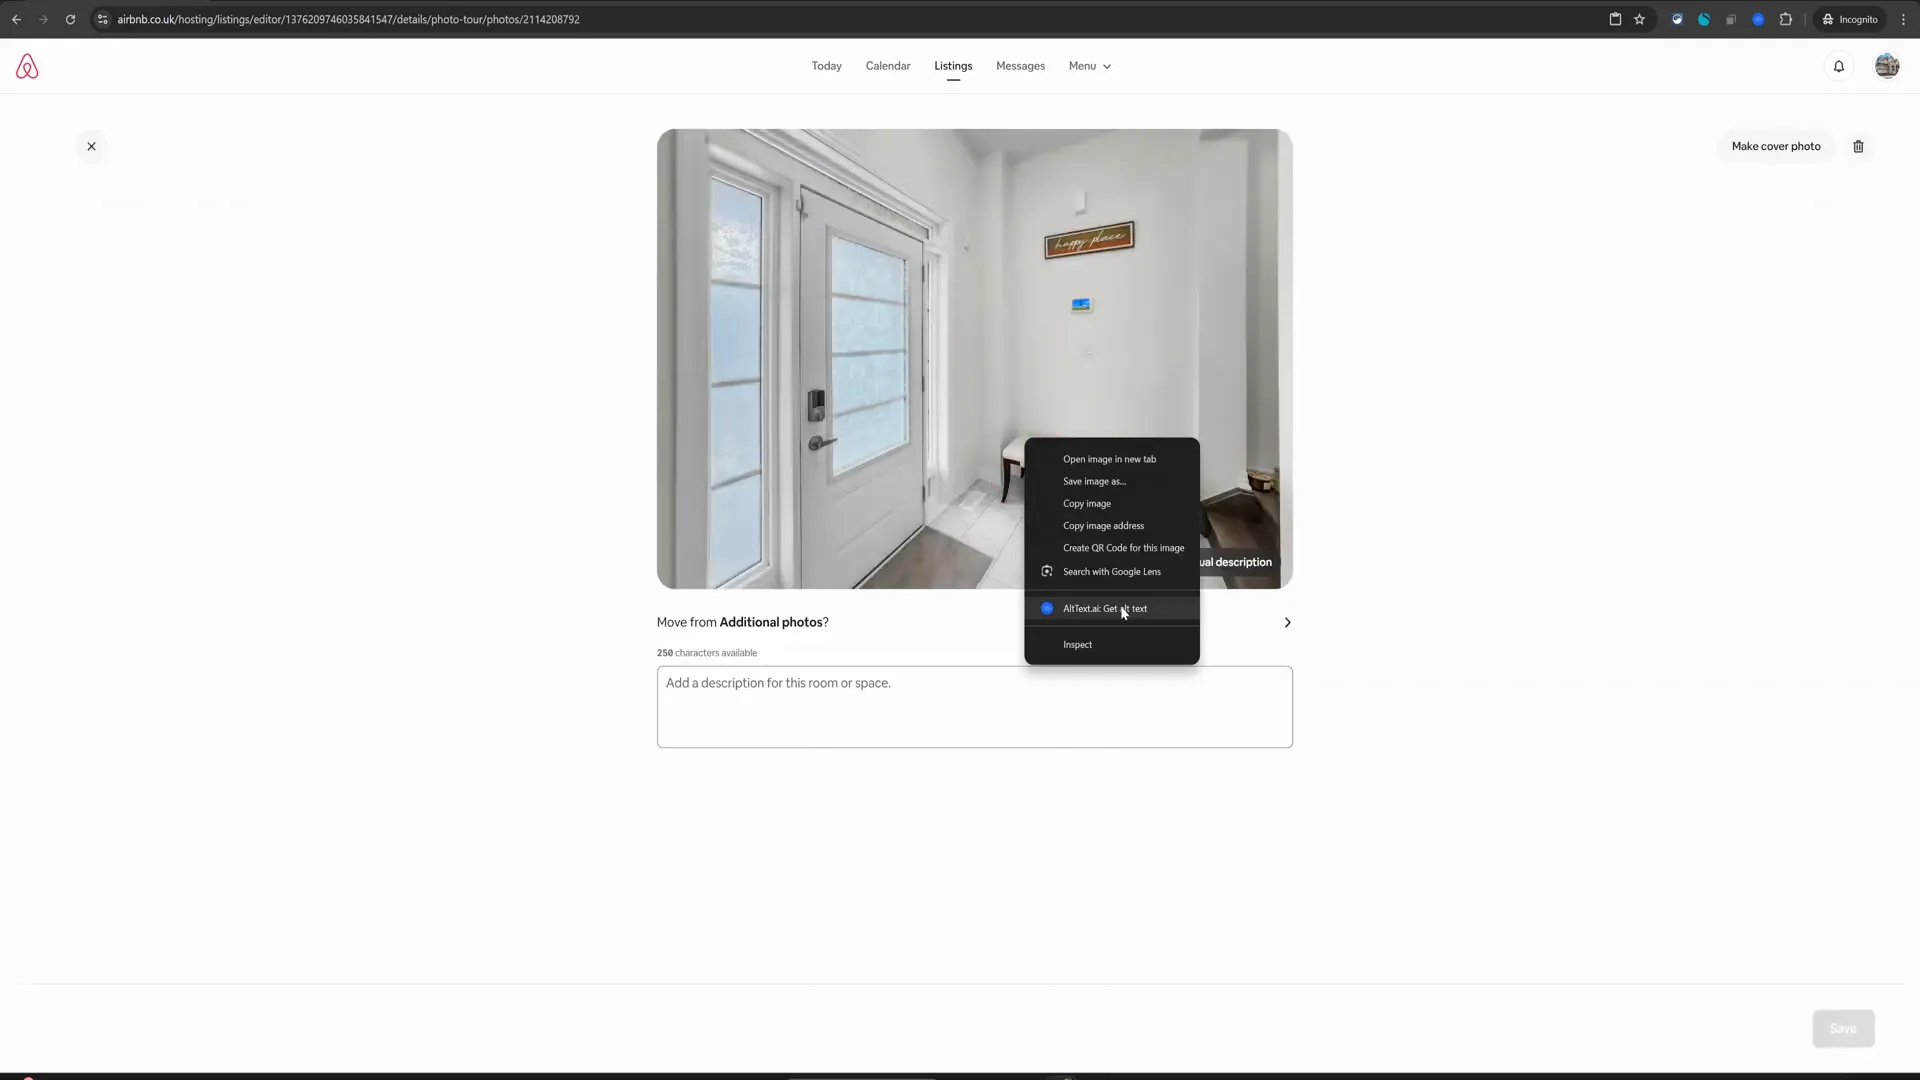
After reaching the listing editor, locate the section that allows you to view all your photos. Click on the “All Photos” option to see the images you have uploaded. This step is crucial because you will be adding captions to each of these images individually.
Step 3: Generate Captions
Now that you have your photos open, it's time to generate captions. For each image, right-click and choose the option that appears to generate a caption. This AI tool will automatically create a caption that highlights the key features of the space, making your listing more appealing.
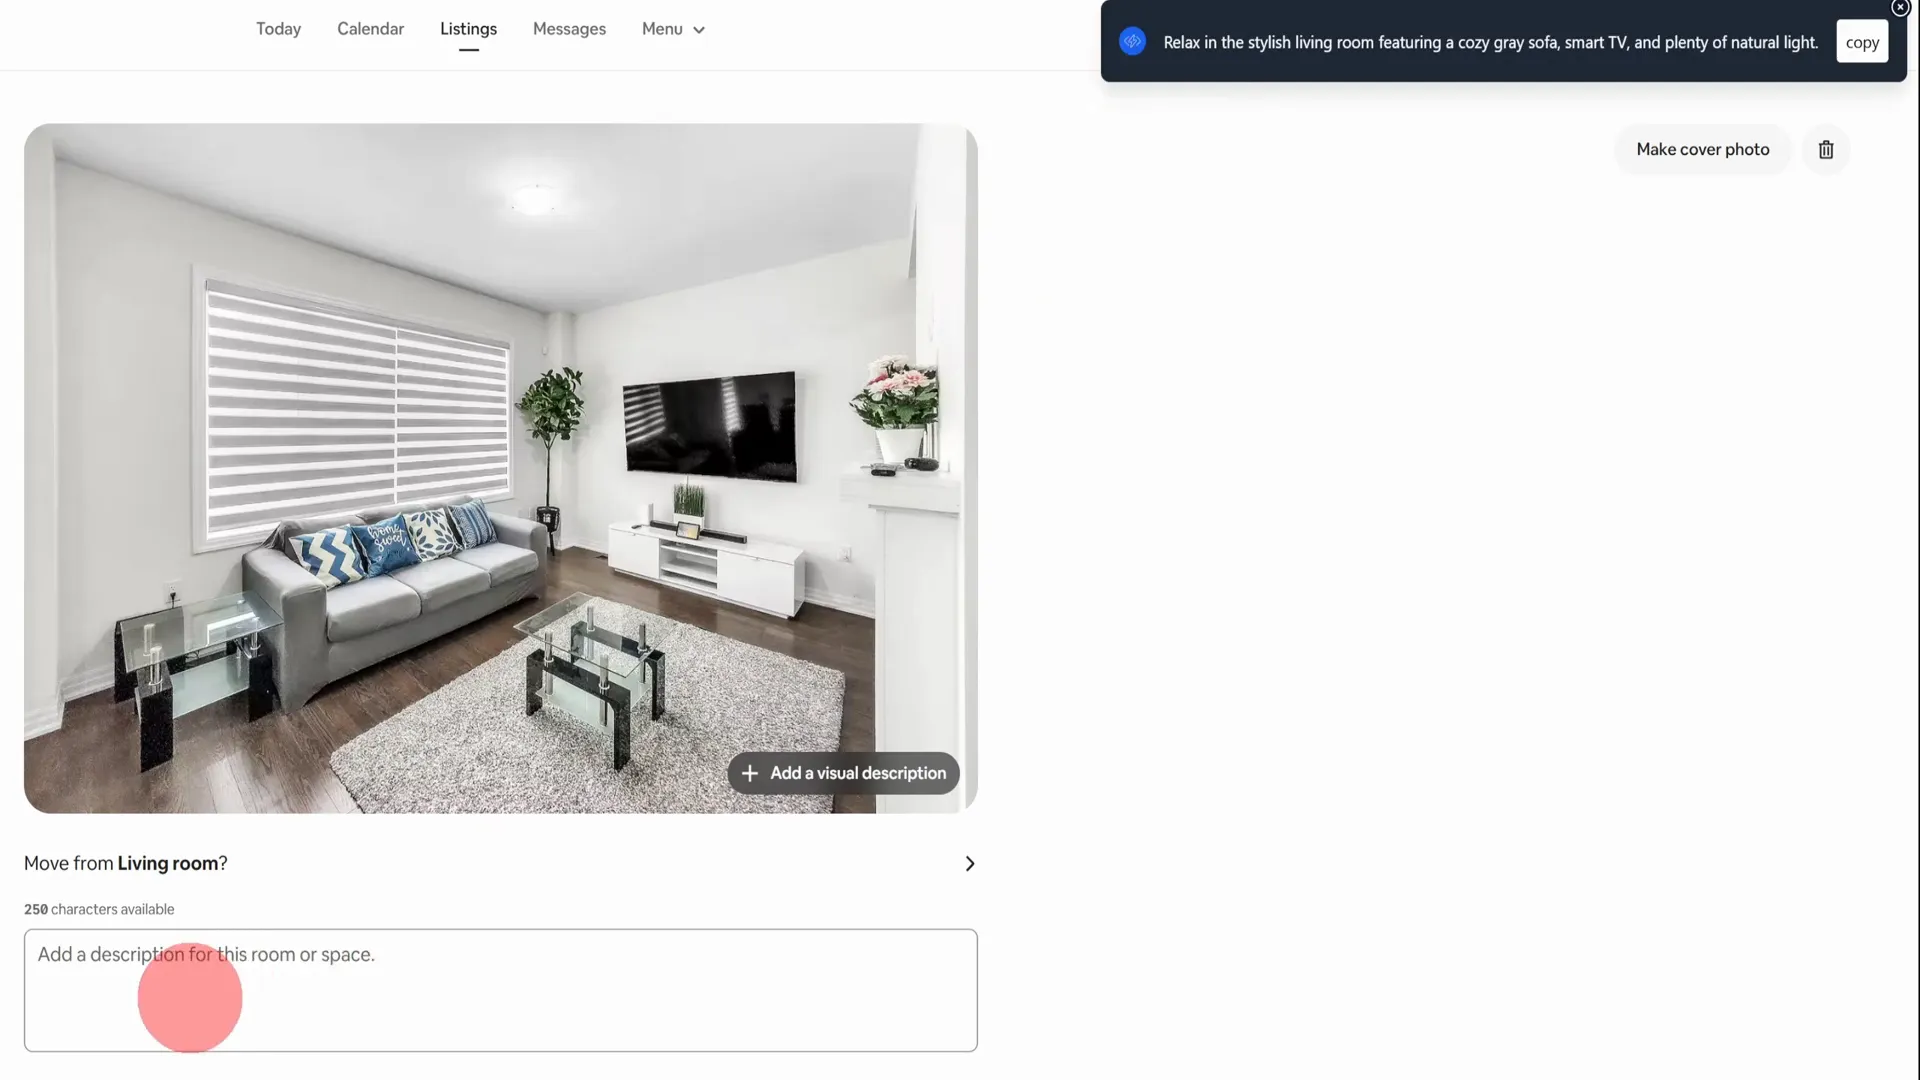
Step 4: Paste the Caption
Once you have the caption generated, it will be copied to your clipboard. Head over to the description section of your listing and paste the text there. For example, you might see something like:
“Relax in the stylish living room featuring a cozy gray sofa, smart TV, and plenty of natural light.”
This not only adds character to your listing but also enhances the storytelling aspect of your property.

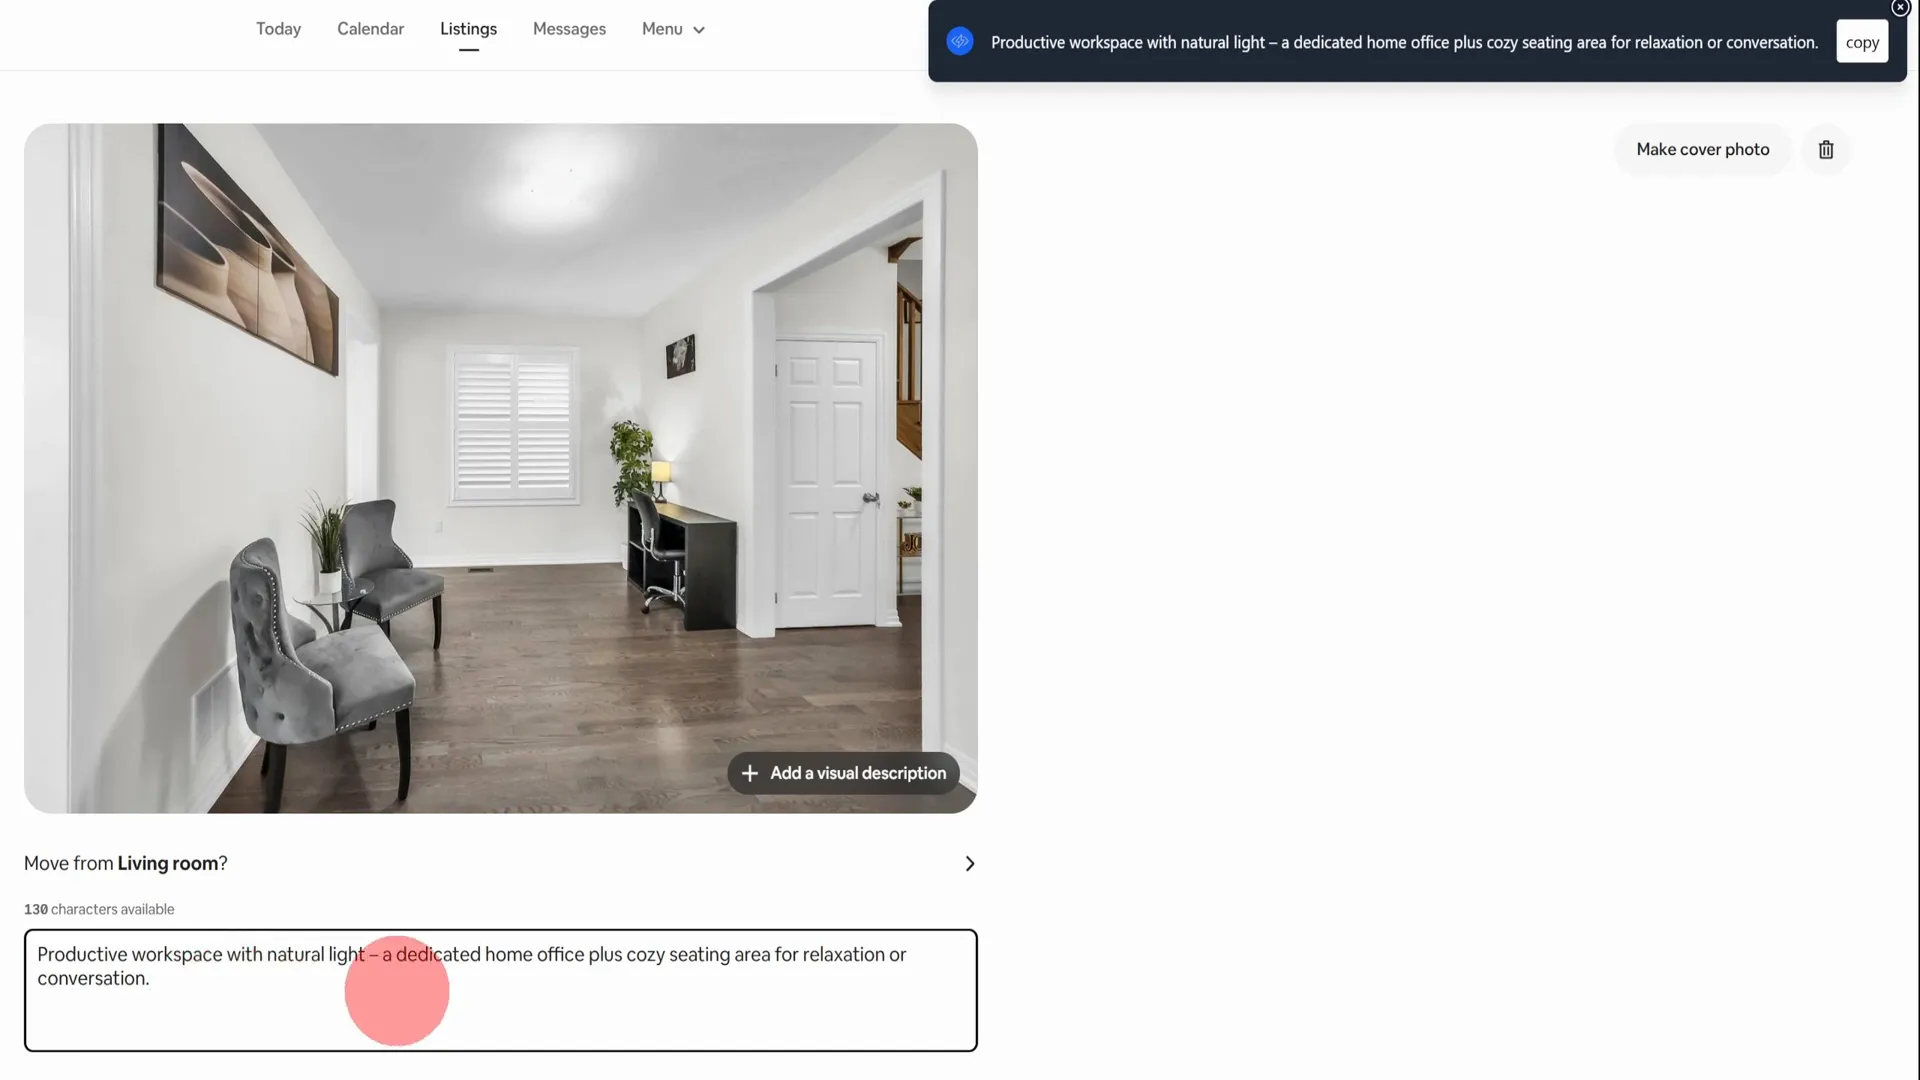
Step 5: Repeat for Each Photo
Continue this process for each image in your listing. Each caption should be tailored to highlight the unique aspects of that specific space. For instance, if you're working on the workspace photo, you might generate a caption like:
“Productive workspace with natural light, a dedicated home office plus cozy seating.”
This method not only saves you time but also ensures that your captions are professional and engaging.
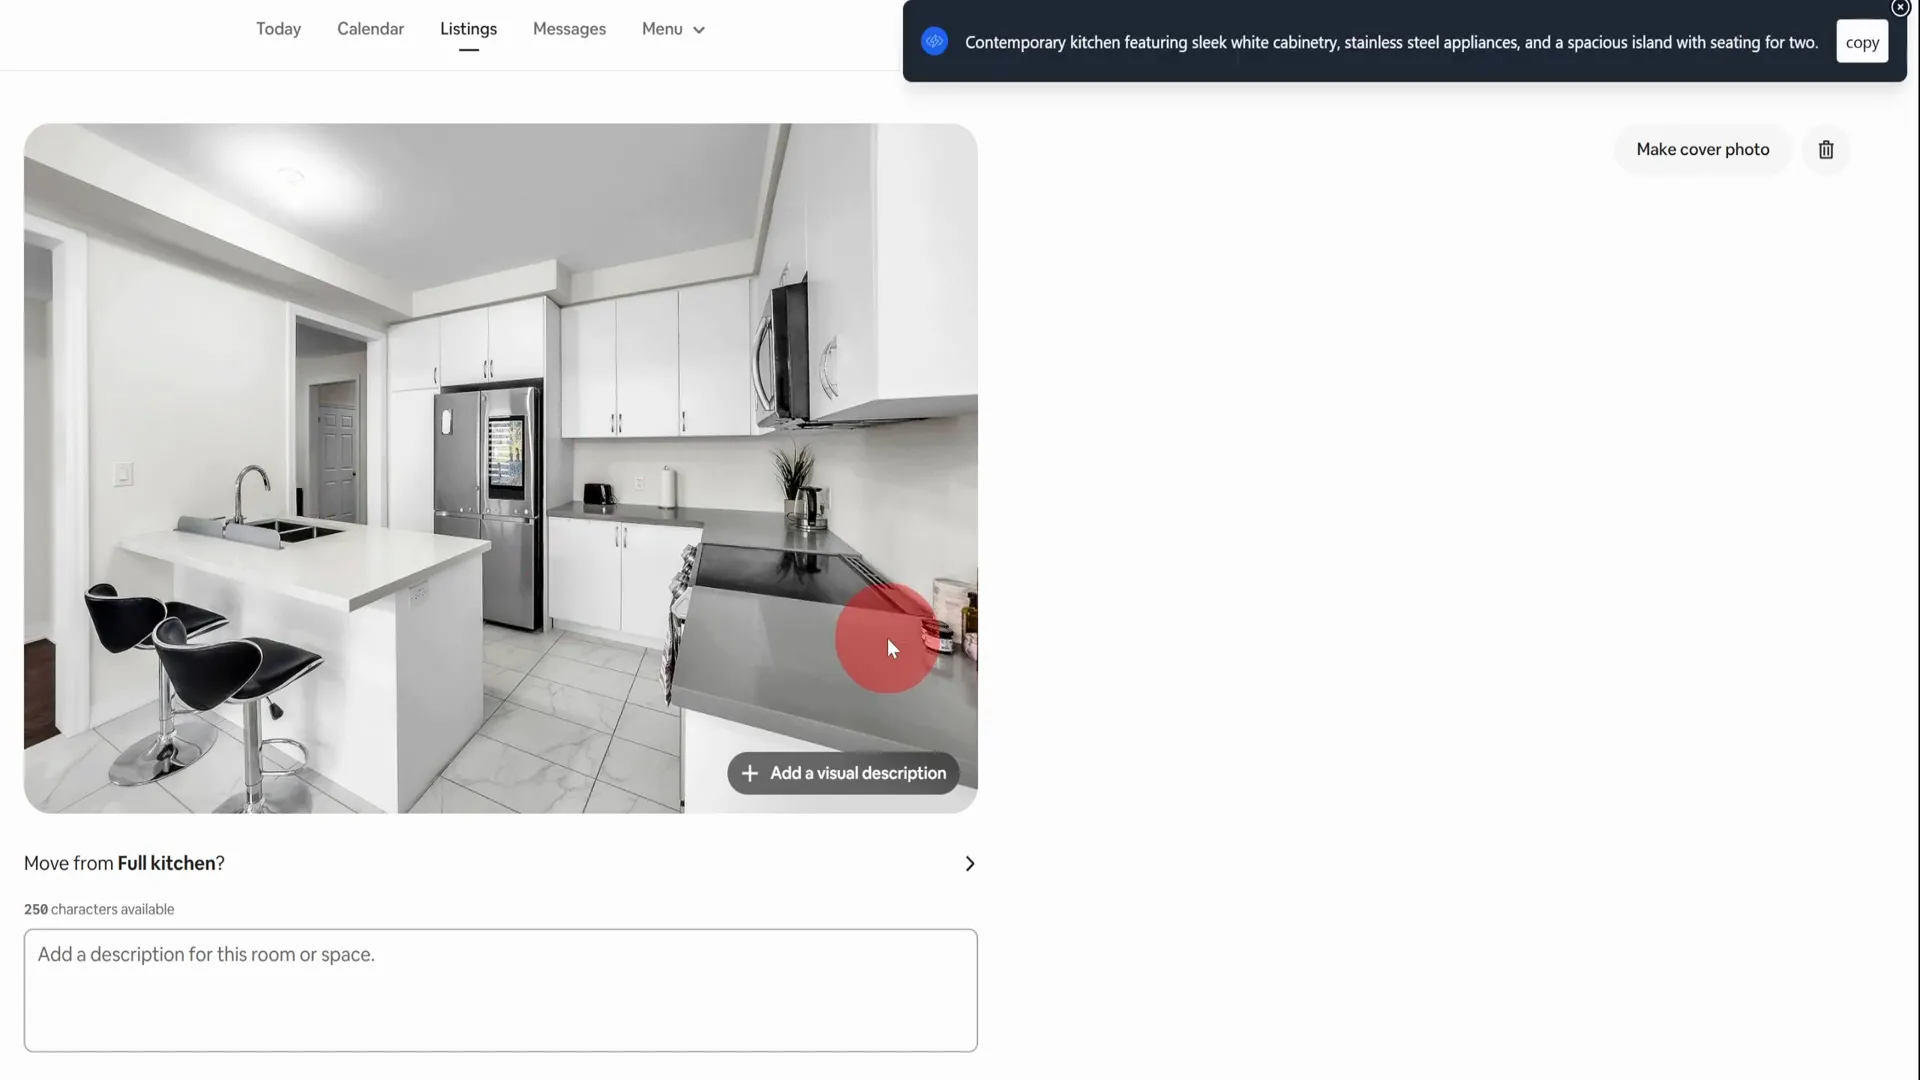
Step 6: Explore More Examples
Before we move on to the setup instructions, let's go through one more example. Click on the kitchen photo and repeat the right-click process. The AI tool will read the image and generate an appropriate caption. Once it's done, simply paste it into the description section.
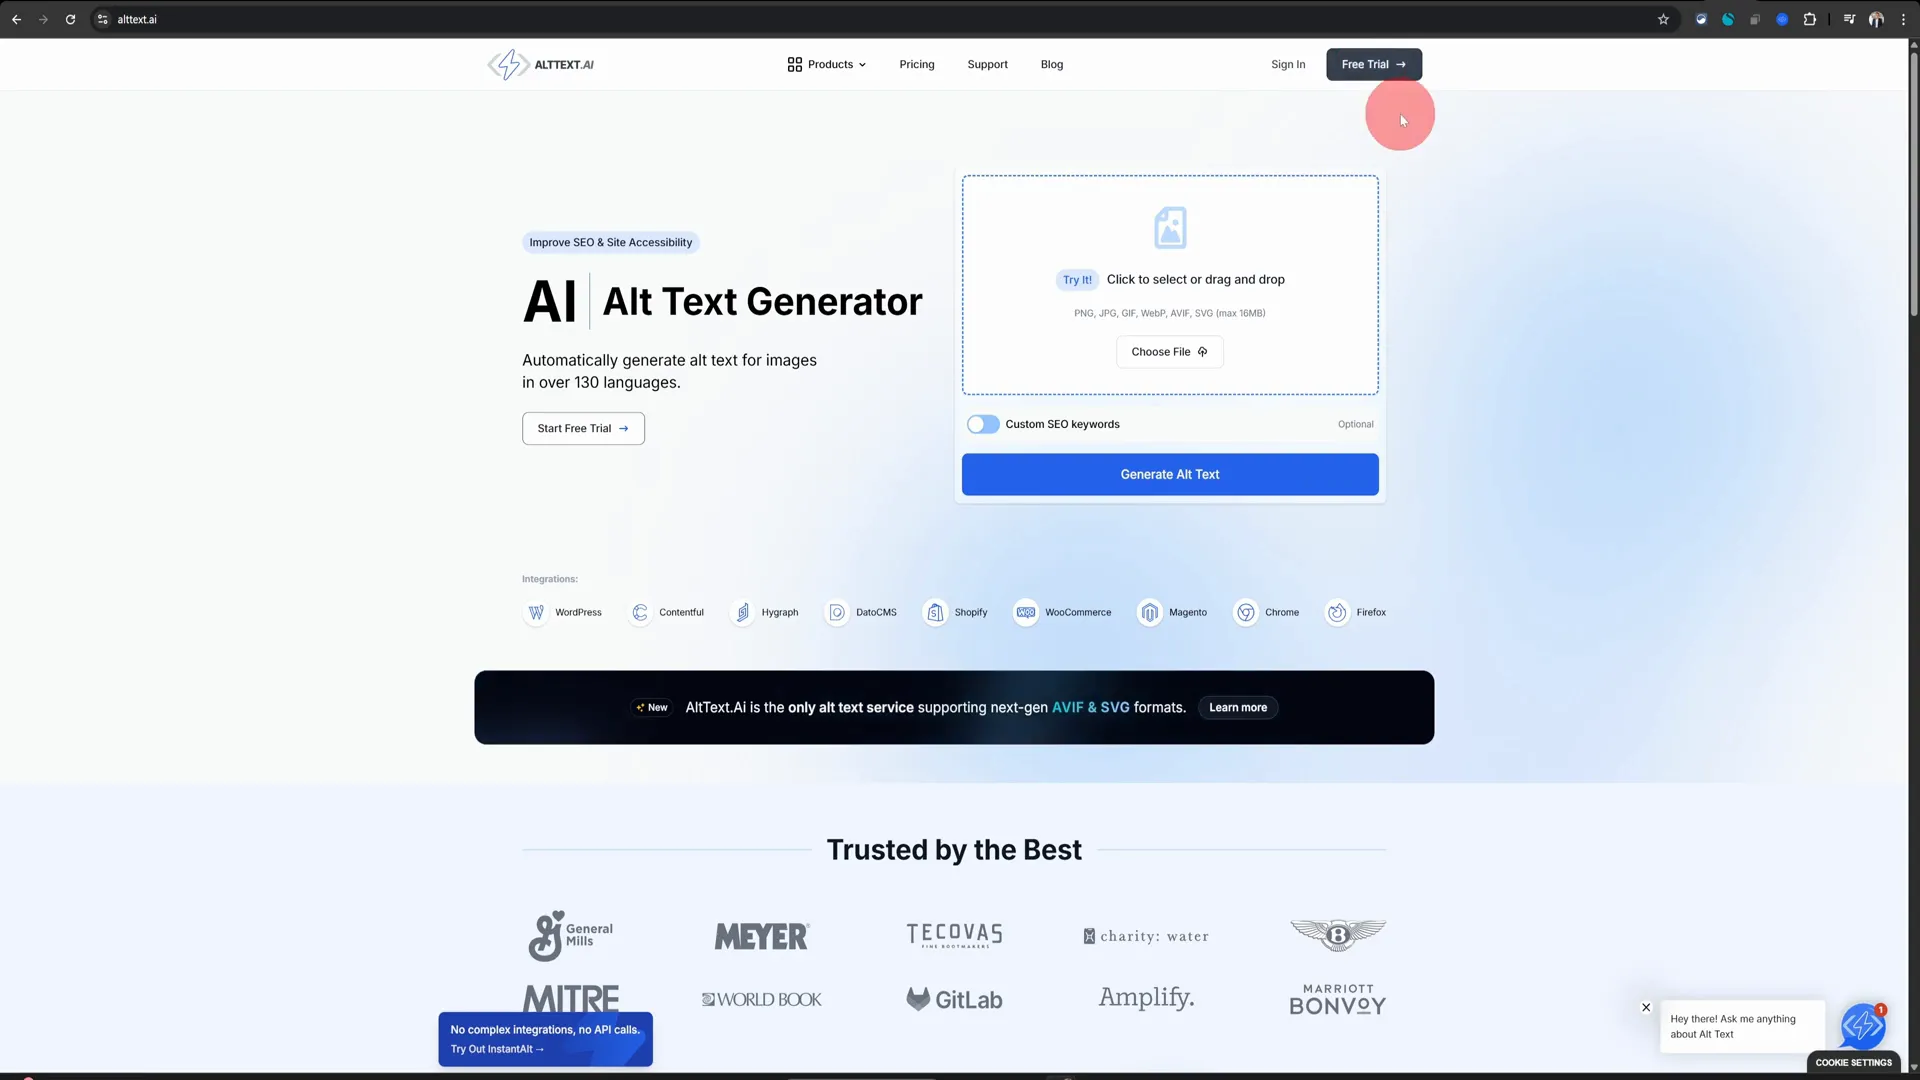
Step 7: Setting Up the AI Tool
To access the right-click caption generation feature, you need to sign up for a free trial at the specified website. I will provide a link in the description below. Once you sign up, you will be prompted to install a Chrome extension.
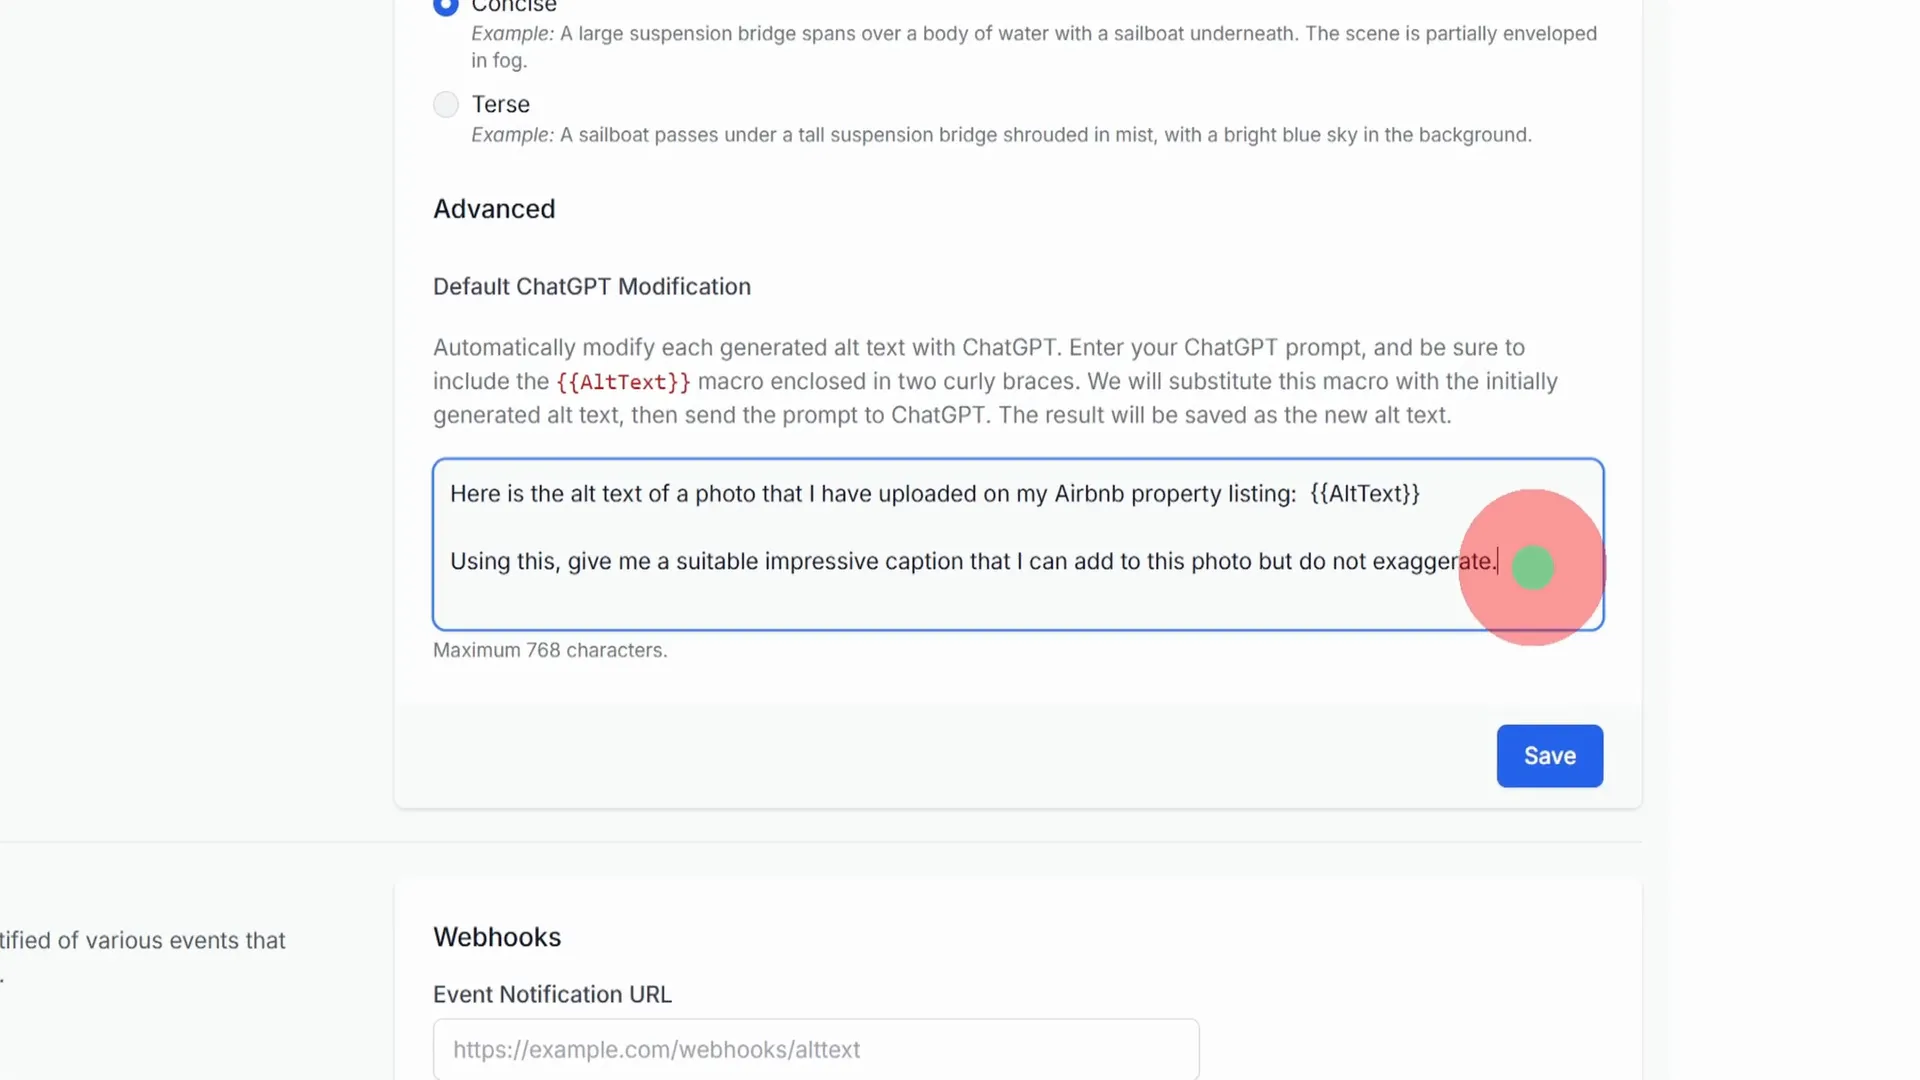
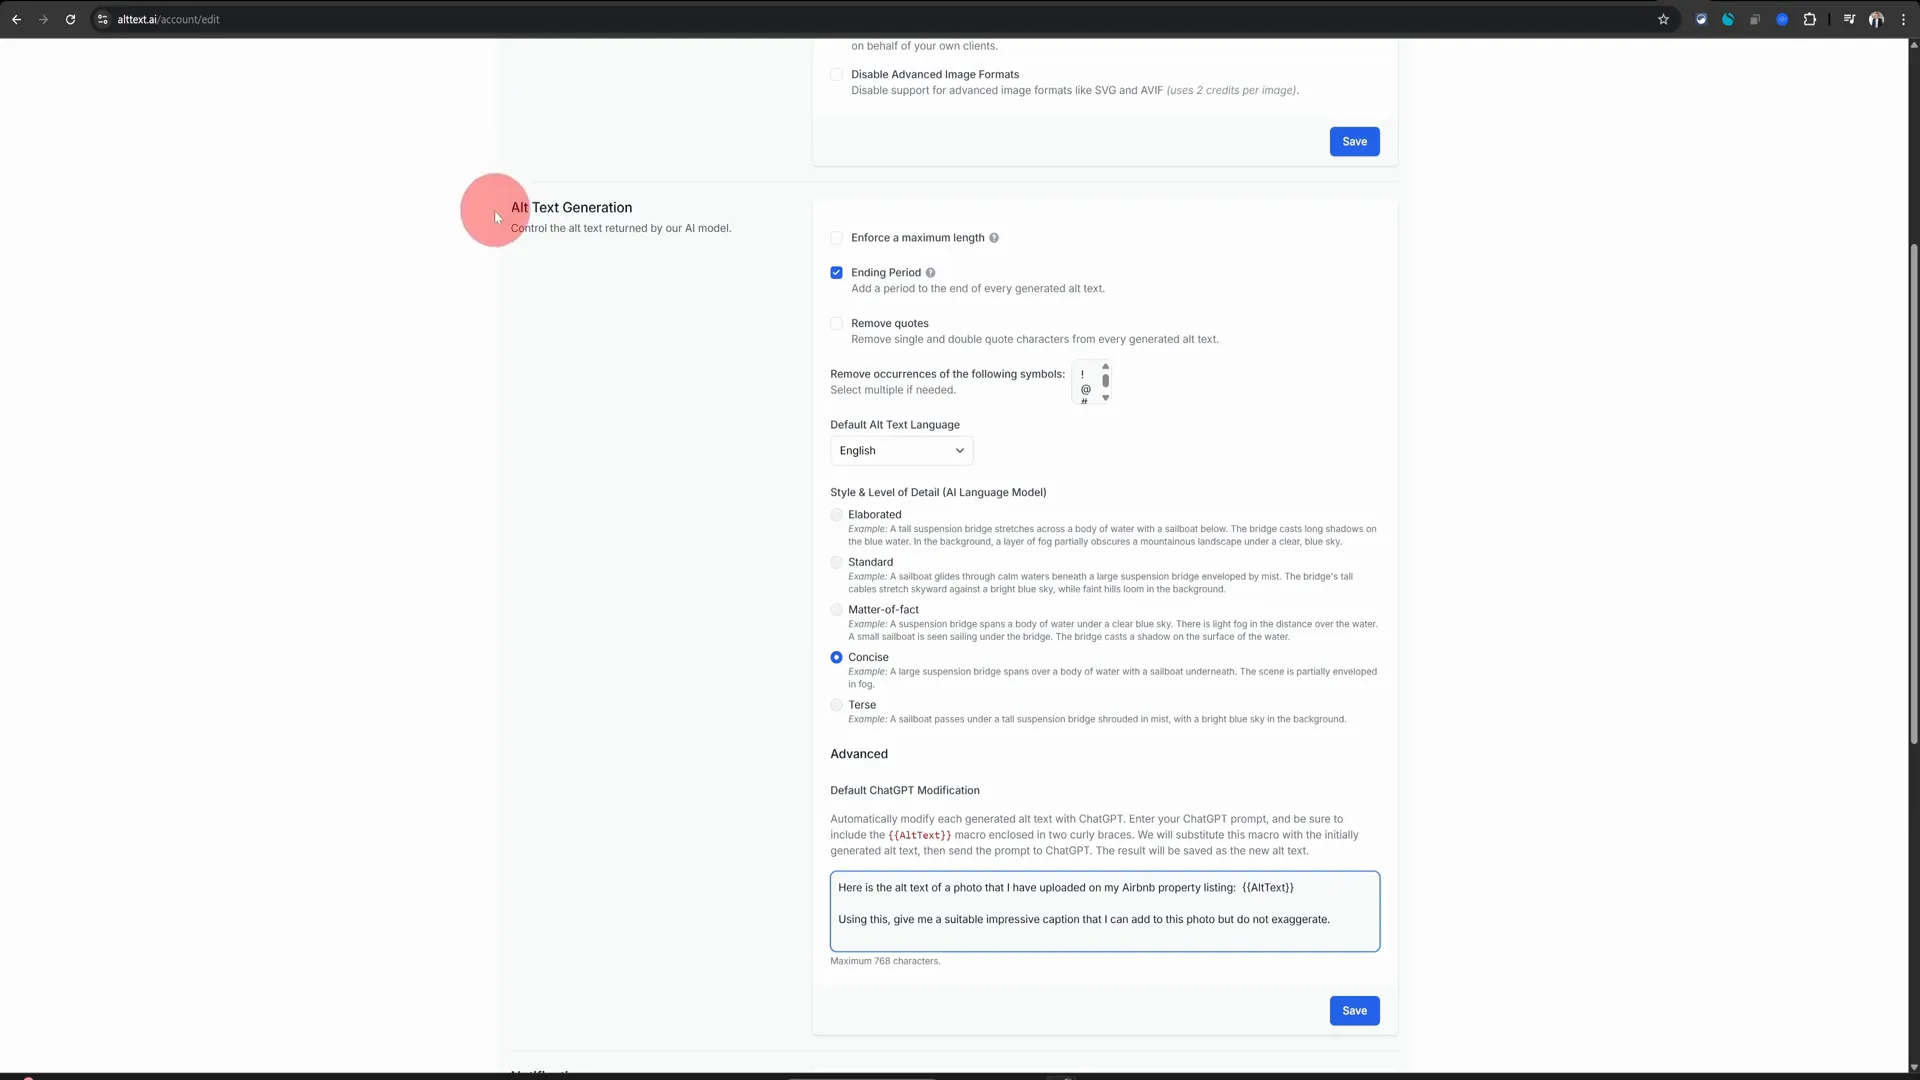
Step 8: Configure the Extension
After installing the extension, navigate to your account settings. You’ll find an option for “Alt Text Generation.” In the advanced section, you need to copy and paste a specific text that I will also include in the description. This text will help the AI generate better captions for your images.
Step 9: Save Your Changes
Once you have pasted the necessary text into the alt text generation section, click on “Save.” This will ensure that the AI tool is configured correctly and ready to generate captions for you.
Step 10: Generate Captions Anytime
Now, whenever you want to add a caption to any image in your browser, all you need to do is right-click, choose the option, and voilà! An amazing photo caption will be generated for you.
Why Use Captions?
Adding captions to your Airbnb photos is not just about aesthetics; it has several practical benefits:
- Improved Guest Trust: Guests are more likely to book a property that provides clear and detailed descriptions.
- Accessibility: Captions help guests with visual impairments understand the space better.
- SEO Benefits: Well-written captions can improve your listing’s visibility on Airbnb’s algorithm.
Conclusion
In conclusion, adding captions to your Airbnb photos is a simple yet effective way to enhance your listing. By following these steps, you can create a more engaging and informative experience for potential guests. Remember to leverage the free tools available to make the process easier and more efficient.
Give this method a try, and watch as your property gains more attention and bookings. Thank you for reading, and if you found this guide useful, please consider sharing it with other Airbnb hosts!
Frequently Asked Questions (FAQs)
1. Do I need to pay for the AI tool?
No, the tool offers a free trial which you can use to generate captions for your Airbnb photos.
2. Can I customize the captions generated by the AI?
Yes, you can edit the captions after they are generated to better fit your style or preferences.
3. How long does it take to set up the AI tool?
The setup process is quick and should take no more than 10-15 minutes.
4. Will adding captions really make a difference?
Absolutely! Captions enhance the visual storytelling of your listing, making it more appealing to potential guests.
5. Is this method suitable for all types of listings?
Yes, whether you have a cozy apartment or a spacious villa, adding captions can benefit all types of Airbnb listings.
For more tips and tricks on Airbnb hosting, stay tuned for our upcoming articles!