No-Nonsense Tips: How to Change the Main Photo on Booking.com (FAST & EASY!)
If you’re a property owner or manager using Booking.com to attract guests, you already know how crucial your listing’s photos are. The main photo–the cover image that potential guests see first–can make or break a booking. But did you know that changing this main photo is surprisingly simple once you know where to look? In this comprehensive guide, brought to you with No-Nonsense Tips, you’ll learn exactly how to update your Booking.com main photo quickly and effectively, plus how to leverage Booking.com’s new Smart Ordering feature to maximise your listing’s performance.
Whether you’re a seasoned short-term rental host, hotel manager, or just getting started with your first property listing, this step-by-step tutorial will walk you through everything you need to know to refresh your cover photo and potentially boost your bookings. Let’s dive in!
Step 1: Why Changing Your Main Photo Matters
Your main photo on Booking.com is the first impression that potential guests get of your property. It appears in search results, on your listing page, and often influences whether a viewer clicks through to learn more or moves on to another option. A compelling, high-quality main photo can increase clicks, engagement, and ultimately bookings.
But changing this photo isn’t just about aesthetics. It’s also about strategic presentation. You want to showcase your property’s best features in a way that appeals to your target guests. This is where Booking.com’s new Smart Ordering feature comes into play, which we’ll discuss in detail later.
Before you start, one important No-Nonsense Tip: always use a desktop computer to make major changes to your Booking.com listing. While the mobile app is great for quick tasks, it isn’t designed for detailed hosting setups like photo management.
Step 2: Logging into the Booking.com Extranet
To begin, you need to access your Booking.com Extranet, which is the backend platform where hosts manage their listings. Here’s how:
- Open your preferred web browser on your computer.
- Go to Booking.com Extranet login page.
- Enter your login credentials (email and password) associated with your property account.
- Once logged in, you will land on your property dashboard, the central hub for managing your listing.
From this dashboard, you have access to all the tools you need to optimise your listing, including photo management.
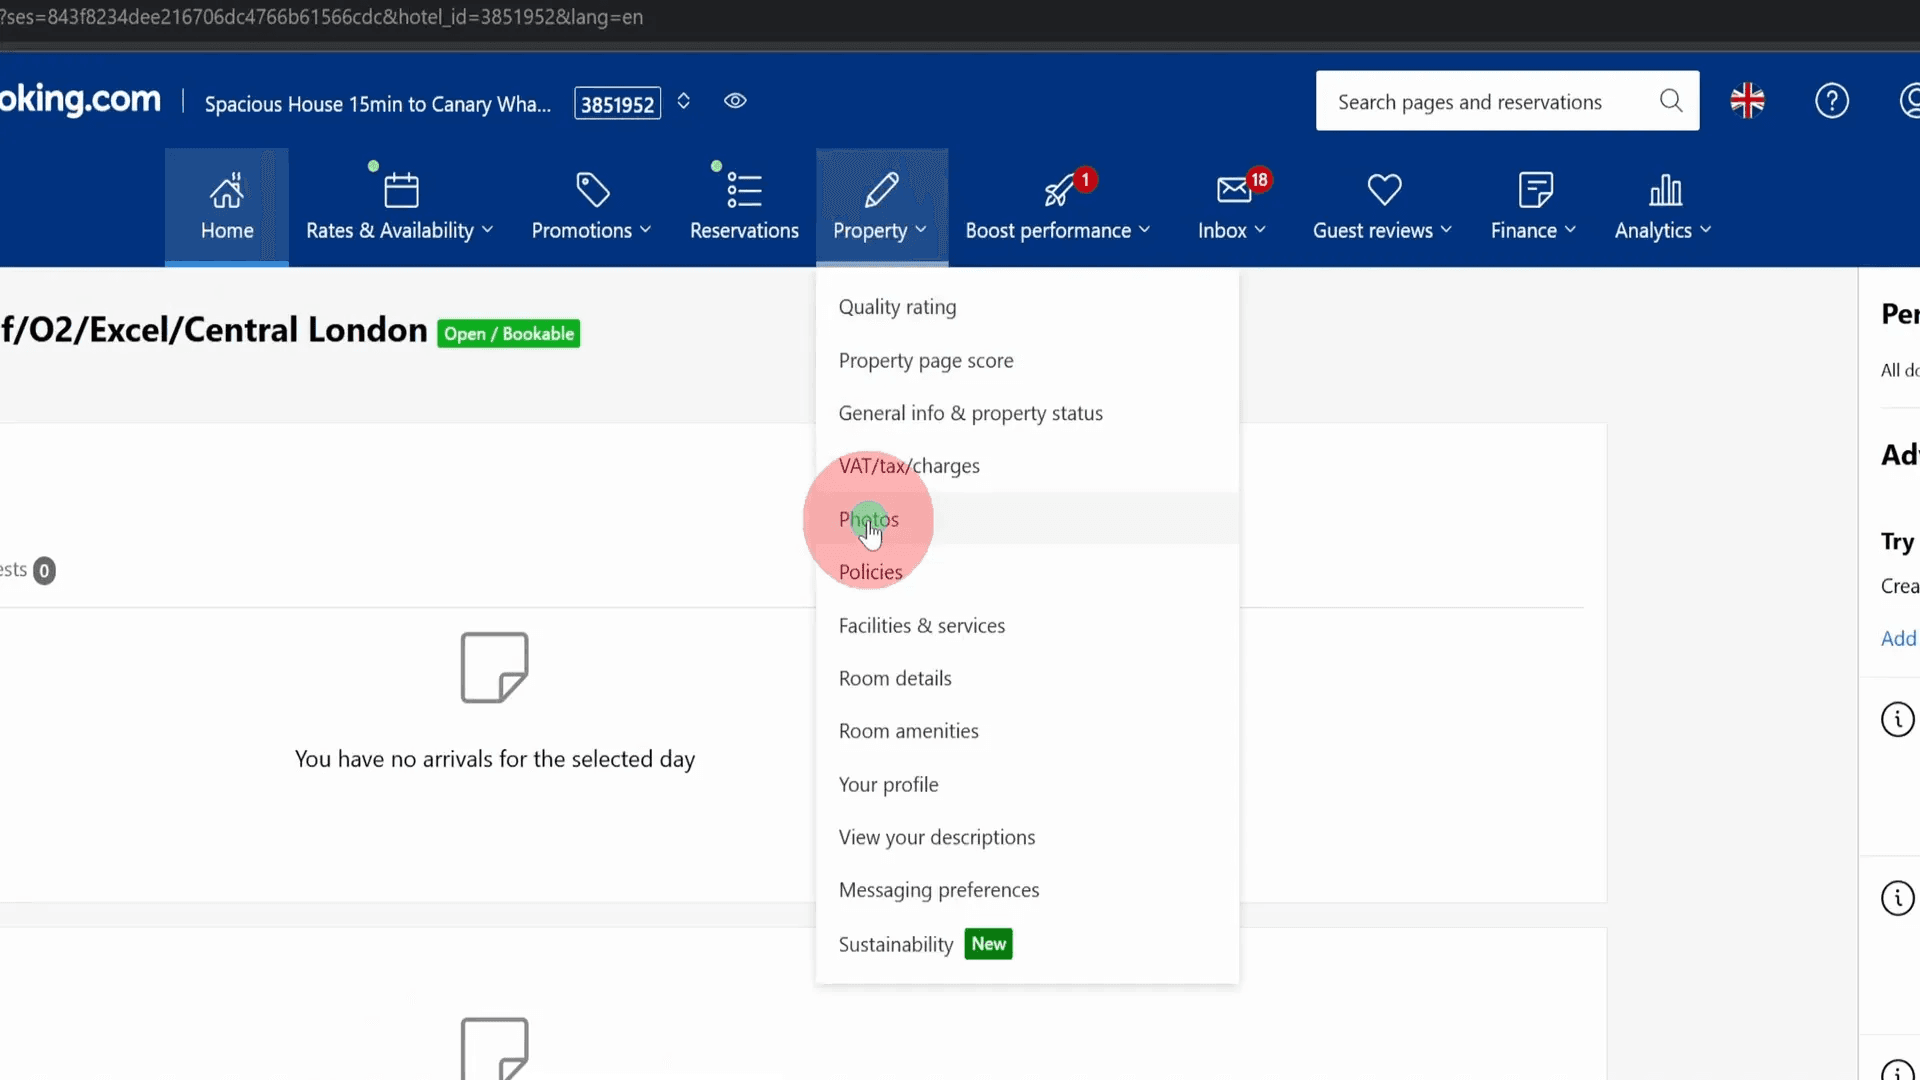
Step 3: Navigating to the Photo Gallery
Now that you’re inside the Extranet dashboard, follow these steps to access your photos:
- Look at the top menu bar of the dashboard.
- Find and click on the Property icon (normally represented by a building or house icon).
- From the dropdown menu, select Photos.
This action opens your property’s photo gallery, where all your listing images are stored and managed.
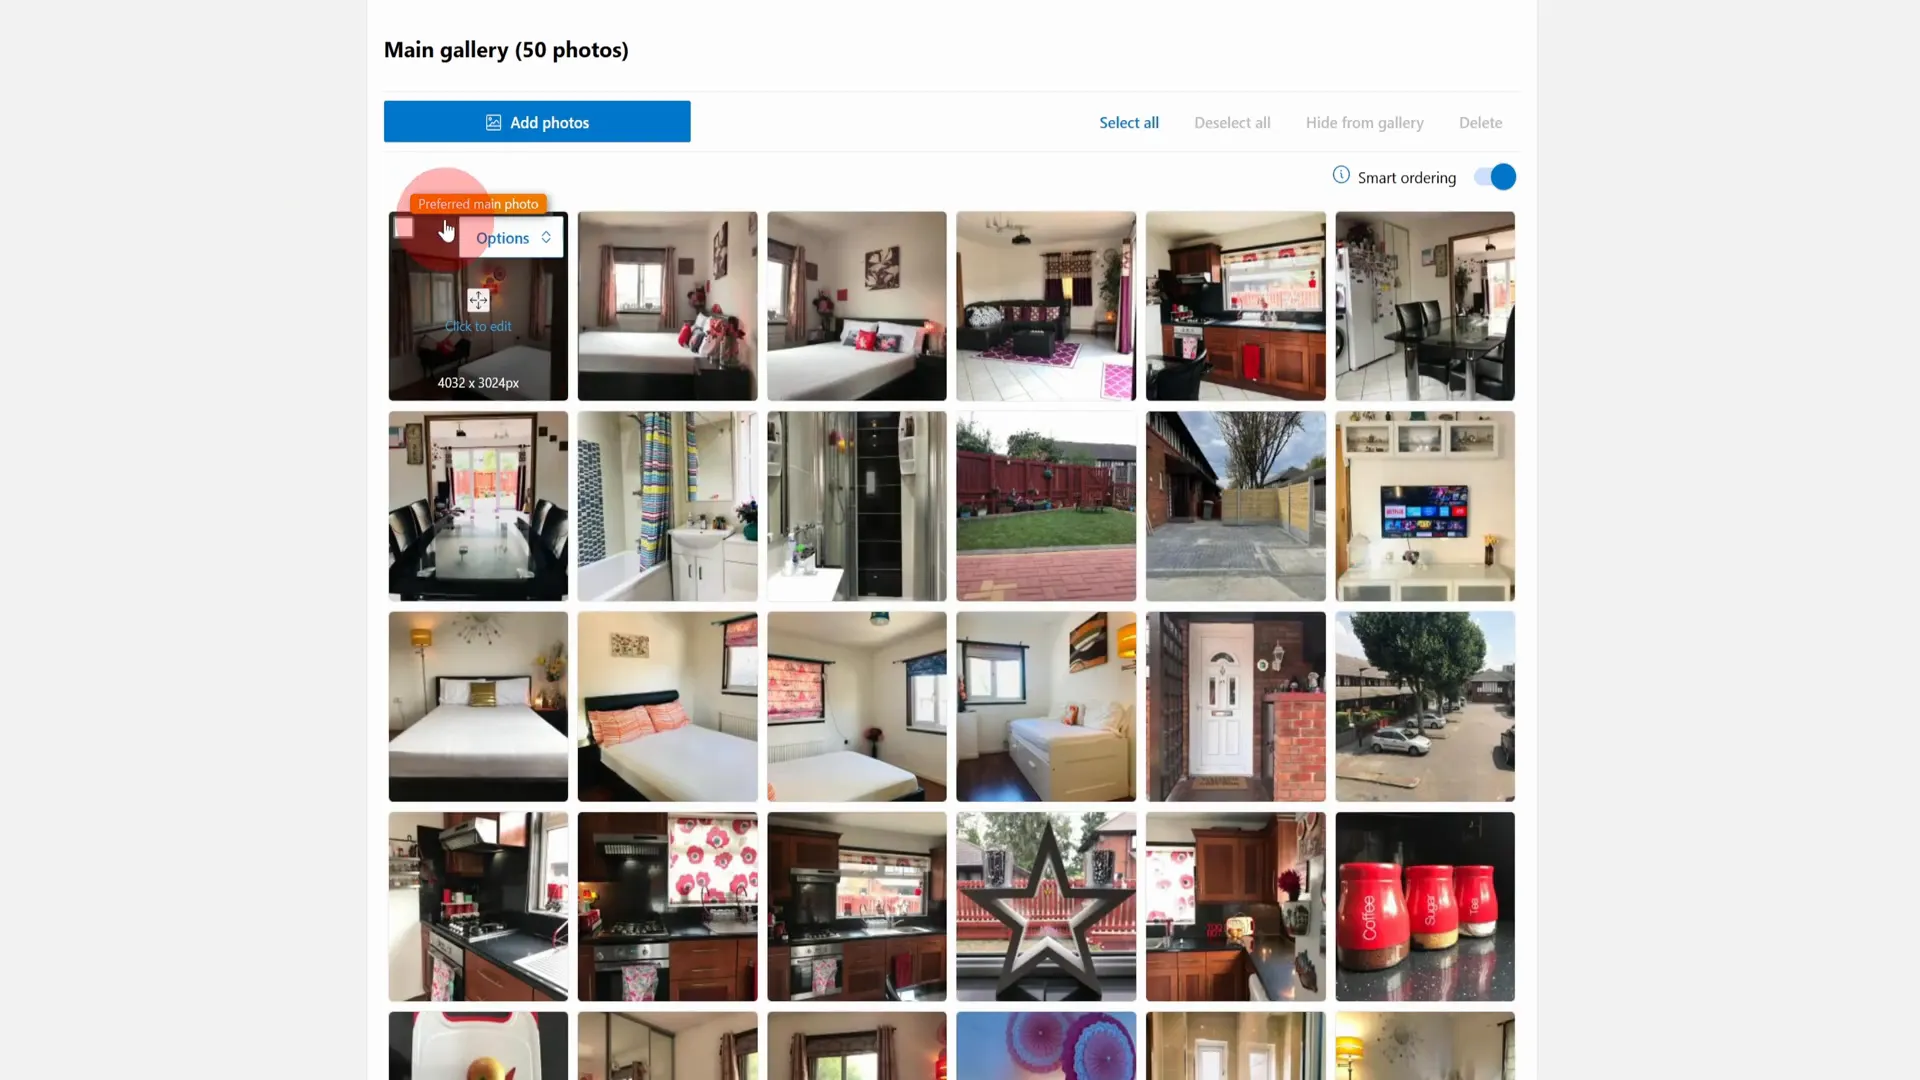
Step 4: Identifying Your Current Main Photo
Within the photo gallery, you will see all the images you’ve uploaded for your listing. Your current main photo–the one that guests see first–will be marked with a preferred icon or label.
This visual cue makes it easy to identify which photo is currently set as the cover image. You might want to change this if the photo is outdated, doesn’t showcase your property’s best features, or simply if you want to refresh the look of your listing.
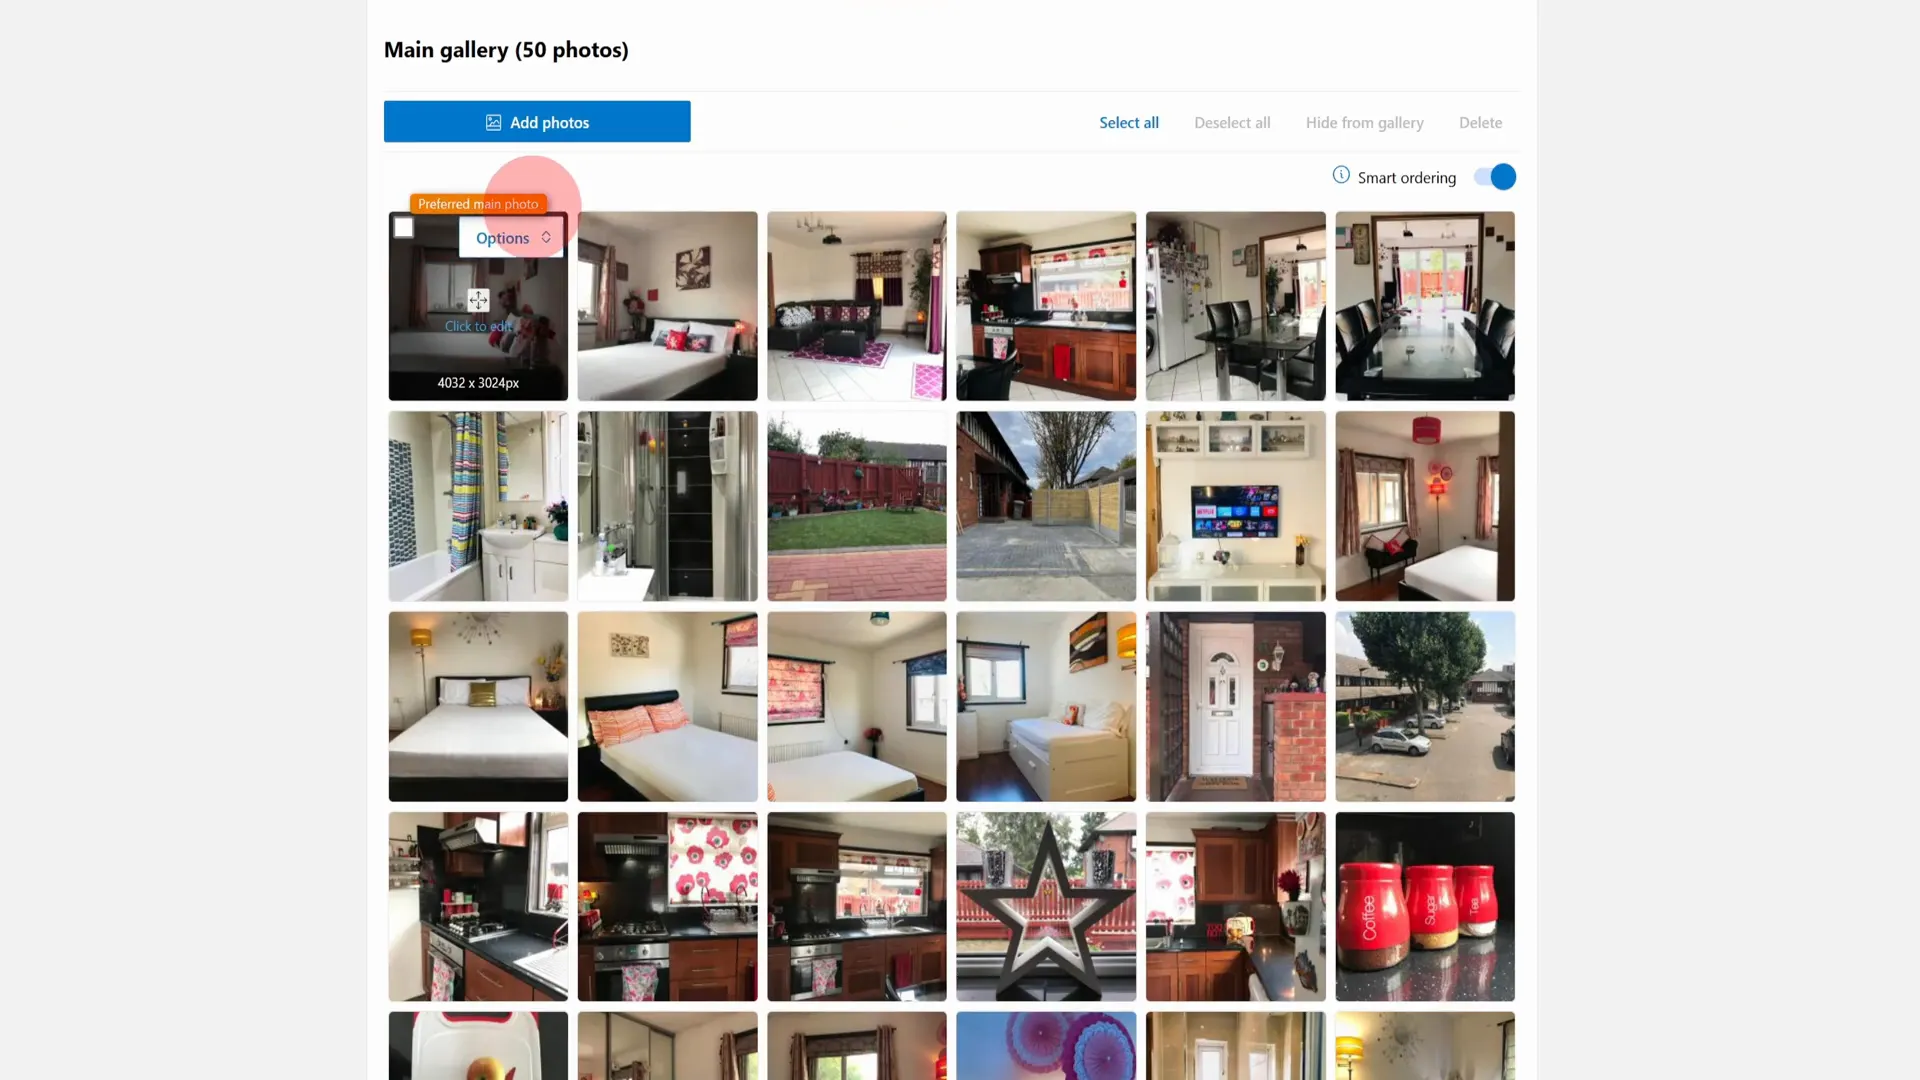
Step 5: Changing the Main Photo Manually
To manually change your main photo, follow these straightforward steps:
- Hover your mouse cursor over the photo you want to set as your new main photo.
- A small options menu will appear on or near the photo.
- Click on this options menu to reveal more choices.
- Select the option labeled Set preferred main photo.
- The page will refresh, and you'll see that the selected photo now has the preferred icon, confirming it is your new main photo.
This process is quick and gives you full control over which image represents your property first. However, there’s an even smarter way to manage your main photo that can save you time and potentially improve your listing’s performance.
Step 6: Leveraging Booking.com’s Smart Ordering Feature
Booking.com recently introduced a feature called Smart Ordering. This innovative tool uses data-driven algorithms to automatically select and rotate the photos on your listing, including the main cover photo.
Here’s how it works:
- When you enable Smart Ordering, Booking.com analyses which photos attract the most clicks and engagement based on user behaviour data.
- It automatically prioritises those photos, placing the best-performing images prominently on your listing.
- The photos can rotate and experiment dynamically, ensuring your listing always shows the most compelling visuals to potential guests.
This removes the guesswork from choosing your main photo manually and can lead to increased clicks and bookings by optimising your listing’s visual appeal based on real user data.
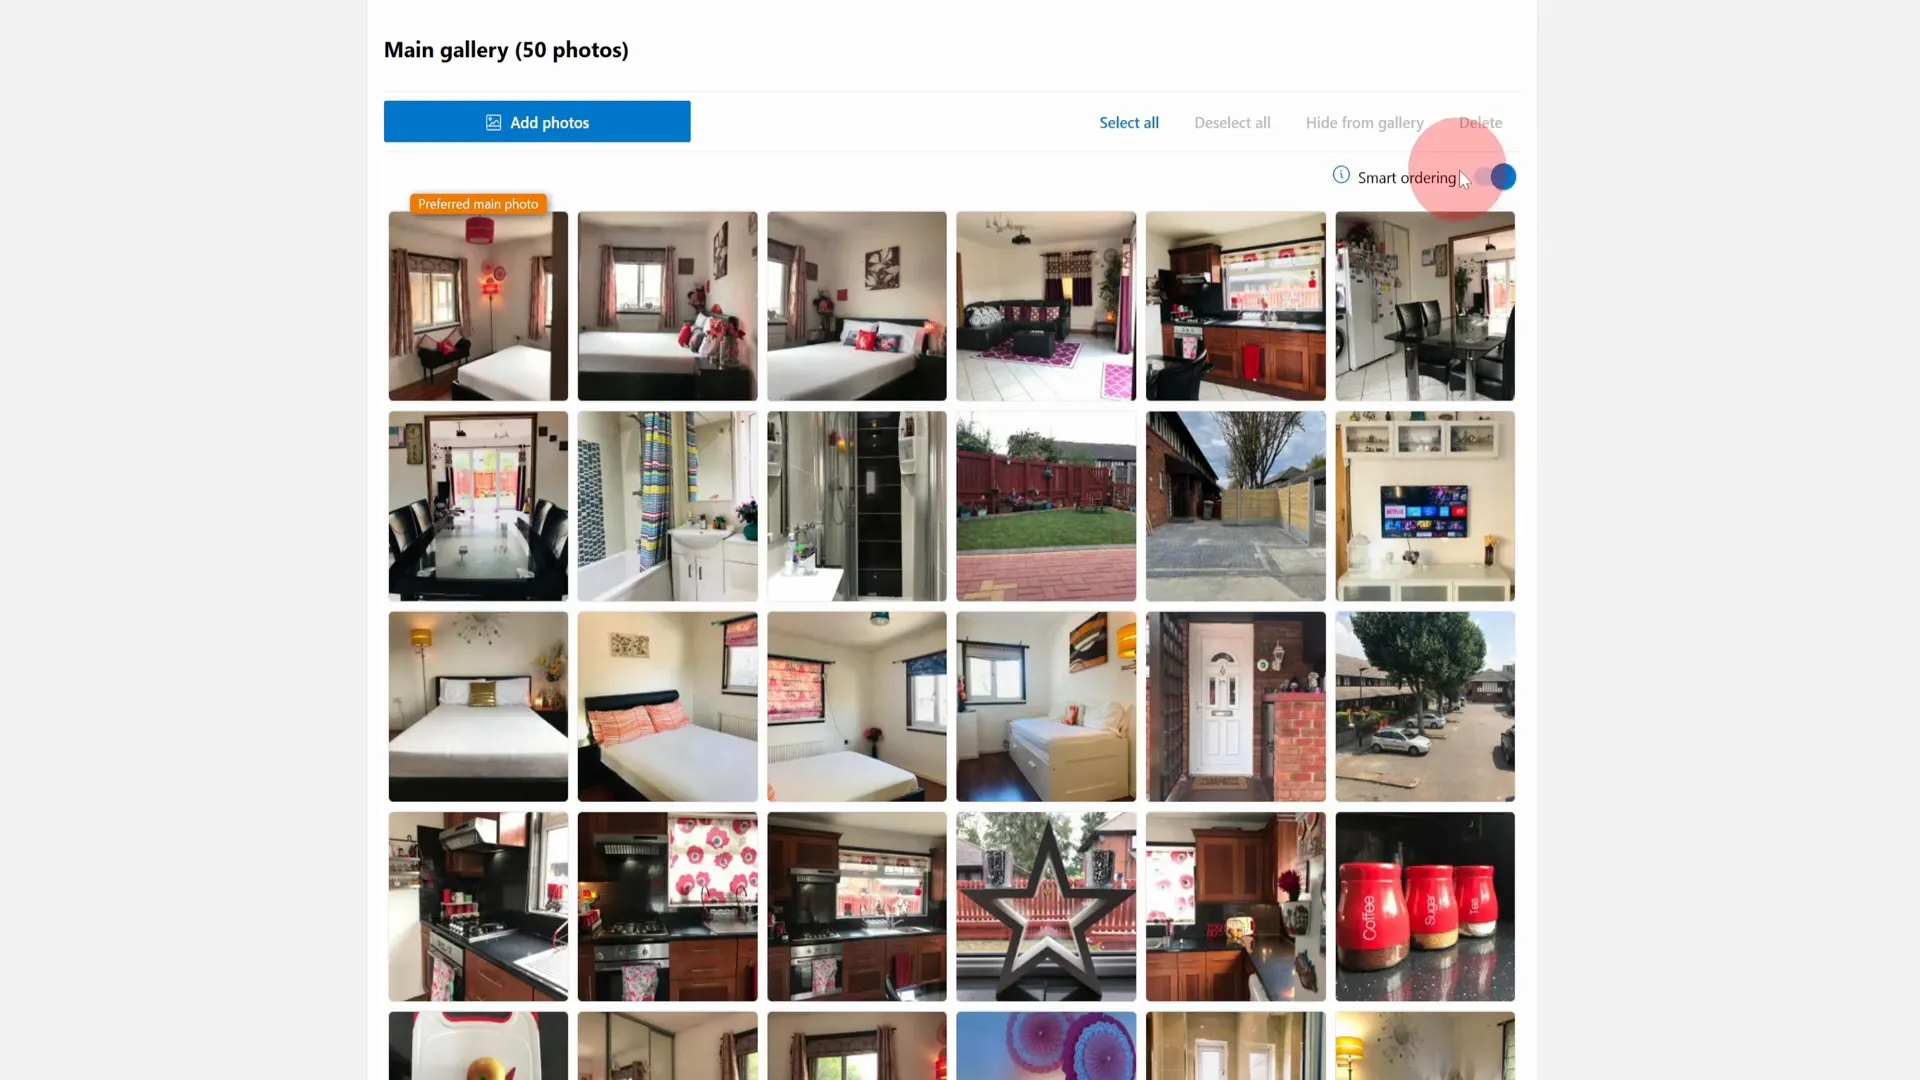
Step 7: How to Enable Smart Ordering
Enabling Smart Ordering is simple and highly recommended if you want to maximise your listing’s performance without constantly monitoring and changing photos yourself. Here’s how to turn it on:
- Within your photo gallery on the Booking.com Extranet, look for the Smart Ordering toggle or option.
- Switch the Smart Ordering feature to On.
- Once enabled, Booking.com will take over the photo ordering, including the main photo, and continuously optimise it based on data.
This feature is a great example of a No-Nonsense Tip–trusting the platform’s data-driven tools rather than relying solely on your instincts or preferences.
By letting Booking.com experiment with your photos, you free yourself from the tedious task of guessing which photo works best, and you benefit from ongoing optimisation that can improve your listing’s visibility and attractiveness.
Step 8: Tips for Selecting Your Photos
While Smart Ordering automates photo selection, the quality and variety of photos you upload still matter greatly. Here are some tips to ensure your gallery is optimised:
- High Quality: Use clear, high-resolution images that showcase your property’s best angles and features.
- Diverse Shots: Include a mix of interior, exterior, amenities, and unique selling points.
- Lighting: Ensure photos are well-lit, preferably taken during the day with natural light.
- Clean & Tidy: Make sure rooms and spaces are clean and uncluttered before photographing.
- Highlight Unique Features: If your property has a pool, garden, or special decor, make these stand out.
Uploading a variety of good photos gives Smart Ordering more options to work with, increasing the likelihood it will find the perfect combination to attract guests.
Step 9: Troubleshooting and Common Questions
Sometimes hosts face issues or have questions when changing their main photo. Here are some common points to keep in mind:
- Photo Not Updating? After setting a new preferred photo, the change may take a few moments to reflect on your live listing. Refresh and check back.
- Mobile App Limitations: The Booking.com app is not designed for detailed listing edits like photo management. Always use a desktop for these tasks.
- Multiple Properties? Repeat the process for each listing if you manage multiple properties.
- Photo Size Requirements: Ensure your photos meet Booking.com’s size and format guidelines to avoid upload issues.
Step 10: Final Thoughts and Best Practices
Updating your Booking.com main photo is a straightforward yet impactful way to enhance your listing’s appeal. By following these No-Nonsense Tips, you can confidently manage your photos and make data-backed decisions thanks to the Smart Ordering feature.
Remember:
- Always use a desktop to make major listing changes.
- Access your photo gallery via the Property icon in the Extranet dashboard.
- Manually set your preferred main photo by hovering over images and selecting the option.
- Consider enabling Smart Ordering to let Booking.com optimise photo selection automatically.
- Upload a diverse range of high-quality photos to give the system plenty to work with.
- Be patient as changes may take a moment to reflect on your live listing.
By keeping your main photo fresh, high-quality, and optimised, you increase the chances of capturing guest attention and boosting bookings without unnecessary guesswork.
I hope you find these No-Nonsense Tips useful as you manage your Booking.com listing. Remember, a great listing starts with great photos, and with Booking.com’s tools at your disposal, you’re well-equipped to succeed.
Happy hosting and here’s to more bookings!