No-Nonsense Tips: How to Change Your Property Name on Booking.com Quickly and Easily
Are you a host on Booking.com looking to update your property name but feeling stuck on how to do it? Changing your property name might seem like a small tweak, but it’s essential for branding, attracting the right guests, and keeping your listing fresh and accurate. In this comprehensive guide, I’ll walk you through the exact steps to change your property name on Booking.com using the extranet, with clear, straightforward instructions designed to save you time and hassle.
This tutorial is based on my own tested method as a seasoned host and administrator on Booking.com, and I’ll share some No-Nonsense Tips along the way to make sure you get it right the first time. Whether you’re rebranding, correcting a typo, or updating your listing’s style, you’ll find everything you need here.
Why Changing Your Property Name on Booking.com Matters
Your property name is often the first impression potential guests get when scrolling through listings. It’s your brand’s identity on the platform and can influence click-through rates and bookings. Maybe you’ve updated your accommodation’s style, added new amenities, or simply want a more eye-catching name. Whatever the reason, updating your property name is a smart move to keep your listing competitive.
However, many hosts don’t realise that this process isn’t as straightforward on the Booking.com app, so it’s important to use the desktop version for this task. The app is great for managing reservations and quick updates, but when it comes to more detailed hosting setups, like changing your property name, the extranet is your best friend.
Step 1: Log In to the Booking.com Extranet
The first and most important step is to access the Booking.com extranet. This is the administrative backend where you manage all aspects of your listing. Unlike the mobile app, the extranet provides full functionality for hosting-related setups.
Open your preferred web browser on a desktop or laptop and go to the Booking.com extranet login page: admin.booking.com.
Enter your host credentials to sign in. If you’ve forgotten your password, use the password recovery options to reset it before proceeding.
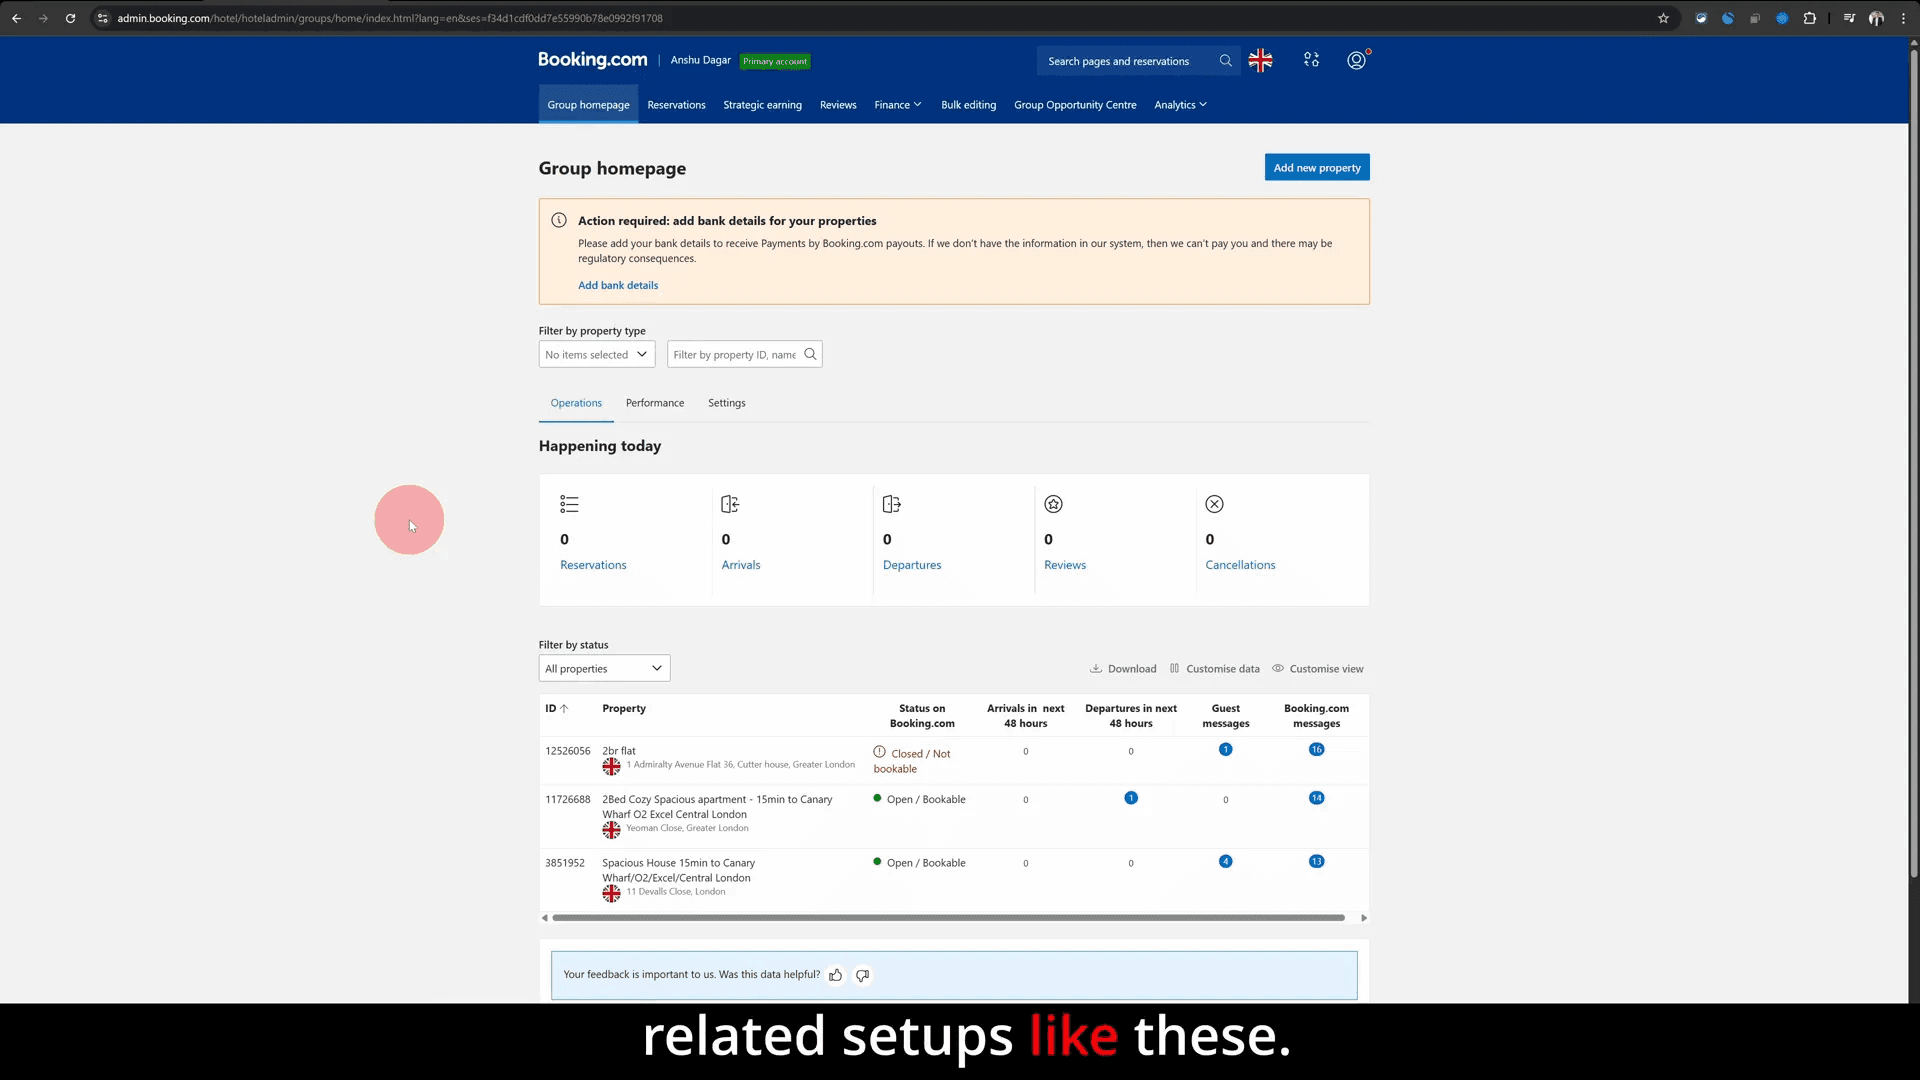
Once logged in, you’ll see the dashboard containing all your listings. This is where you select the property you want to update.
Step 2: Select the Property Listing You Want to Rename
From the dashboard, you’ll see a list of your properties if you manage more than one. Click on the specific listing whose name you want to change. This action opens the listing dashboard, where you can manage property details, availability, pricing, and more.
Choosing the correct listing is crucial. Make sure you’re working on the right property to avoid confusion or unintended changes to other listings.
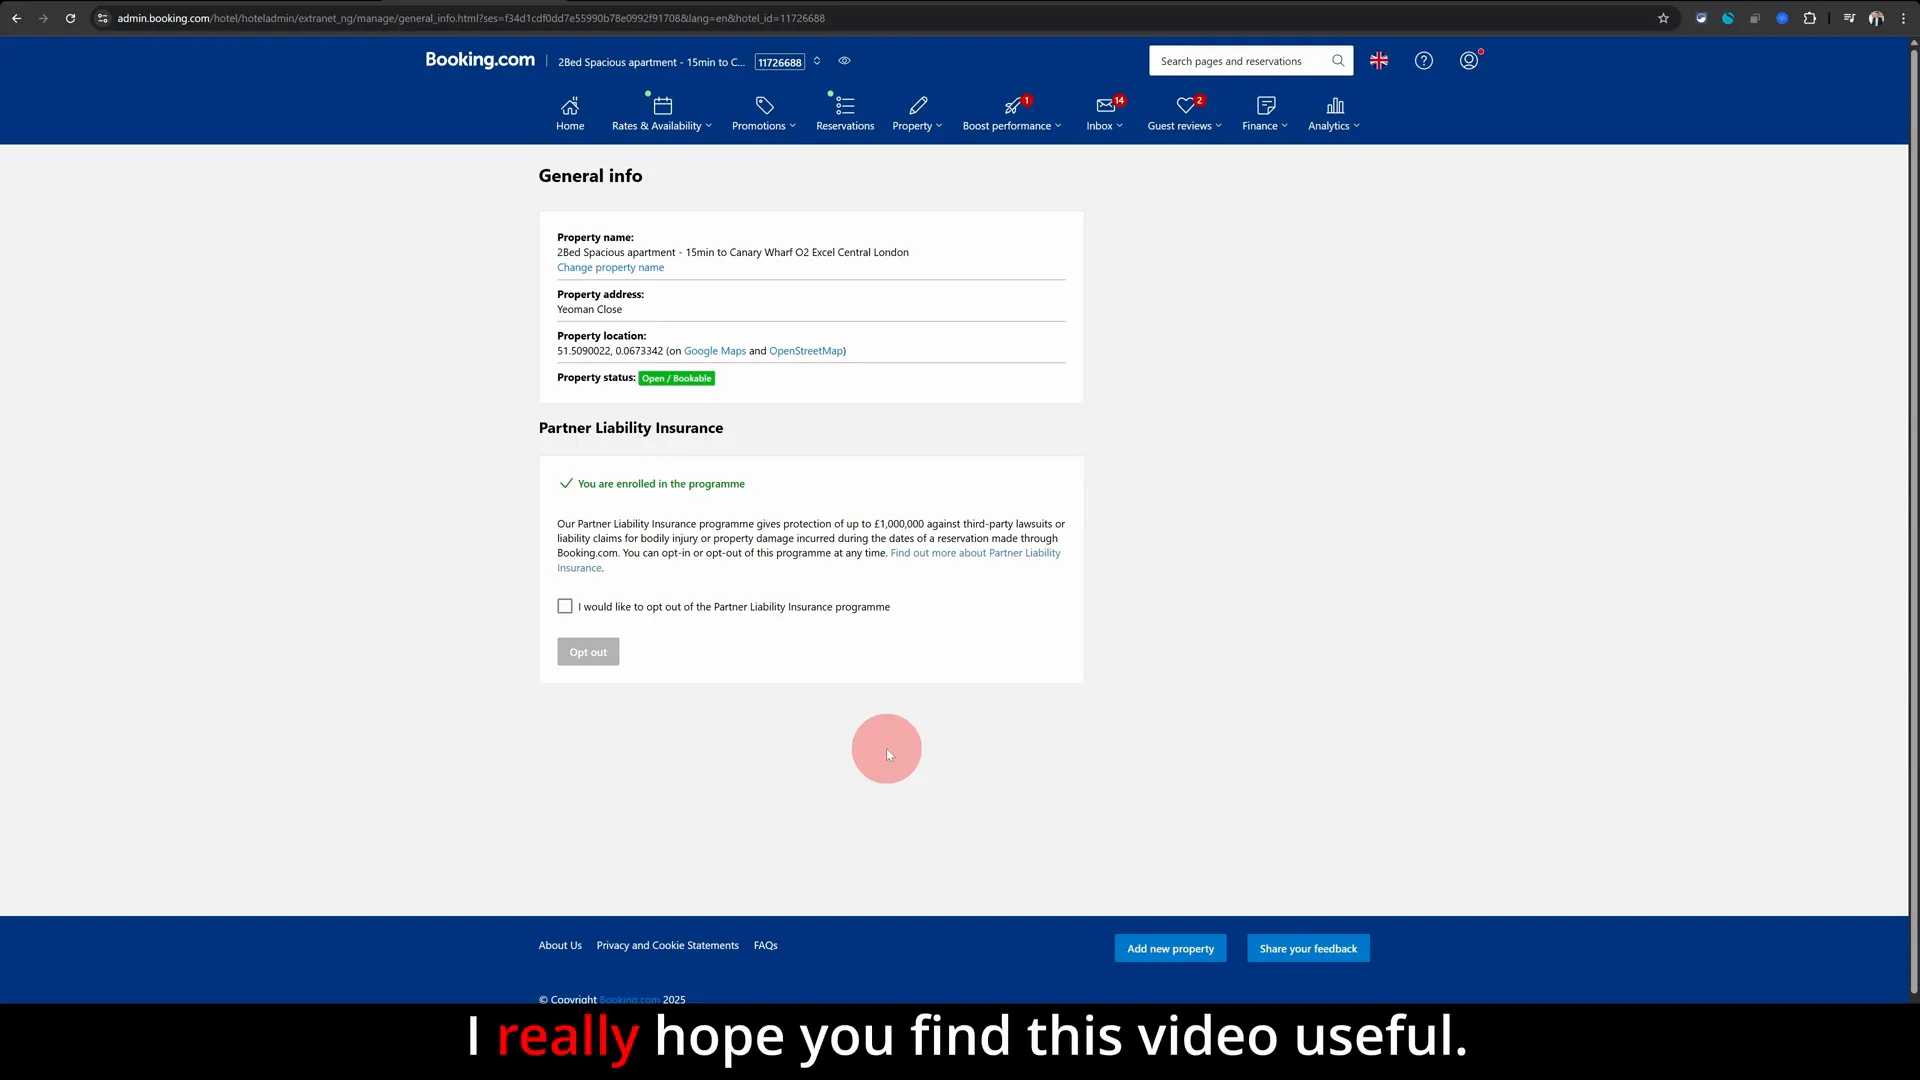
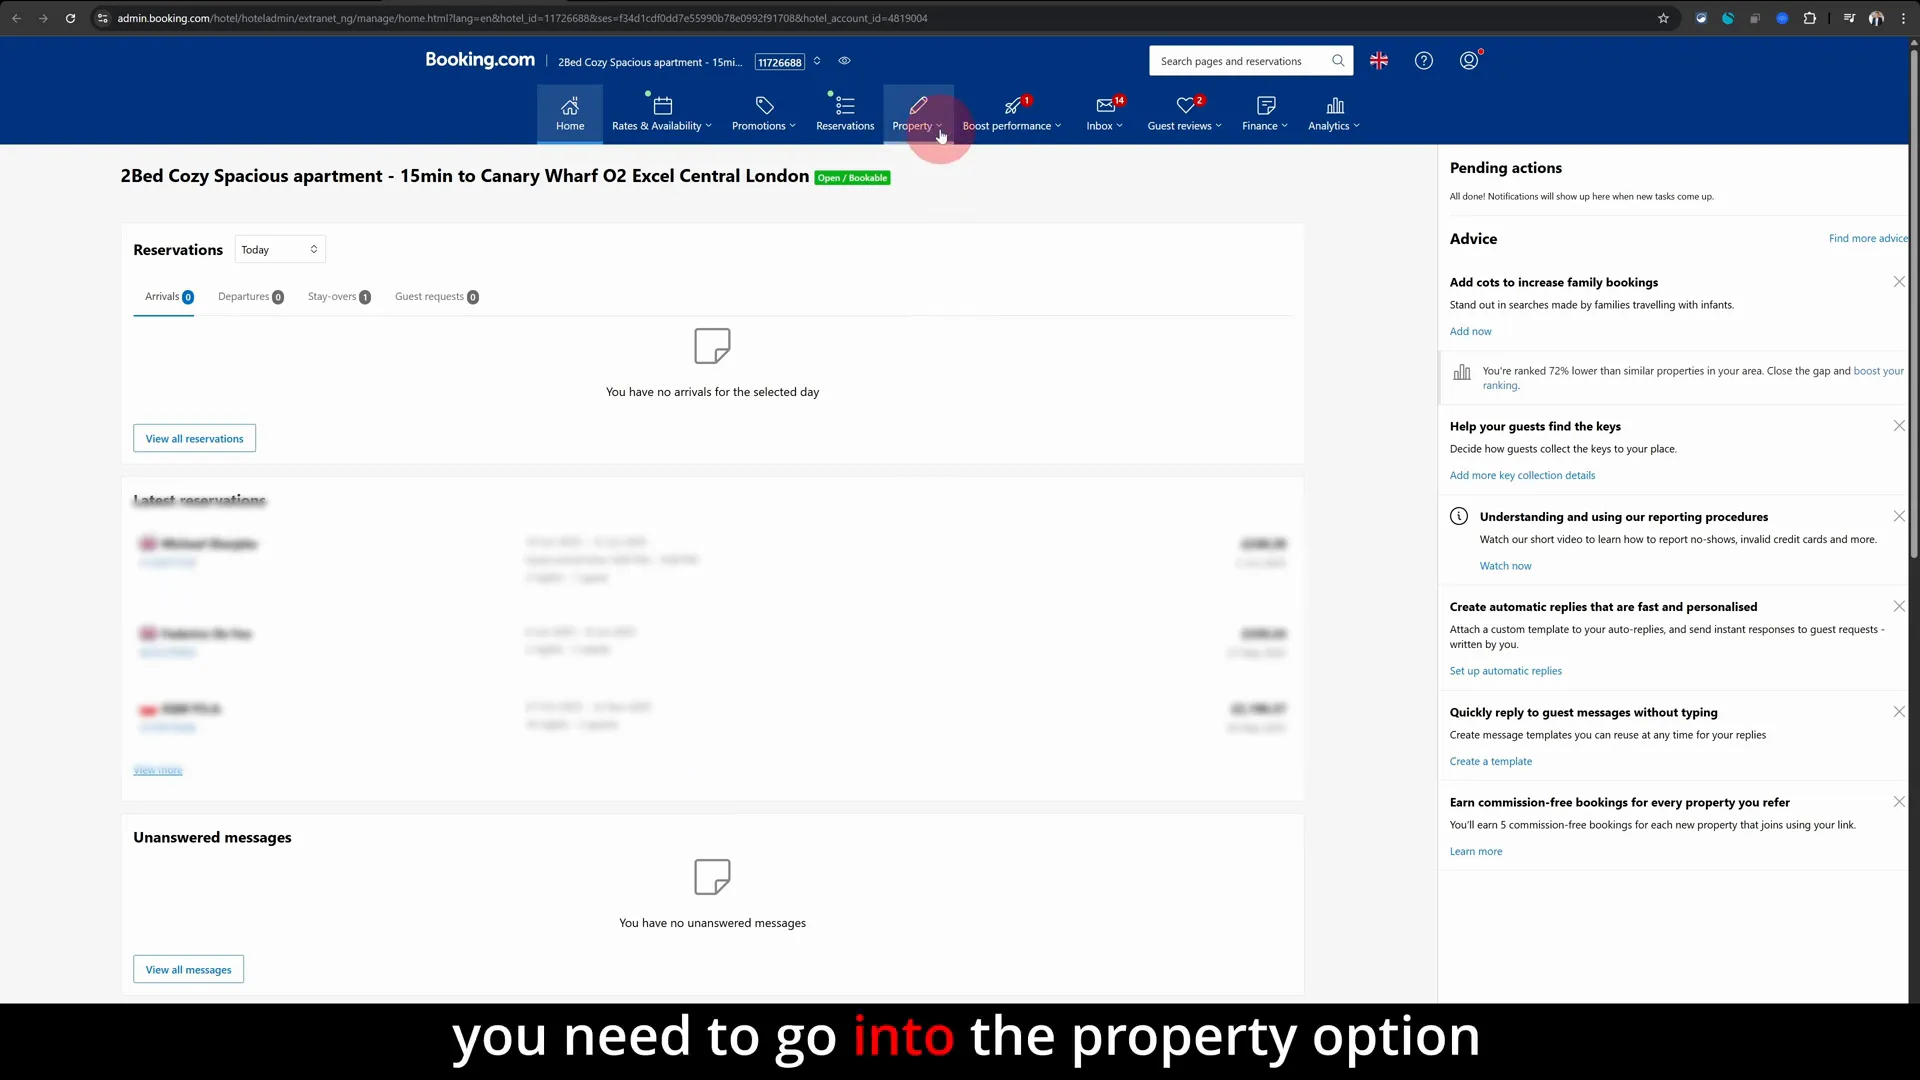
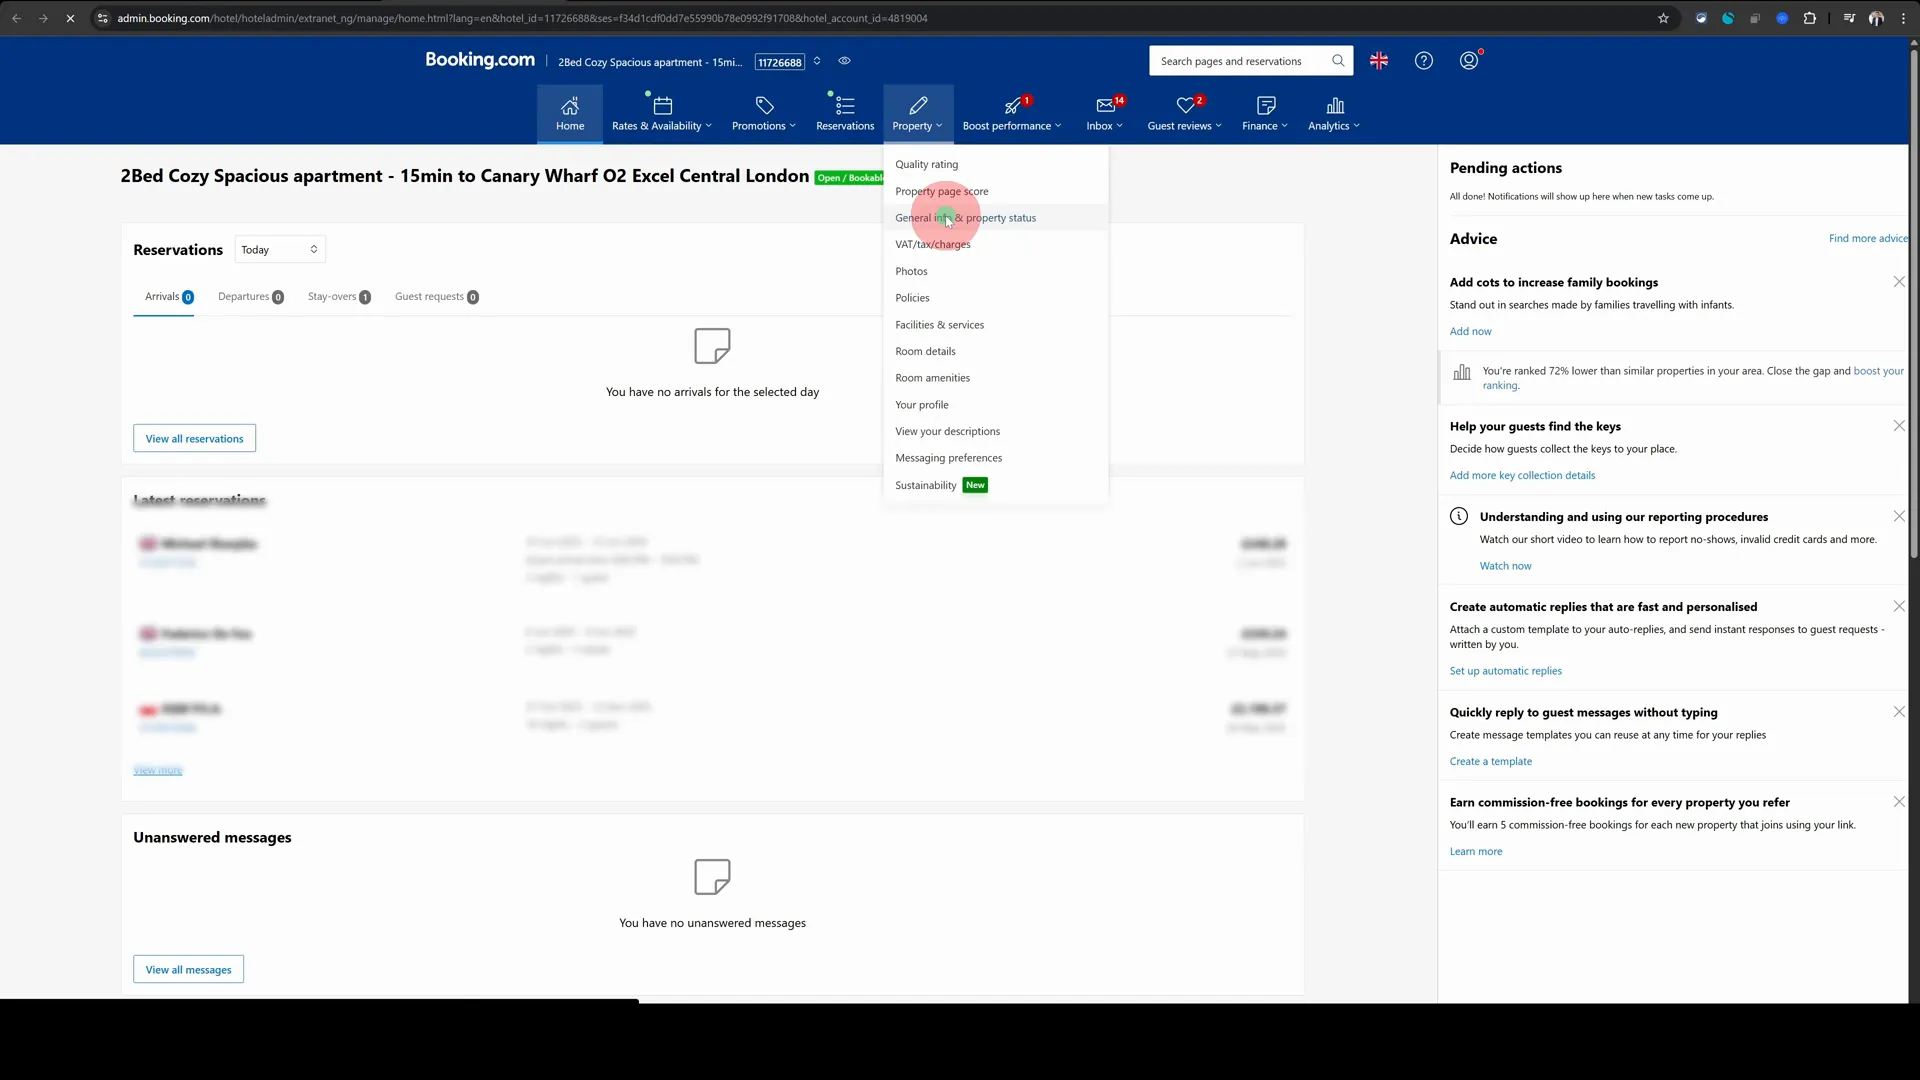
Step 3: Navigate to the Property Settings
With the listing dashboard open, look for the menu on the left or top navigation bar and find the Property option. This is where you manage all the key information about your accommodation.
Click on Property, then select General Info & Property Status from the dropdown menu. This section contains the core details about your listing, including the property name.
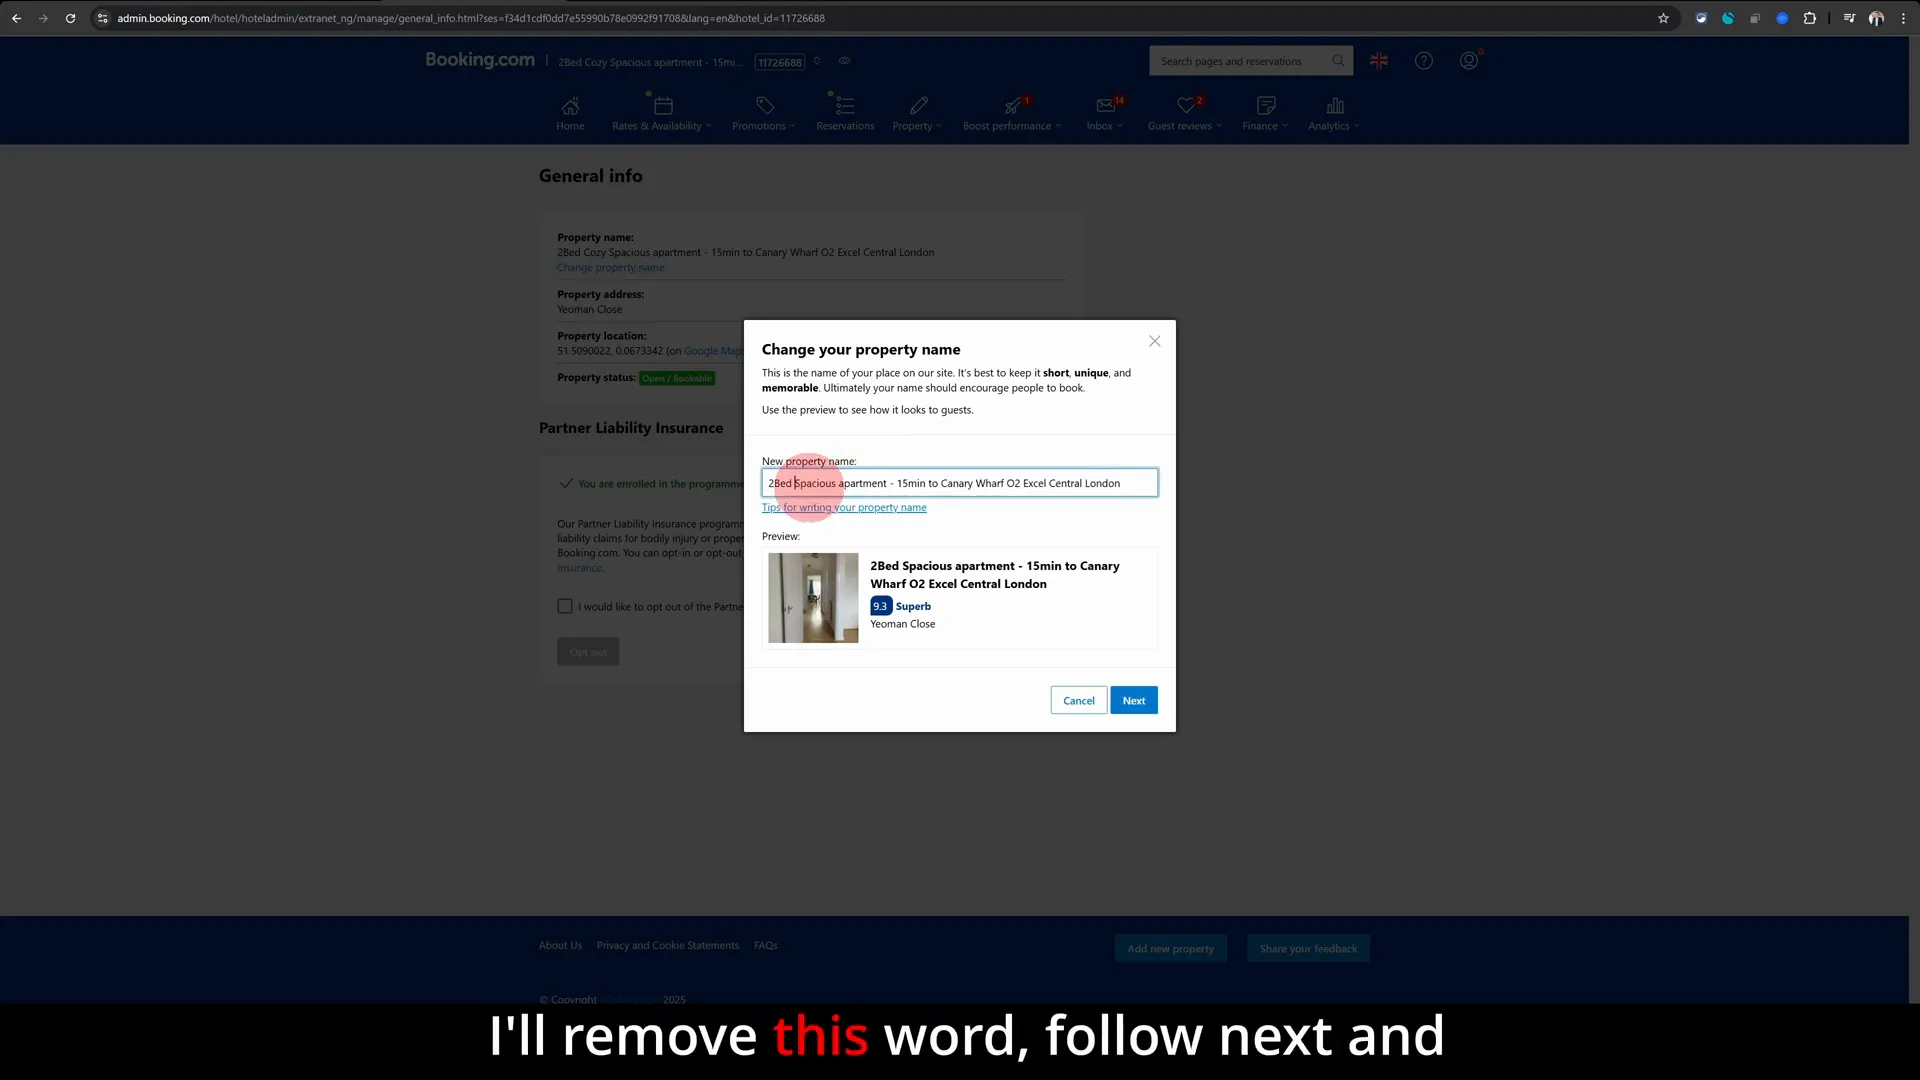
Step 4: Change Your Property Name
Once you’re in the General Info & Property Status section, you’ll see a pop-up or form with various fields about your property. The very first field here is the New Property Name.
This is where you enter the new name you want for your listing. Be sure to choose a name that accurately reflects your property and appeals to your target guests. Avoid overly long names or unnecessary punctuation that can clutter your listing.

For example, if your current property name is “Sunny Beachside Apartment - Follow Next,” and you want to remove “Follow Next” to make it cleaner, simply delete that part and type in the new name you prefer.
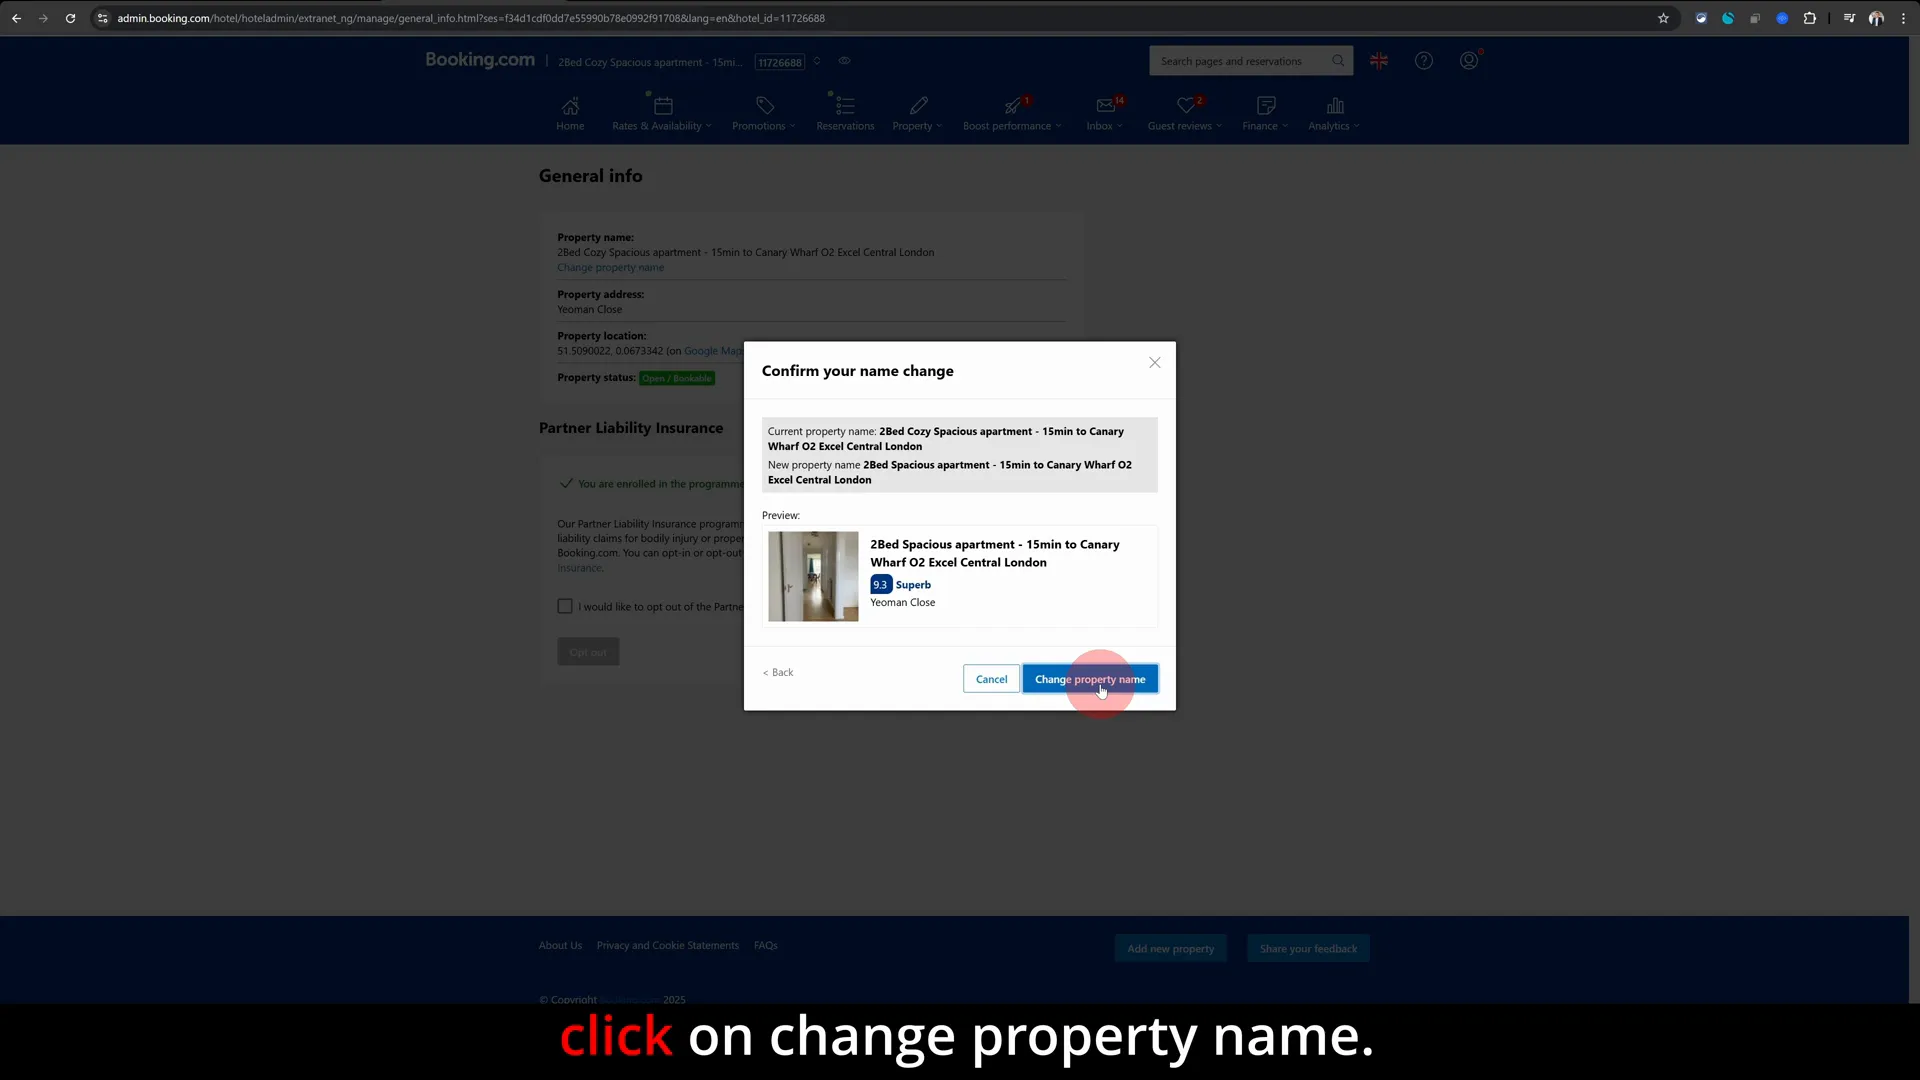
Step 5: Submit the Change
After entering the new property name, scroll down and click on the Change Property Name button to submit your update.
This action sends your request to Booking.com for review. It’s important to understand that the name change isn’t immediate. Booking.com has a verification process to ensure that property names meet their guidelines and don’t violate any policies.
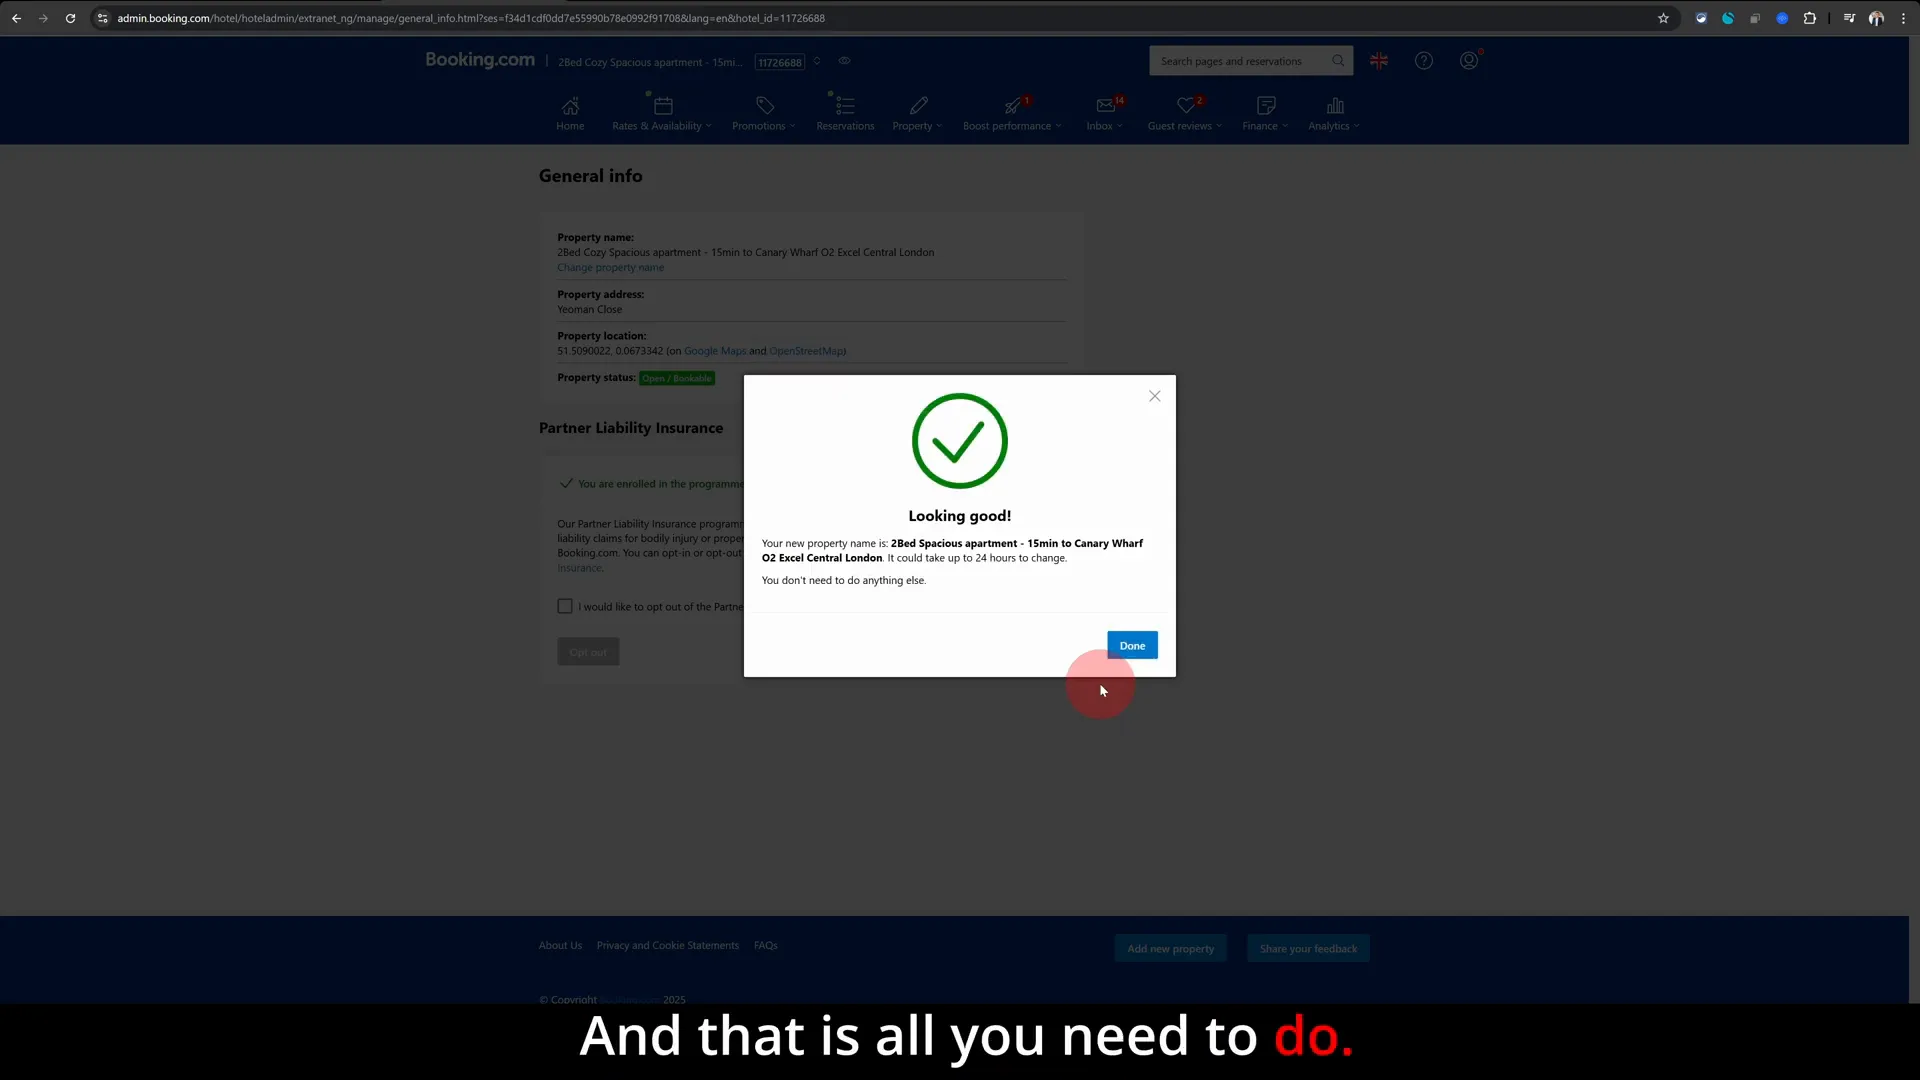
Step 6: Wait for Verification and Approval
Once you’ve submitted the change, Booking.com will review your new property name. This process typically takes up to 24 hours, though it can sometimes be quicker or take slightly longer depending on their workload.
During this time, your old property name will remain visible on the platform. You don’t need to take any further action unless Booking.com contacts you for clarification or requests you to modify the name for compliance reasons.
This verification step helps maintain quality and consistency across the platform. It also protects hosts and guests by preventing misleading or inappropriate property names.
Additional No-Nonsense Tips for Managing Your Booking.com Listing
While changing your property name is a straightforward process, here are some additional tips that can help you maintain a professional and attractive listing:
- Always use the desktop extranet for detailed edits. The mobile app is convenient but limited for complex changes.
- Keep your property name clear and concise. Avoid emojis, excessive punctuation, or irrelevant words that might confuse guests.
- Consider SEO-friendly keywords. Including your location or unique feature in the name can improve search visibility.
- Regularly review your listing details. Make sure photos, amenities, and descriptions are up to date alongside your property name.
- Respond promptly to Booking.com requests. If they need to verify your new property name or request changes, timely responses speed up the approval process.
Common Questions About Changing Your Property Name on Booking.com
Can I change my property name multiple times?
Yes, you can update your property name as often as needed, but keep in mind each change will go through the verification process. Frequent changes might confuse returning guests, so use this feature thoughtfully.
Will changing my property name affect my existing bookings?
No, your current bookings and guest communications remain unaffected. The change only updates how your listing appears to new potential guests.
What if Booking.com rejects my new property name?
If your new name doesn’t comply with Booking.com’s guidelines, they will notify you with the reason. You can then modify the name and resubmit it for approval.
Is it possible to change the property name using the Booking.com app?
While the app is great for managing bookings and quick updates, it currently does not support changing your property name. Always use the desktop extranet for this task to ensure a smooth process.
Summary: Quick Steps to Change Your Property Name on Booking.com
- Log in to the Booking.com extranet at admin.booking.com using a desktop or laptop.
- Select the property listing you want to rename from your dashboard.
- Navigate to Property > General Info & Property Status.
- In the popup, enter your new property name in the first field.
- Click the Change Property Name button to submit your update.
- Wait for Booking.com to verify and approve your new name (usually within 24 hours).
Final Thoughts
Changing your property name on Booking.com is a simple but important step in managing your listing and improving your property’s appeal. By following these No-Nonsense Tips and using the extranet on your desktop, you can ensure your property name accurately represents your brand and attracts the right guests.
Remember, the verification process is in place to protect both hosts and guests, so be patient and follow Booking.com’s guidelines. With a well-chosen property name and up-to-date listing details, you’re well on your way to boosting your bookings and enhancing your hosting success.
Have any questions or want more tips on managing your Booking.com listing? Feel free to reach out or explore other guides for hosts. Happy hosting!
Have a wonderful day wherever you are, and until next time, keep your hosting game strong!