
Airbnb Hosting Tips: How to Add or Delete Photos on Your Airbnb Listing (2025 Update)

Managing your Airbnb listing effectively is crucial for attracting guests and ensuring a successful hosting experience. One of the key elements that can significantly impact your listing’s appeal is the quality and relevance of your photos. In this guide, we’ll explore how to add or delete photos from your Airbnb listing quickly and efficiently. Whether you’re looking to refresh your images or remove outdated ones, this tutorial will provide you with all the necessary steps. Let’s dive into the world of Airbnb hosting tips! Table of Contents Step 1: Access Your Hosting Dashboard Step 2: Navigate to Your Listings Step 3: Open the Photo Editor Step 4: Adding New Photos Step 5: Deleting Existing Photos Step 6: Finalizing Your Changes Pro Tips for Successful Airbnb Listings Frequently Asked Questions (FAQ) Conclusion Step 1: Access Your Hosting Dashboard To begin, you want to make sure that you are using a desktop computer. While the Airbnb mobile app is convenient for many tasks, it is not well-suited for managing your photo listings. Once you’re ready, log into your Airbnb account from your computer. On the top right corner, you’ll see an option to Switch to Hosting. Click on this option to navigate to your hosting dashboard. Step 2: Navigate to Your Listings Once you are in your hosting dashboard, locate the Listings option in the top menu. This is where you can manage all aspects of your properties. Click on it, and you will see all your listings displayed. Find the listing for which you want to add or delete photos. Step 3: Open the Photo Editor Now, click on your listing image to open the listing editor. By default, the editor will select the Photo Tour option on the left-hand side, allowing you to see all your images on the right. This is where the magic happens! Step 4: Adding New Photos If you want to enhance your listing, adding new photos is a great way to do it! To add more photos, look for the plus icon within the editor. Clicking on this icon will present you with an Add Photos option. Select this, and you will be prompted to choose the photos you wish to upload from your computer. When selecting photos, aim for high-quality images that showcase your property effectively. It’s recommended to include a mix of wide-angle shots and close-up details to attract potential guests. Make sure that your images are well-lit and capture the essence of your space! Step 5: Deleting Existing Photos Sometimes, you may find that certain photos no longer represent your property well. In such cases, it’s essential to remove them. To do this, click on the All Photos option. This will display all the images currently associated with your listing. Scroll through the images until you find the one you want to delete. Once located, click on the delete icon in the top right corner of that image. Be cautious! When you confirm the deletion, the photo will be permanently removed from your listing. Take a moment to ensure that you are deleting the correct photo, as this action cannot be undone. Step 6: Finalizing Your Changes After adding or removing photos, it’s always a good idea to review your listing. Make sure that the new photos are displayed correctly and that your listing still conveys the right message to potential guests. Once satisfied, you can save your changes and exit the editor. Pro Tips for Successful Airbnb Listings High-Quality Images: Always prioritize high-resolution photos. Blurry or poorly lit images can deter potential guests. Diverse Angles: Include a variety of shots, such as wide-angle views of rooms, close-ups of unique features, and even outdoor spaces. Regular Updates: Keep your listing fresh by regularly updating photos, especially after any renovations or decor changes. Engaging Captions: Consider adding captions or descriptions for each photo to highlight special features or amenities. Frequently Asked Questions (FAQ) Q1: Can I add photos from my mobile device? A1: While you can manage your Airbnb listing from a mobile device, it’s recommended to use a desktop computer for adding or deleting photos, as the mobile app does not support these features effectively. Q2: How many photos can I upload to my listing? A2: Airbnb allows you to upload multiple photos to your listing. However, it’s best to focus on quality over quantity. Aim for a well-rounded selection that showcases your property effectively. Q3: What types of photos should I include? A3: Include a mix of wide-angle shots, close-ups of details, and images of amenities. Highlight unique features of your property to capture guests’ attention. Q4: Can I edit the photos after uploading them? A4: No, once photos are uploaded, you cannot edit them directly within Airbnb. You would need to delete the existing photo and upload a new version if changes are necessary. Q5: Is there a recommended order for my listing photos? A5: Yes, it’s advisable to start with the most appealing and spacious images first, such as living areas or bedrooms, to draw guests in. Follow with images of bathrooms, kitchens, and unique features. Conclusion Updating your Airbnb listing with fresh and relevant photos is a vital part of attracting guests and enhancing their booking experience. By following these simple steps to add or delete photos, you’ll ensure that your listing remains appealing and up-to-date. Remember, high-quality images can make a significant difference in how potential guests perceive your property. So, whether you’re looking to refresh your image gallery or remove outdated photos, you now have the knowledge to do so effectively. Happy hosting, and may your Airbnb journey be filled with success!
Airbnb Hosting Tips: How to Pause or Unpublish Your Airbnb Listing in 2025
Welcome to the ultimate guide on managing your Airbnb listing! If you’re looking for ways to take a break from hosting or need to unlist your property for any reason, you’ve come to the right place. This comprehensive article will walk you through the steps to unlist or snooze your Airbnb listing in just a few clicks. Whether you’re going on holiday, doing renovations, or simply need a breather, these Airbnb hosting tips will help you manage your listing effectively. Table of Contents Step 1: Access Your Hosting Dashboard Step 2: Locate Your Listing Step 3: Open the Listing Editor Step 4: Choose Your Listing Status Step 5: Unlist Your Property Step 6: Relisting Your Property Conclusion Frequently Asked Questions Step 1: Access Your Hosting Dashboard First things first, you need to log into your Airbnb account from your computer. While the mobile app is handy for many tasks, it’s not ideal for managing your listing status. So grab your laptop or desktop and follow these steps: Navigate to the top right section of the Airbnb homepage. Click on the “Switch to Hosting” option. This action will take you directly to your hosting dashboard. From here, you can manage all aspects of your listings, including unlisting or snoozing them. Step 2: Locate Your Listing Once you’re in your hosting dashboard, the next step is to find your specific listing. Here’s how: Click on the “Listings” option in the top menu. Select your listing from the list that appears. This will open up the listing editor, where you can make changes to your listing status. Step 3: Open the Listing Editor To unlist or unpublish your property, you’ll need to access the settings within the listing editor. Follow these steps: Look for the cog wheel icon located next to the “Arrival Guide”. Click on the cog wheel to access the listing status settings. Here, you will find the option to change your listing status. Step 4: Choose Your Listing Status In the listing status settings, you’ll see two options: “Listed” and “Unlisted.” If you want to unlist your property, simply select the “Unlisted” option. However, before you proceed, consider the following: If you only need to pause your listing temporarily, you can choose to snooze it. If you’re going on a holiday or need a short break, snoozing is a great option. To snooze your listing, click on the “Choose Dates” option, and select the dates when you want your property to be unavailable on Airbnb. Once you’ve chosen your dates, click “Save.” Step 5: Unlist Your Property If you decide that unlisting is the best option for you, follow these steps: Scroll down to the bottom of the listing status settings. Click on the “Unlist for Now” option. After clicking this option, you’ll be prompted to choose a reason for unlisting your property. Select the option that best fits your situation and click “Unlist.” This action will make your property unavailable on Airbnb immediately. Step 6: Relisting Your Property When you’re ready to start hosting again, relisting your property is just as easy. Here’s what you need to do: Return to the same menu where you initially unlisted your property. Select the “Listed” option. Click on “List Your Space.” If you had snoozed your listing, it will automatically become publicly available on the end date you selected in the calendar. However, for properties that have been unlisted, you will need to manually relist them when you want to start hosting again. Conclusion By following these simple steps, you can easily manage your Airbnb listing status, whether you need to unlist it temporarily or permanently. Remember, the key to effective Airbnb hosting is being proactive and responsive to your needs as a host. Utilize these Airbnb hosting tips to ensure that your property is available when you want it to be, and take a break when you need to recharge. We hope this guide has been useful for you! If you have any questions or need further assistance, feel free to reach out. Happy hosting! Frequently Asked Questions What happens when I unlist my property? When you unlist your property, it becomes unavailable for bookings immediately. You will need to manually relist it when you are ready to host again. Can I snooze my listing instead of unlisting it? Yes, snoozing your listing allows you to temporarily take your property offline for a set period. It will automatically become available again on the date you select. Is it better to use the desktop version for managing my listing? Absolutely! The Airbnb mobile app is not suited for hosting steps like unlisting or managing your property. Always use a desktop for these tasks. How do I know when my property is relisted? You will receive a notification from Airbnb when your property is successfully relisted, and you can check the status in your hosting dashboard.
How to Delete In-progress Airbnb Listing in 2025 (Quick & Easy!) | Airbnb Hosting Tips
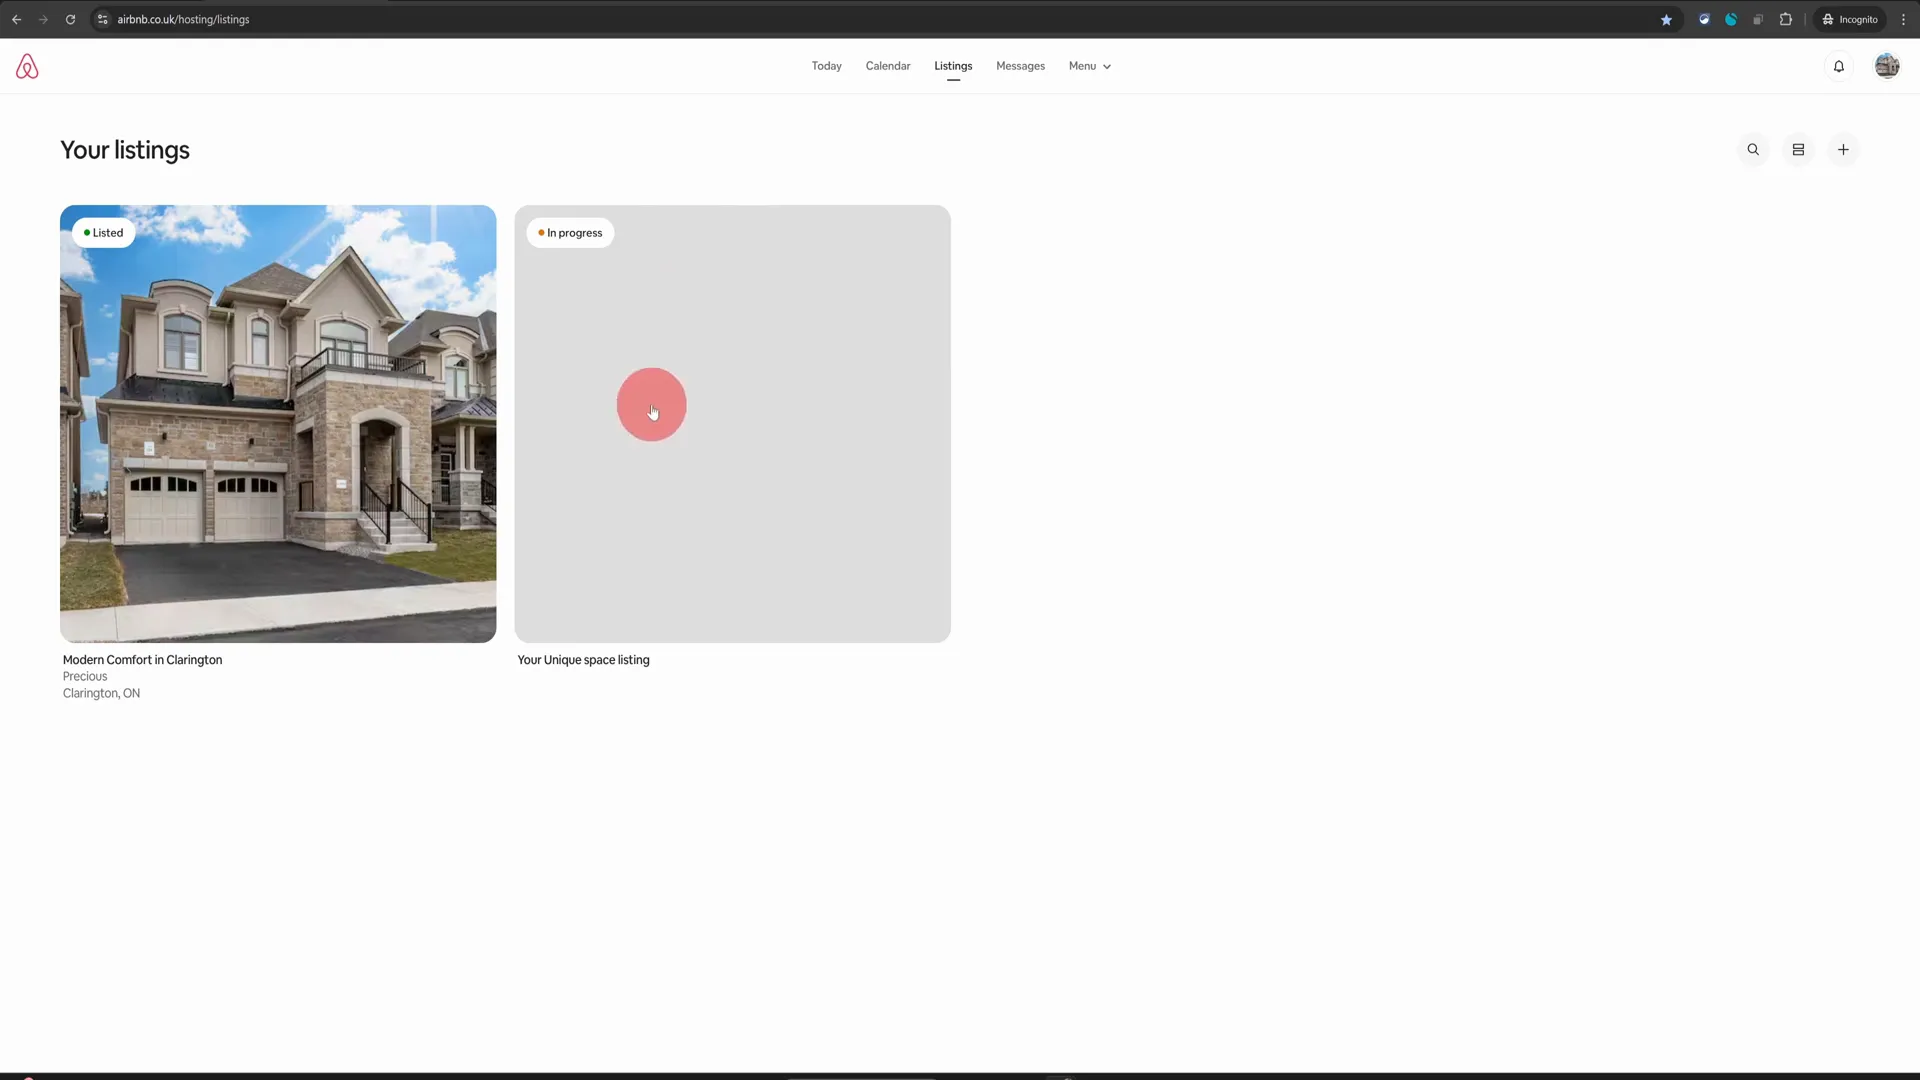
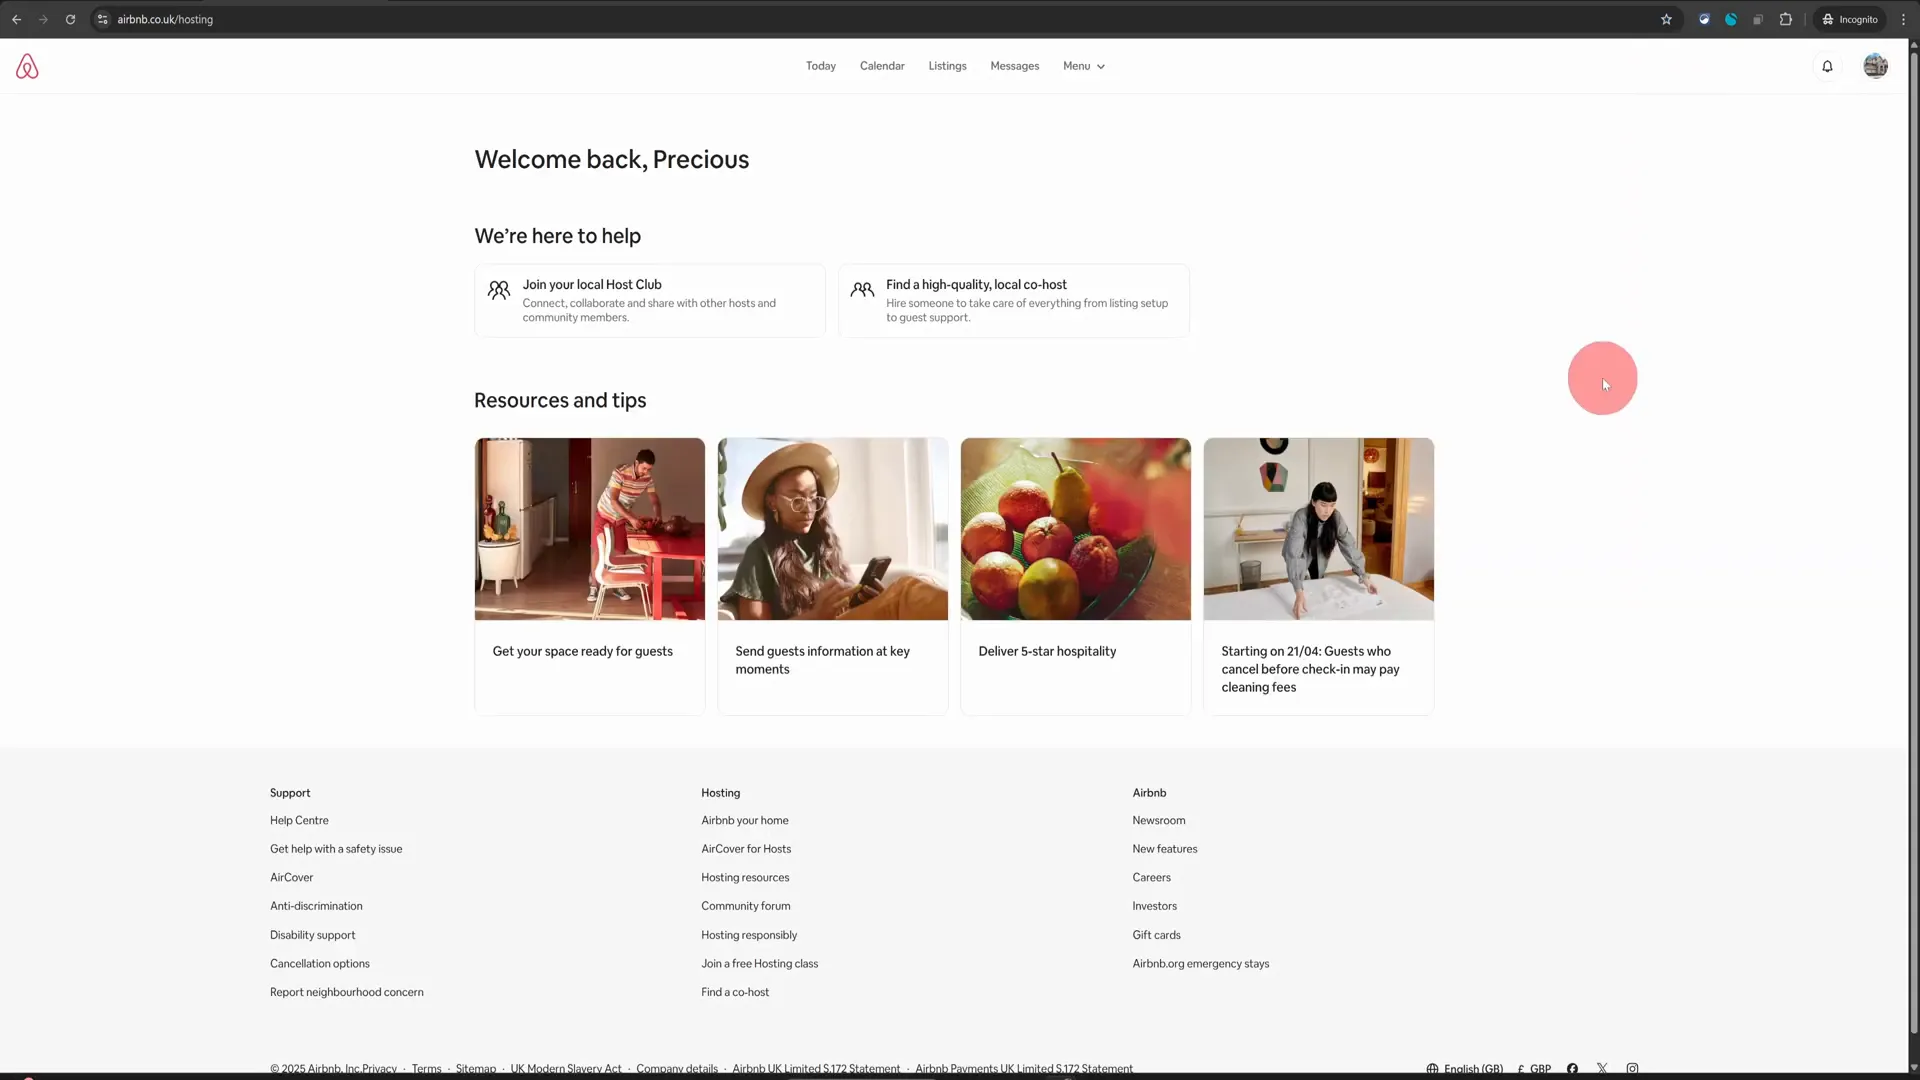
Welcome to the world of Airbnb hosting! If you’ve ever found yourself with an unfinished listing cluttering your dashboard, you’re not alone. Many hosts, both new and experienced, often create draft listings that they later decide to abandon. Luckily, deleting these in-progress listings is simpler than it seems. In this article, we’ll walk you through the steps to remove an unwanted draft listing from your Airbnb dashboard in just a few clicks. This guide is a must-read for anyone looking to streamline their hosting experience and keep their dashboard tidy. Table of Contents Step 1: Access Your Listings Page Step 2: Locate the Draft Listing Step 3: Change the Layout Step 4: Click the Arrow Icon Step 5: Confirm Removal Frequently Asked Questions (FAQ) Conclusion Step 1: Access Your Listings Page The first step in deleting an in-progress Airbnb listing is to access your listings page. Once you log in to your Airbnb account, navigate to the hosting dashboard. Here, you will find all your current and draft listings displayed prominently. Take a moment to identify the listings you have. You will likely see a live listing that is currently active, alongside any draft listings that you might have started but decided not to complete. In our example, we have a live listing and an in-progress listing that we want to delete. Step 2: Locate the Draft Listing On your listings page, you’ll notice that there is no obvious delete option available for draft listings. This can be a bit frustrating, especially when you’re trying to clean up your dashboard. However, don’t worry; there’s a simple trick to access the delete function. First, look towards the top right corner of your screen. You will see an icon that allows you to change the layout of your listings. Click on this icon to adjust the view. Step 3: Change the Layout After clicking on the layout icon, your listings will be displayed differently. This new layout will allow you to hover over your listings and see more options. Hover your mouse over the listing you wish to delete. On the right-hand side, an arrow icon will appear. This is your gateway to removing the unwanted draft listing. Step 4: Click the Arrow Icon Now that you have located the arrow icon next to your draft listing, click on it. This action will bring up several options related to that specific listing. Among these options, you will find the “Remove Listing” option. This is the option you want to select to proceed with the deletion. Step 5: Confirm Removal Once you click on the “Remove Listing” option, a prompt will appear asking you to confirm your decision. This is an important step, as it ensures that you don’t accidentally delete a listing that you might want to keep. Take a moment to review the listing details, and if you are sure you want to delete it, click on the “Yes, remove” button. After confirming, the temporary listing will be removed from your profile forever. This quick process helps keep your dashboard organized and clutter-free, allowing you to focus on the listings that matter. Frequently Asked Questions (FAQ) Why would I want to delete a draft listing? There are several reasons why you might want to delete a draft listing. Perhaps you started creating a listing but decided it wasn’t the right time to host. Or maybe you created a test listing to experiment with the platform. Deleting these drafts helps maintain a clean and organized dashboard. Can I recover a deleted listing? Once a listing is deleted, it cannot be recovered. It’s important to ensure that you really want to delete the listing before confirming the action. If you’re unsure, consider simply deactivating the listing instead of deleting it. What if I don’t see the delete option? If you don’t see the delete option, make sure you are in the correct layout view. Follow the steps provided to change your layout. If the issue persists, consider reaching out to Airbnb support for assistance. Will deleting a draft listing affect my live listings? No, deleting a draft listing will not affect your live listings. Each listing operates independently, so you can manage them without concern for how one affects the other. Conclusion Managing your Airbnb listings doesn’t have to be a daunting task. By following these simple steps, you can easily delete any in-progress listings that are cluttering your dashboard. This not only helps you maintain an organized hosting profile but also ensures that you can focus on what truly matters—providing an excellent experience for your guests. Remember, whether you’re a new host or a seasoned pro, keeping your Airbnb hosting dashboard tidy is crucial for efficiency. If you found this guide helpful, be sure to explore more Airbnb hosting tips and tricks to enhance your hosting experience. Happy hosting!
Airbnb Hosting Tips: How to Change an Airbnb Reservation on Your Phone

Welcome to your comprehensive guide on changing an Airbnb reservation directly from your mobile device! Whether you’re a guest looking to extend your stay or a host needing to adjust details, this guide will walk you through the steps to make those changes effortlessly. The process is straightforward, and we will ensure you have all the information you need to navigate the Airbnb app with confidence. Table of Contents Step 1: Accessing the Reservation Step 2: Viewing Reservation Details Step 3: Changing the Reservation Step 4: Reviewing Pricing Changes Step 5: Breakdown of Charges Step 6: Sending the Request FAQs Conclusion Step 1: Accessing the Reservation The first thing you need to do is open the Airbnb app on your mobile phone. Once you’re in, navigate to the message thread related to the reservation you want to change. This is where you’ll find all the communication with your guest or host. At the top of the message thread, there will be a “Details” option. Click on this to proceed. This leads you to the reservation details page, where you can view all pertinent information about the booking. Step 2: Viewing Reservation Details Once you’re on the reservation details page, scroll down to view all the information related to the booking. You’ll see options that will help you manage the reservation. Towards the bottom of the page, you’ll find a section labeled “Support.” Here, you’ll see the “Change a Reservation” option. Clicking on this will take you to a menu where you can make various changes. Step 3: Changing the Reservation In this menu, you can change three key aspects: the property, the dates, and the number of guests. Let’s break these down one by one. Changing Properties If you want to move a guest from one property to another, ensure that both properties are under the same host account. Click on the dropdown icon to view all your listings. Select the property you wish to move the reservation to and click “Save.” However, in this example, let’s say you don’t want to change the listing. You can simply close this option. Changing Dates Next, let’s discuss how to change the dates of the reservation. Click on the “Change” option next to the dates. If the guest is already staying at your property and wants to extend their stay, you will not see the option to change the start date. Instead, you can select a new end date. For instance, if they want to extend their stay from the 7th to the 17th, you would select the 17th and click “Save.” Changing Guest Count If you need to adjust the number of guests, click on the “Change” option next to the guest count. Make the necessary changes and save. If you don’t need to change the guest count, simply close this option as well. Step 4: Reviewing Pricing Changes As you scroll down, the app will automatically calculate the new price based on any changes you’ve made. For example, if the original booking price was $2,000 and the new price reflects a change due to an extended stay, you’ll see this difference clearly. If you feel the new amount is too high, you can override it by clicking on the “Change” option next to the calculated amount and entering your desired figure. Step 5: Breakdown of Charges Further down the page, you’ll find a breakdown of the charges. This will show you the original payout, the new payout, and details about any service fees. If you need to see a detailed breakdown, you can click on that option. This transparency is essential for both hosts and guests to understand the financial implications of changes. Step 6: Sending the Request Once you’re satisfied with all the changes, the final step is to click on the “Send Request” option. This will notify the guest that you are attempting to alter their reservation. They will receive a notification from Airbnb with all the details you’ve adjusted, including the pricing breakdown. The guest will then have the option to accept or reject the alteration. FAQs Can I change a reservation if the guest has already checked in? Yes, you can change the end date of the reservation, but you won’t be able to change the start date once the guest has checked in. What happens if the guest rejects the alteration request? If the guest declines the request, the original reservation remains unchanged. You may need to communicate further to resolve the issue. Is there a fee for changing a reservation? Generally, there are no fees for changing a reservation, but it’s always good to check Airbnb’s policies or consult with your guest. Can I change the reservation details multiple times? Yes, you can make multiple changes, but each change will need to be sent as a new request to the guest for approval. Conclusion Changing an Airbnb reservation on your phone is a simple process when you know the steps. By following this guide, you can easily navigate the Airbnb app to adjust dates, guest counts, or even switch properties within the same host account. Remember to communicate clearly with your guests and ensure they are aware of any changes being made. Happy hosting! For more tips and tricks on Airbnb hosting, be sure to check out our other articles. Until next time, enjoy your hosting journey!
Interior Decor Tips That’ll Give Your AirBnB A More Broad Appeal
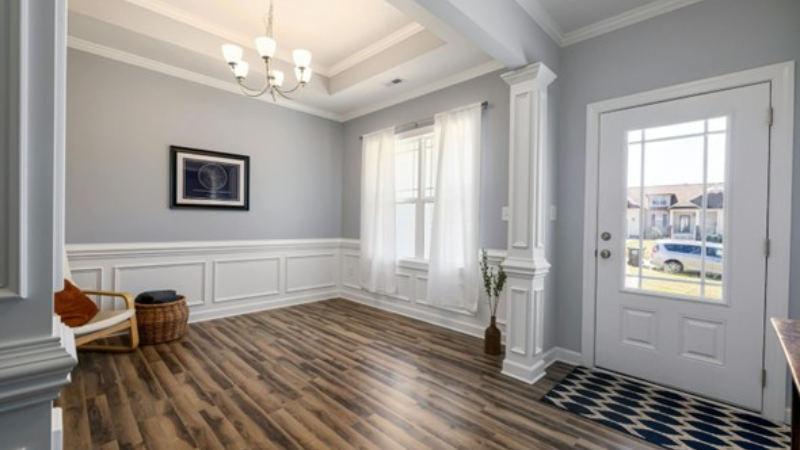
If you rent out a property on a short term basis, you’re probably a member of AirBnB. It’s a great way to make money, and if you’ve got a house sitting empty, why not rent out to the paying market? That being said, some AirBnBs are more popular than others. This is all to do with location, design, and even the price range on offer, but it also has something to do with the general appeal of the accommodation that these tourists scroll by. If your AirBnB hasn’t gotten much love since you put it up on the platform, this could be the problem you’re contending with. Thankfully, however, there’s a way to fix this: focus on a more broad appeal. It’s good to have a target client in mind, but if that’s been hit and miss for you thus far, you should widen the net with the tips down below. Go For Comfort Over Chic Touches It’s great to decorate, but you don’t want those decorations to supersede any actual comfort your AirBnB can offer. Art on the wall will look good, but if there’s a pretty empty living room down the hall that doesn’t even have a rug on the cold, hardwood floor, the illusion will very swiftly be broken. Use a Neutral Color Palette Neutral colors have the broadest appeal of all. They’re not offensive on the eye to anyone, and they can easily be matched with other colors on the same palette. That’s why a good neutral tone throughout your rental could bring more people into it. Both your walls and floor, as well as any furniture you place down, should share this kind of coloring throughout. Get a white or grey sofa for the living room, and put a set of Beige Dining Chairs in the dining room. Bed frames are also most popular when they’re white or off white in shade. Remember, the more things like stains and damp patches are easier to see, the more comfortable a guest will feel regarding the cleanliness of the property itself. Spark Interest in the Local Area Whoever is going to be staying is likely to want to find interesting, cool, and fun places nearby. That’s why a guide on nearby hotspots, for all age groups, is such a key feature in any AirBnB. It’s not unusual to find a guide in a holiday rental, and most AirBnBs will come with a manual for how to use the amenities and how to best respect the space. But alongside this, leaving a little guide to the local area, which can also include things like takeaway menus that you recommend, can lead to a lot more positive reviews on your guest profiles. When you have an AirBnB, try to ensure that most guests who come across it can see themselves staying in it. You can do this by targeting that sense of broad appeal, and the tips above will help you to do just that. You may also like to read; Create a Welcoming Airbnb with These Timeless Decor Ideas
5 Secrets to Maintaining a Stunning Airbnb Property
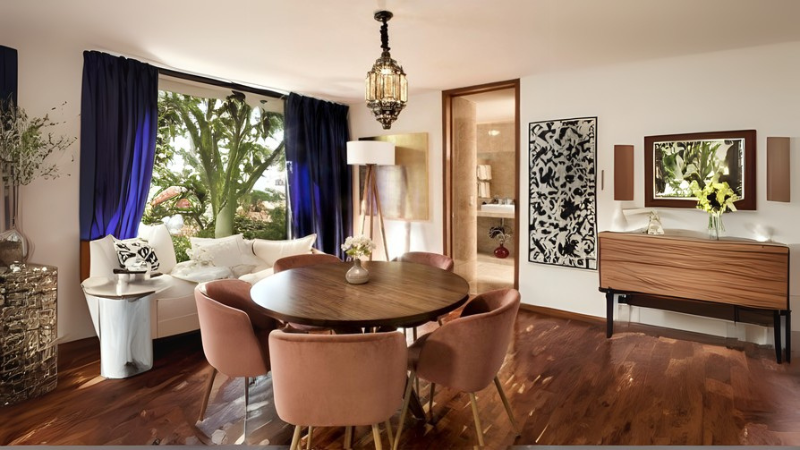
The vacation rental market can be extremely competitive, and having a well-maintained, eye-catching Airbnb can set you apart from the rest. Not only does a stunning property attract more guests, but it also leads to better reviews and repeat customers. Whether you are a seasoned host or just starting, let’s take a look at five secrets that can help you maintain a property that wows your guests from the moment they arrive. Secret 1: Prioritize Cleanliness and Organization A spotless space is important for your guest experience. Establish a routine cleaning schedule and ensure that every single nook and cranny is attended to between your guests’ stays. Organized spaces free of clutter not only help create a welcoming atmosphere but also minimize stress for your guests. Consider investing in a professional cleaning service and quality supplies, as a clean property will enhance your reputation and improve the longevity of your investment. Secret 2: Create a Warm and Inviting Interior The interior of your Airbnb needs to feel like a home away from home. Make sure to use comfortable furnishings, organized decor, and thoughtful lighting to set the right mood. Thoughtful touches such as quality linens, local artwork, and fresh flowers can help transform your space into a haven that resonates with your guests. Personalizing the decor by incorporating elements that reflect local culture can also make your property truly memorable. Secret 3: Stay on Top of Regular Maintenance Routine maintenance is the key to preventing minor issues from becoming larger problems. Regularly inspect the plumbing, appliances, and electrical systems to ensure everything functions properly. Keeping up with maintenance and scheduling checkups will help you identify any issues before they impact your guests’ experience while staying at your property. This proactive approach will not only save you from expensive repairs but will also demonstrate your commitment to providing a reliable, high-quality stay. Secret 4: Enhance Curb Appeal with Exterior Upgrades First impressions are formed before guests even step through the door. An upgrade to the exterior of your property can dramatically boost its appeal and help you gain more bookings. One effective way to elevate your Airbnb’s curb appeal is by incorporating stone veneer into your design. Stone veneer is a durable, low-maintenance material that can instantly add sophistication and texture to your property’s exterior. It has a timeless look that blends with modern aesthetics while also imparting traditional charm, making your home stand out in the neighborhood. Secret 5: Foster Excellent Communication with Your Guests Effective communication can turn a good experience into a great one. Make sure you respond quickly to inquiries, offer clear instructions for check-in and check-out, and provide local recommendations so that guests feel more at home. A personalized welcome message and a willingness to address any issues during a guest’s stay can leave a lasting positive impression. Building trust through good communication can often lead to better reviews and increased referrals, which are invaluable for Airbnb hosts. By focusing on these five secrets, you can ensure that your Airbnb property remains stunning and competitive. Investing in these strategies will not only delight your guests but also give you a better chance of successfully hosting Airbnb properties well into the future. You may also like to read; Create a Welcoming Airbnb with These Timeless Decor Ideas