

How to Delete In-progress Airbnb Listing in 2025 (Quick & Easy!) | Airbnb Hosting Tips
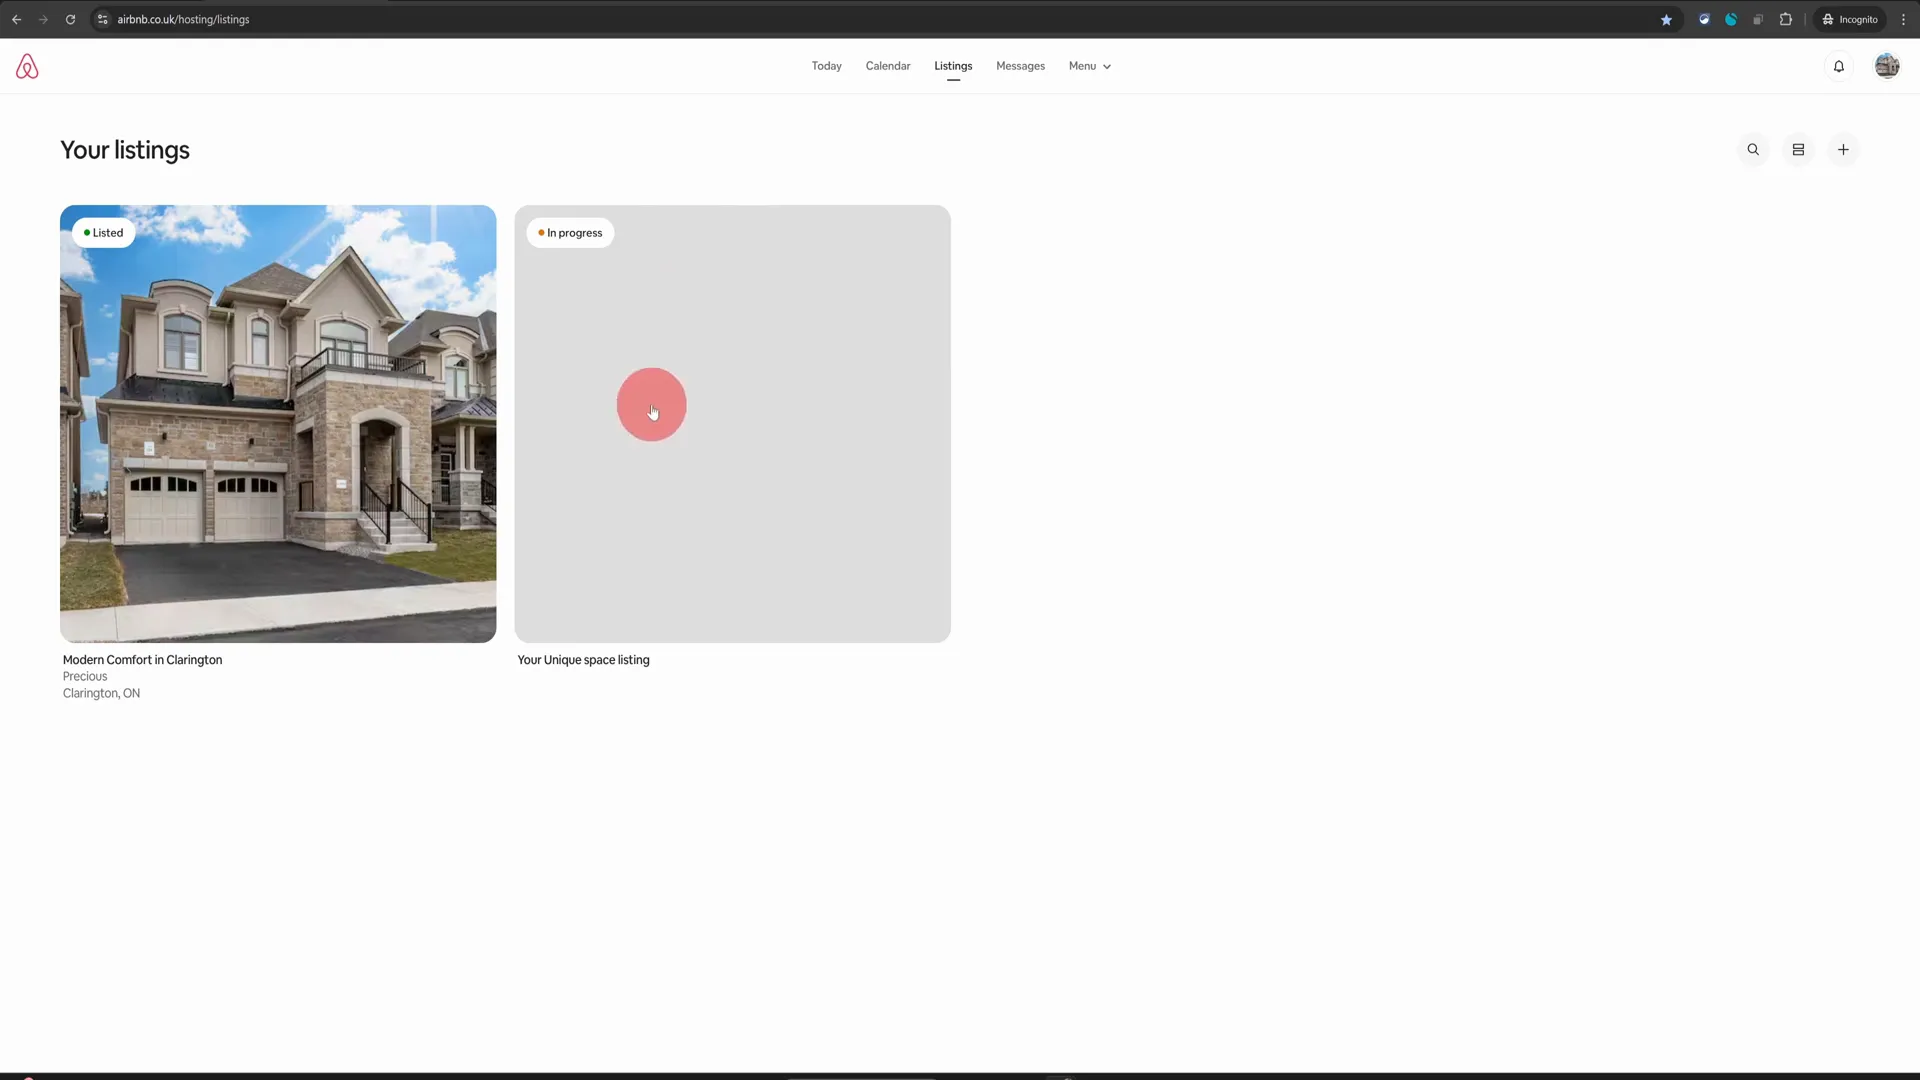
Welcome to the world of Airbnb hosting! If you’ve ever found yourself with an unfinished listing cluttering your dashboard, you’re not alone. Many hosts, both new and experienced, often create draft listings that they later decide to abandon. Luckily, deleting these in-progress listings is simpler than it seems. In this article, we’ll walk you through the steps to remove an unwanted draft listing from your Airbnb dashboard in just a few clicks. This guide is a must-read for anyone looking to streamline their hosting experience and keep their dashboard tidy. Table of Contents Step 1: Access Your Listings Page Step 2: Locate the Draft Listing Step 3: Change the Layout Step 4: Click the Arrow Icon Step 5: Confirm Removal Frequently Asked Questions (FAQ) Conclusion Step 1: Access Your Listings Page The first step in deleting an in-progress Airbnb listing is to access your listings page. Once you log in to your Airbnb account, navigate to the hosting dashboard. Here, you will find all your current and draft listings displayed prominently. Take a moment to identify the listings you have. You will likely see a live listing that is currently active, alongside any draft listings that you might have started but decided not to complete. In our example, we have a live listing and an in-progress listing that we want to delete. Step 2: Locate the Draft Listing On your listings page, you’ll notice that there is no obvious delete option available for draft listings. This can be a bit frustrating, especially when you’re trying to clean up your dashboard. However, don’t worry; there’s a simple trick to access the delete function. First, look towards the top right corner of your screen. You will see an icon that allows you to change the layout of your listings. Click on this icon to adjust the view. Step 3: Change the Layout After clicking on the layout icon, your listings will be displayed differently. This new layout will allow you to hover over your listings and see more options. Hover your mouse over the listing you wish to delete. On the right-hand side, an arrow icon will appear. This is your gateway to removing the unwanted draft listing. Step 4: Click the Arrow Icon Now that you have located the arrow icon next to your draft listing, click on it. This action will bring up several options related to that specific listing. Among these options, you will find the “Remove Listing” option. This is the option you want to select to proceed with the deletion. Step 5: Confirm Removal Once you click on the “Remove Listing” option, a prompt will appear asking you to confirm your decision. This is an important step, as it ensures that you don’t accidentally delete a listing that you might want to keep. Take a moment to review the listing details, and if you are sure you want to delete it, click on the “Yes, remove” button. After confirming, the temporary listing will be removed from your profile forever. This quick process helps keep your dashboard organized and clutter-free, allowing you to focus on the listings that matter. Frequently Asked Questions (FAQ) Why would I want to delete a draft listing? There are several reasons why you might want to delete a draft listing. Perhaps you started creating a listing but decided it wasn’t the right time to host. Or maybe you created a test listing to experiment with the platform. Deleting these drafts helps maintain a clean and organized dashboard. Can I recover a deleted listing? Once a listing is deleted, it cannot be recovered. It’s important to ensure that you really want to delete the listing before confirming the action. If you’re unsure, consider simply deactivating the listing instead of deleting it. What if I don’t see the delete option? If you don’t see the delete option, make sure you are in the correct layout view. Follow the steps provided to change your layout. If the issue persists, consider reaching out to Airbnb support for assistance. Will deleting a draft listing affect my live listings? No, deleting a draft listing will not affect your live listings. Each listing operates independently, so you can manage them without concern for how one affects the other. Conclusion Managing your Airbnb listings doesn’t have to be a daunting task. By following these simple steps, you can easily delete any in-progress listings that are cluttering your dashboard. This not only helps you maintain an organized hosting profile but also ensures that you can focus on what truly matters—providing an excellent experience for your guests. Remember, whether you’re a new host or a seasoned pro, keeping your Airbnb hosting dashboard tidy is crucial for efficiency. If you found this guide helpful, be sure to explore more Airbnb hosting tips and tricks to enhance your hosting experience. Happy hosting!

Airbnb Hosting Tips: How to Change an Airbnb Reservation on Your Phone
Welcome to your comprehensive guide on changing an Airbnb reservation directly from your mobile device! Whether you’re a guest looking to extend your stay or a host needing to adjust details, this guide will walk you through the steps to make those changes effortlessly. The process is straightforward, and we will ensure you have all the information you need to navigate the Airbnb app with confidence. Table of Contents Step 1: Accessing the Reservation Step 2: Viewing Reservation Details Step 3: Changing the Reservation Step 4: Reviewing Pricing Changes Step 5: Breakdown of Charges Step 6: Sending the Request FAQs Conclusion Step 1: Accessing the Reservation The first thing you need to do is open the Airbnb app on your mobile phone. Once you’re in, navigate to the message thread related to the reservation you want to change. This is where you’ll find all the communication with your guest or host. At the top of the message thread, there will be a “Details” option. Click on this to proceed. This leads you to the reservation details page, where you can view all pertinent information about the booking. Step 2: Viewing Reservation Details Once you’re on the reservation details page, scroll down to view all the information related to the booking. You’ll see options that will help you manage the reservation. Towards the bottom of the page, you’ll find a section labeled “Support.” Here, you’ll see the “Change a Reservation” option. Clicking on this will take you to a menu where you can make various changes. Step 3: Changing the Reservation In this menu, you can change three key aspects: the property, the dates, and the number of guests. Let’s break these down one by one. Changing Properties If you want to move a guest from one property to another, ensure that both properties are under the same host account. Click on the dropdown icon to view all your listings. Select the property you wish to move the reservation to and click “Save.” However, in this example, let’s say you don’t want to change the listing. You can simply close this option. Changing Dates Next, let’s discuss how to change the dates of the reservation. Click on the “Change” option next to the dates. If the guest is already staying at your property and wants to extend their stay, you will not see the option to change the start date. Instead, you can select a new end date. For instance, if they want to extend their stay from the 7th to the 17th, you would select the 17th and click “Save.” Changing Guest Count If you need to adjust the number of guests, click on the “Change” option next to the guest count. Make the necessary changes and save. If you don’t need to change the guest count, simply close this option as well. Step 4: Reviewing Pricing Changes As you scroll down, the app will automatically calculate the new price based on any changes you’ve made. For example, if the original booking price was $2,000 and the new price reflects a change due to an extended stay, you’ll see this difference clearly. If you feel the new amount is too high, you can override it by clicking on the “Change” option next to the calculated amount and entering your desired figure. Step 5: Breakdown of Charges Further down the page, you’ll find a breakdown of the charges. This will show you the original payout, the new payout, and details about any service fees. If you need to see a detailed breakdown, you can click on that option. This transparency is essential for both hosts and guests to understand the financial implications of changes. Step 6: Sending the Request Once you’re satisfied with all the changes, the final step is to click on the “Send Request” option. This will notify the guest that you are attempting to alter their reservation. They will receive a notification from Airbnb with all the details you’ve adjusted, including the pricing breakdown. The guest will then have the option to accept or reject the alteration. FAQs Can I change a reservation if the guest has already checked in? Yes, you can change the end date of the reservation, but you won’t be able to change the start date once the guest has checked in. What happens if the guest rejects the alteration request? If the guest declines the request, the original reservation remains unchanged. You may need to communicate further to resolve the issue. Is there a fee for changing a reservation? Generally, there are no fees for changing a reservation, but it’s always good to check Airbnb’s policies or consult with your guest. Can I change the reservation details multiple times? Yes, you can make multiple changes, but each change will need to be sent as a new request to the guest for approval. Conclusion Changing an Airbnb reservation on your phone is a simple process when you know the steps. By following this guide, you can easily navigate the Airbnb app to adjust dates, guest counts, or even switch properties within the same host account. Remember to communicate clearly with your guests and ensure they are aware of any changes being made. Happy hosting! For more tips and tricks on Airbnb hosting, be sure to check out our other articles. Until next time, enjoy your hosting journey!
Airbnb Hosting Tips: Choosing the Right Amenities for Your Guests
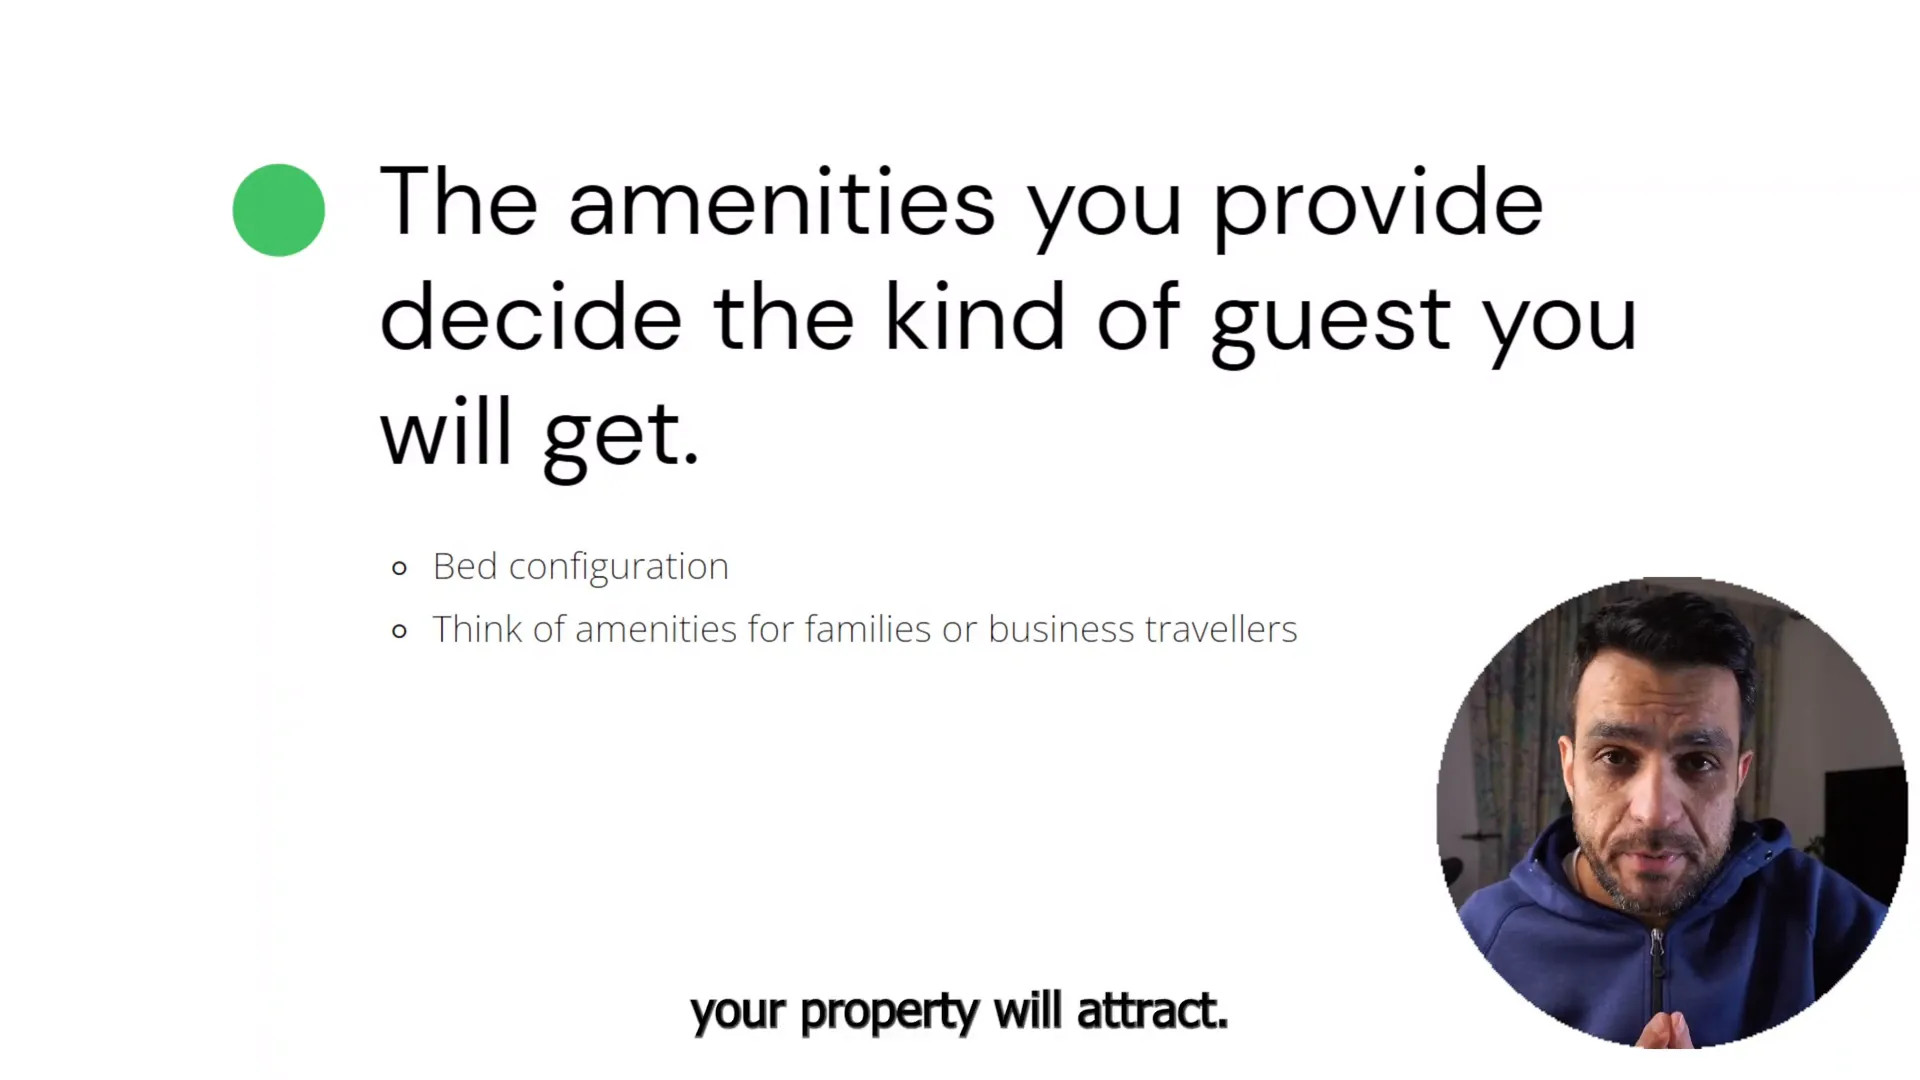
When it comes to Airbnb hosting, the amenities you provide can dictate the type of guests you attract. This guide will walk you through essential Airbnb hosting tips that can help you tailor your space to appeal to your ideal clientele. Understanding what different guest groups look for can mean the difference between a successful booking and a missed opportunity. Table of Contents Step 1: Understand Your Guest Demographics Step 2: Target Business Travelers Step 3: Cater to Families with Infants Step 4: Create Clear Communication Around Amenities Step 5: Avoid Attracting Noisy Groups Step 6: Highlight Family-Friendly Features Step 7: Be Specific in Your Listings Step 8: Prepare for Unique Guest Needs Step 9: Regularly Update Your Amenities Step 10: Gather Feedback and Adapt Frequently Asked Questions Step 1: Understand Your Guest Demographics The first step in selecting the right amenities is understanding the demographics of your potential guests. Different types of beds and amenities signal different guest groups. For instance: If you have all single beds, you’re likely to attract singles and stags. All double beds will draw in couples looking for a romantic getaway. A combination of double and single beds invites couples with young kids. Offering a travel cot with a high chair is perfect for families traveling with infants. By designing your property with these factors in mind, you can tailor your offerings to meet the needs of your ideal customers. Step 2: Target Business Travelers Business travelers are often considered the ideal guests. They typically require less hassle, as they are usually out during the day and return only to sleep. To attract this group, consider the following amenities: High-speed internet A dedicated workspace with a desk and chair Clear instructions for check-in and check-out to streamline their stay These features not only cater to their needs but also enhance the overall guest experience. Step 3: Cater to Families with Infants Families with infants can also be a great demographic to target. They tend to be quieter and require specific amenities. Here are some tips: Provide a travel cot and mattress, and be clear about what you offer. Communicate whether you will provide baby blankets or not. Make sure to specify any baby dining items or cutlery available. Being transparent about what baby items you provide helps families prepare adequately, ensuring their little ones are comfortable during their stay. Step 4: Create Clear Communication Around Amenities Clear communication is crucial. Guests appreciate knowing exactly what to expect. For example, if you provide a travel cot, specify that it comes with a mattress but no additional bedding for hygiene purposes. This avoids any confusion and ensures that guests arrive prepared. Here’s a simple message you could use: “We provide a travel cot with a mattress. Please bring your own blankets and any other bedding for hygiene reasons.” Step 5: Avoid Attracting Noisy Groups If your goal is to avoid noisy groups, be mindful of the amenities you offer. For instance, avoid providing features that encourage partying, such as large communal spaces or a hot tub. Instead, focus on creating a relaxing environment that appeals to families or business travelers. Step 6: Highlight Family-Friendly Features When you list your property, make sure to emphasize your family-friendly features. This could include: High chairs Baby cutlery Safety gates These amenities can significantly enhance the appeal of your listing to families, which can help you secure more bookings. Step 7: Be Specific in Your Listings When creating your Airbnb listing, be specific about the amenities you provide. If you have a travel cot, describe it in detail: Is it a travel cot or a regular cot? Do you provide a mattress? What additional items are available for infants? Being thorough in your descriptions helps set the right expectations and attracts the right guests. Step 8: Prepare for Unique Guest Needs Every guest group has unique needs. For instance, business travelers might need office supplies, while families may require entertainment options for kids. Considering these factors can help enhance the guest experience: Offer office supplies, such as pens and notepads, for business travelers. Provide toys or games for families. By anticipating these needs, you can create a welcoming environment that encourages positive reviews and repeat bookings. Step 9: Regularly Update Your Amenities As trends evolve, so should your amenities. Regularly assess what guests are looking for and update your offerings accordingly. Stay informed about current trends in short-term rentals to ensure your property remains competitive. Features like smart locks, high-speed internet, and eco-friendly products are increasingly popular. Step 10: Gather Feedback and Adapt Finally, gather feedback from your guests. Their insights can provide valuable information about what amenities worked well and what could be improved. Use this feedback to adapt and enhance the guest experience, ensuring you stay ahead of the competition. Frequently Asked Questions What are the must-have amenities for an Airbnb? Essentials include Wi-Fi, clean linens, towels, toilet paper, and basic kitchen supplies. Additionally, consider amenities that cater to your target demographic, like high chairs for families or workspace for business travelers. How can I attract more families to my Airbnb? Provide family-friendly amenities such as a travel cot, high chair, and toys. Be explicit in your listing about these features to attract families looking for a comfortable stay. Should I include amenities that attract party-goers? If your goal is to attract families or business travelers, avoid amenities that encourage loud gatherings, like large outdoor spaces or hot tubs. Instead, focus on creating a peaceful environment. How do I ensure guests know what amenities I provide? Be clear and detailed in your listing descriptions. Specify what each amenity includes and any limitations, such as hygiene requirements for baby items. What amenities can help me stand out from other listings? Unique amenities like local guides, welcome baskets, or complimentary drinks can set your listing apart. Consider adding thoughtful touches that enhance the guest experience.

Airbnb Hosting Tips: Why Your Listing Stopped Getting Bookings
You’ve listed your property on Airbnb, and initially, everything seems to be going well. But then, the bookings start to dwindle. What’s going on? In this post, we’ll dive into the essential Airbnb hosting tips that will help you keep your listing visible and appealing to potential guests. Understanding how to navigate the Airbnb algorithm and keeping your listing fresh is crucial for ongoing success. Table of Contents Step 1: Understand the Importance of Visibility Step 2: Master Search Engine Optimization (SEO) Step 3: Regular Updates Are Key Step 4: Leverage New Features Step 5: Engage with Your Guests Step 6: Optimize Your Listing Details Step 7: Monitor Your Competition Step 8: Use Airbnb’s Tools Step 9: Get Feedback and Implement Changes Step 10: Review Your Cancellation Policy Step 11: Create an Inviting Environment Step 12: Stay Active on the Platform FAQ Step 1: Understand the Importance of Visibility When you first list your property on Airbnb, it gets a temporary boost in visibility. This is Airbnb’s way of helping you gain initial bookings. However, as time goes on, your listing may slip down the search results. The reality is that only properties visible on the first two pages of search results get significant bookings. If you find yourself beyond page two, you may as well be invisible. Just like on Google, most users won’t venture beyond the first two pages. They associate listings on later pages with less trustworthiness, which can significantly impact your bookings. Therefore, your primary goal should be to remain on those first two pages. Step 2: Master Search Engine Optimization (SEO) So, how do you stay on top? This is where search engine optimization (SEO) comes into play. Airbnb has its own algorithm that determines which listings appear at the top. You’ll need to invest time regularly updating your listing, which keeps it aligned with Airbnb’s evolving features and settings. I recommend dedicating about an hour each week to this task. Keep your listing fresh by updating your photos, descriptions, and amenities. This not only improves your SEO but also shows potential guests that you are an active and engaged host. Step 3: Regular Updates Are Key Updating your listing weekly is not just a suggestion; it’s essential for maintaining visibility. Airbnb rewards hosts who keep their listings fresh. This means adding new photos, tweaking your descriptions, and ensuring all amenities are up to date. When you make changes, Airbnb’s algorithm takes notice, and this can lead to better placement in search results. Step 4: Leverage New Features Airbnb frequently rolls out new features and options for hosts. It’s crucial to stay informed about these updates and incorporate them into your listing. Whether it’s new pricing strategies, additional amenities, or even new rules for cancellations, staying ahead of the curve will help you maintain your competitive edge. Step 5: Engage with Your Guests Another significant factor that influences your visibility is your interaction with guests. Prompt communication and excellent service often lead to positive reviews. The more five-star reviews you accumulate, the better your listing will perform in search results. Always respond quickly to inquiries and messages. This not only builds rapport with potential guests but also signals to Airbnb that you are an active host. Step 6: Optimize Your Listing Details Make sure every section of your listing is filled out completely. This includes descriptions, amenities, and any unique features your property has. A comprehensive listing instills trust in potential guests and boosts your search ranking. Don’t forget to include high-quality photos; they are often the first impression potential guests will have of your property. Step 7: Monitor Your Competition Keep an eye on similar listings in your area. Understanding their pricing, amenities, and how they present their spaces can provide invaluable insights. Consider adjusting your pricing strategy based on what you observe. If your competitors are offering discounts or unique amenities, you might want to follow suit to stay competitive. Step 8: Use Airbnb’s Tools Airbnb provides various tools to help you manage your listing. Use the calendar management features to ensure your availability is current. An up-to-date calendar is crucial; an unavailability shown in your listing can lead to disappointed guests and lost bookings. Regularly update your calendar to reflect your property’s status accurately. Step 9: Get Feedback and Implement Changes After every guest’s stay, ask for feedback. This information can be crucial for improving your listing and overall hosting experience. If guests mention certain aspects they liked or areas needing improvement, act on this feedback. This not only enhances guest satisfaction but can also lead to better reviews. Step 10: Review Your Cancellation Policy Having a flexible cancellation policy can significantly affect your booking rates. Airbnb tends to promote listings with more lenient policies, making them more appealing to potential guests. Consider adjusting your cancellation policy to cater to changing travel needs. Step 11: Create an Inviting Environment Ensuring your property is welcoming and well-maintained is crucial. Invest in quality furnishings and upkeep. A clean, well-presented space will lead to positive reviews and repeat bookings. Guests want to feel comfortable and at home, so pay attention to the details. Step 12: Stay Active on the Platform Finally, be an active user of the Airbnb platform. Log in frequently, update your listing, and engage with potential guests. The more active you are, the better your chances of being prioritized in search results. Airbnb’s algorithm favours hosts who are regularly involved. FAQ What should I do if my listing stops getting bookings? If your listing isn’t getting bookings, start by reviewing your listing for completeness. Ensure that all details are filled out and that your photos are high-quality. Consider updating your pricing strategy and engaging more with potential guests. How often should I update my listing? Updating your listing weekly is recommended. Regular updates signal to Airbnb that you are an active host, which can help improve your visibility in search results. Does my cancellation policy affect my bookings? Yes, having a
Airbnb Hosting Tips: Setting the Right Cleaning Fee
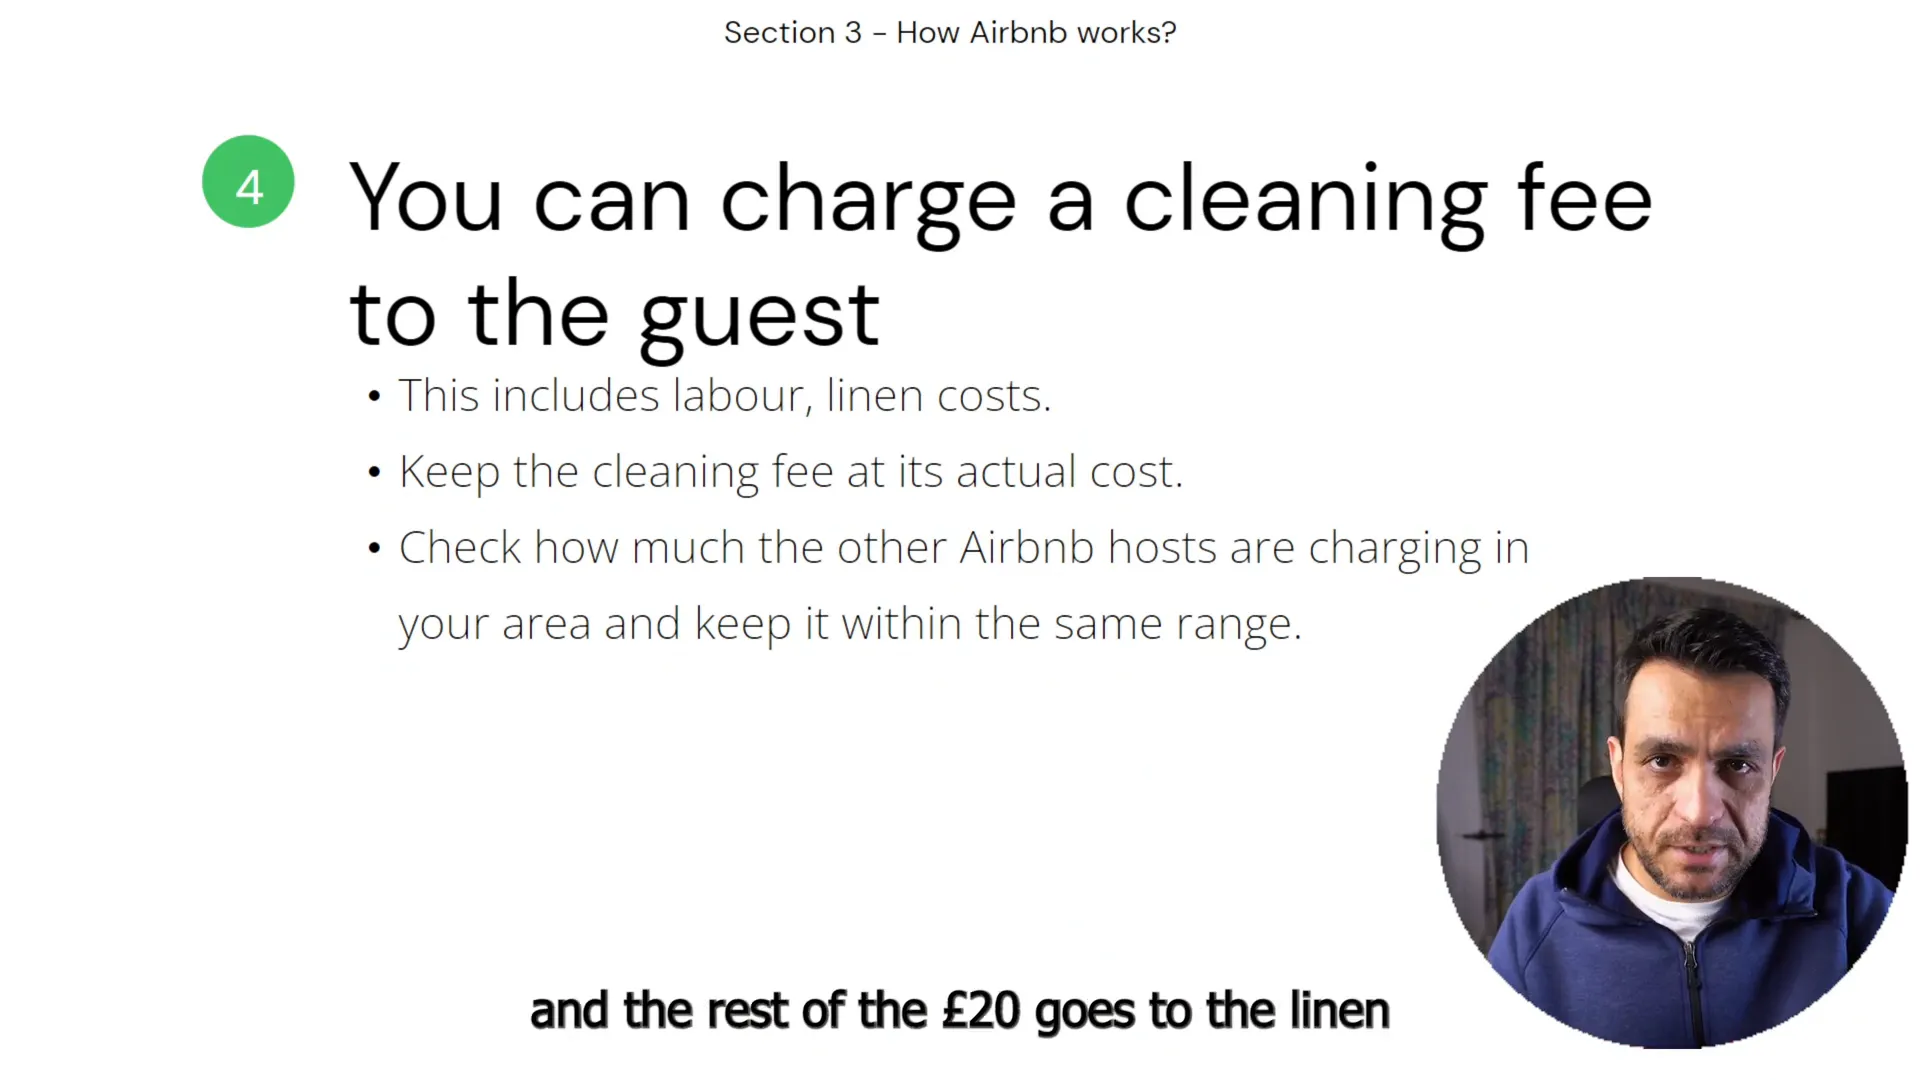
As an Airbnb host, one of the most crucial aspects of your listing is determining the right cleaning fee. This fee can greatly influence your booking rates and guest satisfaction. In this guide, we’ll walk you through all the essential steps to set a reasonable cleaning fee that works for both you and your guests. Table of Contents Step 1: Understand What the Cleaning Fee Covers Step 2: Keep It Reasonable Step 3: Research Local Competitors Step 4: Finding Reliable Cleaners Step 5: Know When to Charge for Extra Cleaning Step 6: Setting Expectations with Cleaners Step 7: Adjust Your Fee Based on Guest Behavior Step 8: Frequently Asked Questions Step 9: Final Thoughts Step 1: Understand What the Cleaning Fee Covers Your cleaning fee is not just a random number; it serves specific purposes. It covers the labor for cleaning the property, washing linens, and providing essential cleaning supplies. For instance, in my two-bedroom apartment in Edinburgh, I charge £50 for cleaning. Out of that, £30 goes directly to my cleaner for two hours of work, while the remaining £20 pays for linen service. Step 2: Keep It Reasonable While you can charge a cleaning fee, it’s essential to keep it reasonable. If you charge too much, you risk scaring off potential guests, especially when they’re comparing listings. A higher cleaning fee can lead to higher expectations from guests, which can backfire if they find the property doesn’t meet those expectations. For example, if I charged £100 for cleaning, guests might expect a pristine, hotel-like experience, which could lead to negative reviews. Step 3: Research Local Competitors To set a competitive cleaning fee, research similar properties in your area. Look for listings that are individually managed, as those managed by property management companies often have inflated prices. By checking a few listings, you can establish a ballpark figure for your cleaning fee. Step 4: Finding Reliable Cleaners Finding a good cleaner can be a straightforward process. Facebook groups dedicated to Airbnb hosts or local job boards can yield quick results. Post an ad, and you’ll likely receive responses within hours. I recommend hiring cleaners in pairs, whether they are friends, siblings, or a couple. This way, if one cleaner is unavailable, the other can step in without disrupting your schedule. Step 5: Know When to Charge for Extra Cleaning It’s important to clarify that the cleaning fee you charge is solely for cleaning after guests check out. If guests request mid-stay cleaning, they should be informed that it will incur additional charges. Your property is a self-service accommodation, so providing cleaning supplies like mops, vacuums, and laundry facilities can empower guests to maintain cleanliness during their stay. Step 6: Setting Expectations with Cleaners When negotiating with your cleaner, it’s vital not to let them convince you that cleaning takes longer than it does. Most guests leave properties in excellent shape, primarily to secure a good review. In my experience, 90% of guests clean up after themselves, making the actual cleaning time much shorter than expected. A two-bedroom apartment typically requires about one hour of cleaning, not three. Step 7: Adjust Your Fee Based on Guest Behavior While most guests leave the property tidy, some may make a mess, especially after extended stays. It’s crucial to account for these variations when determining your cleaning fee. However, the overall average cleaning time should remain consistent, allowing you to charge a fair fee that covers your costs without scaring off potential bookings. Step 8: Frequently Asked Questions Should I set a cleaning fee on Airbnb? Yes, including a cleaning fee is common and helps cover your costs. Ensure it’s clearly stated in your listing to avoid surprises for guests. Why is the cleaning fee often high on Airbnb? Cleaning fees can be higher than those of hotels due to the lack of economies of scale and the individual nature of short-term rentals. This fee covers the cleaning and preparation of the property for guests. How can I determine a competitive cleaning fee for my Airbnb listing? Research the average cleaning fees for similar properties in your area, considering their size and location. This will help you set a fair rate. How can I encourage longer stays at my Airbnb property? Consider setting a higher cleaning fee to discourage short-term bookings while offering discounts for longer stays. This approach can increase your occupancy rates and overall revenue. Step 9: Final Thoughts Setting the right cleaning fee is crucial for your success as an Airbnb host. By keeping it reasonable, understanding what it covers, and researching your competitors, you can create a fee structure that works for both you and your guests. Remember, a well-managed property leads to satisfied guests and positive reviews, which ultimately boosts your bookings.
Airbnb Hosting Tips: Understanding Airbnb Fees and Payouts
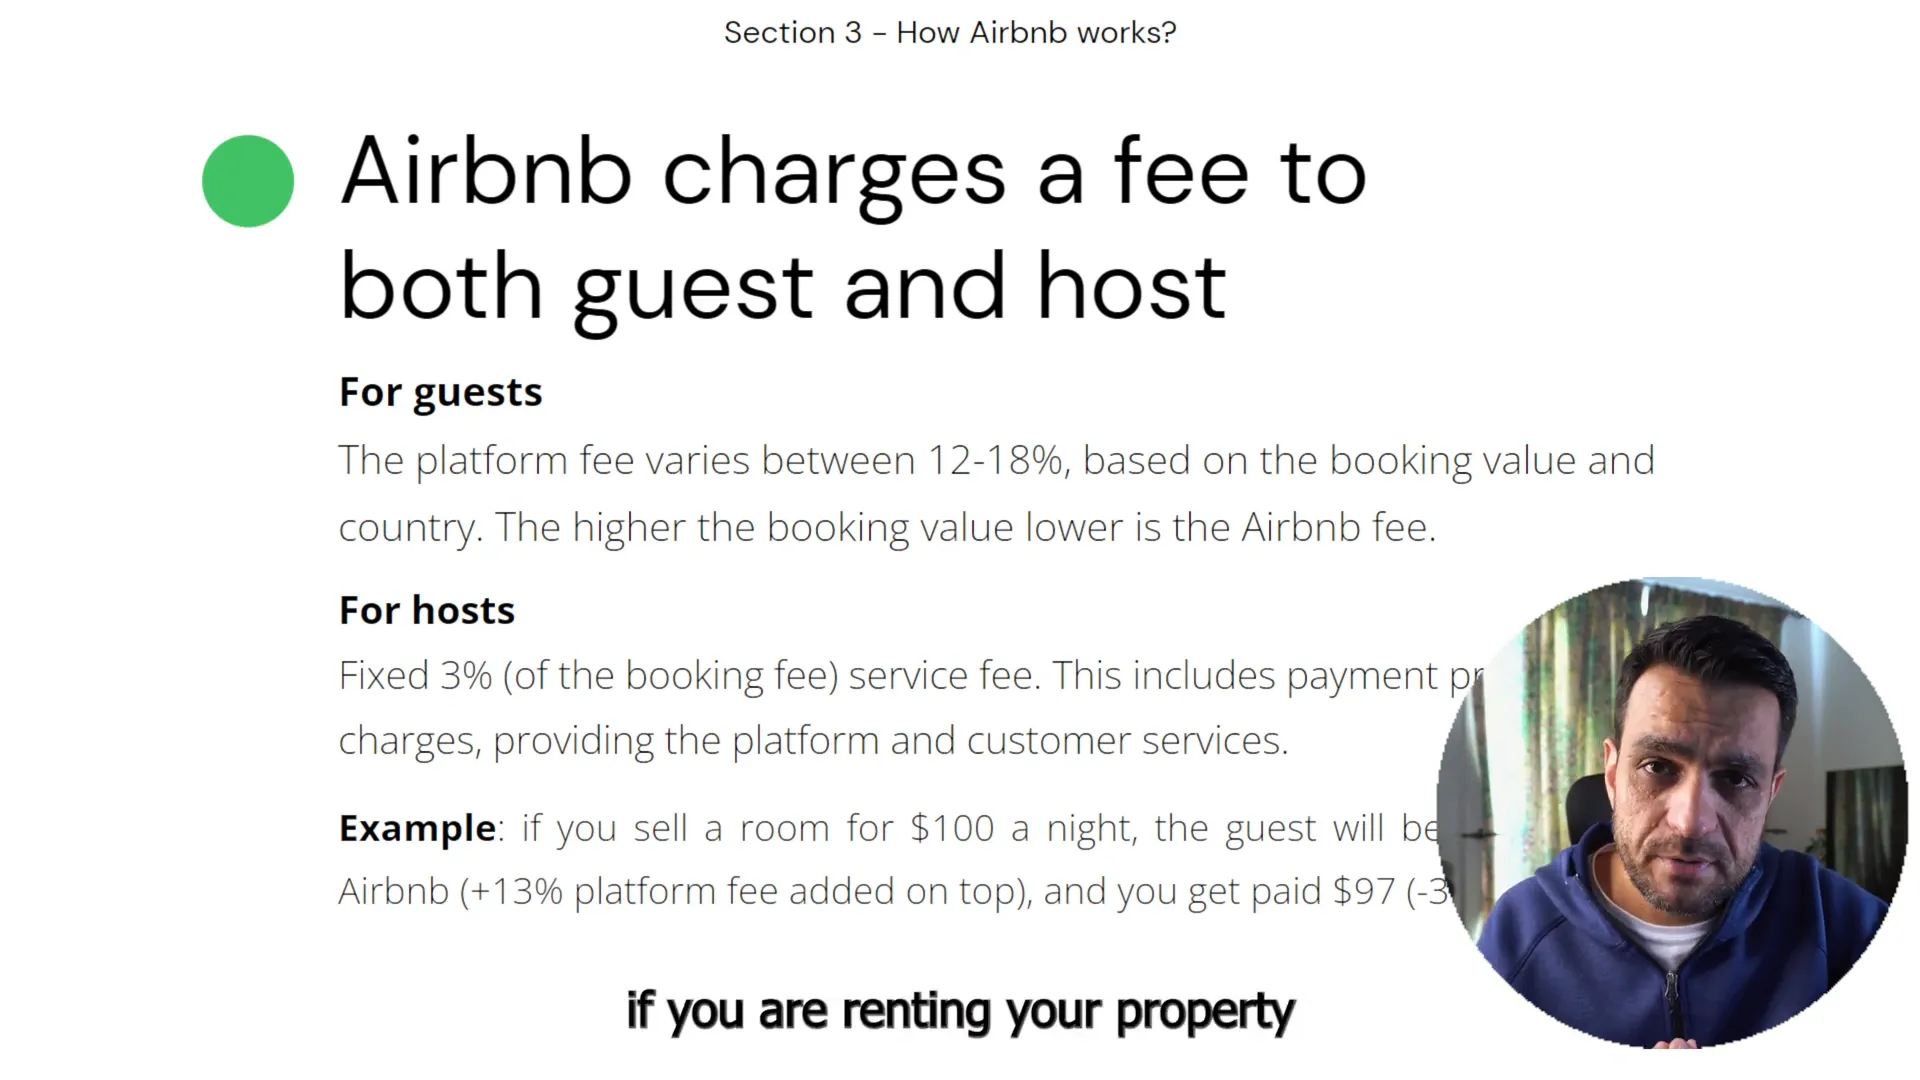
As an Airbnb host, understanding the fees associated with your listings is crucial. Not only do these fees impact your earnings, but they also influence your pricing strategy and overall profitability. In this guide, we’ll break down everything you need to know about Airbnb fees, how they work, and when you can expect to get paid. Table of Contents Step 1: Know the Fee Structure Step 2: Breakdown of Earnings Step 3: Understanding Tax Implications Step 4: When Do You Get Paid? Step 5: First Payment Considerations Step 6: Payment Methods Available FAQs About Airbnb Hosting Fees Conclusion: Maximise Your Airbnb Hosting Experience Step 1: Know the Fee Structure Airbnb has a straightforward fee structure that includes charges for both guests and hosts. Let’s dive into the specifics: Guest Service Fee: Airbnb charges guests a service fee that ranges from 12% to 18%. This percentage can vary based on the booking amount and duration. For our example, we’ll consider it to be around 15%. Host Service Fee: As a host, you’ll typically pay a flat 3% service fee on your booking subtotal. This fee covers various services, including customer support and payment processing. Step 2: Breakdown of Earnings Let’s say you’re renting your property for $100 per night. Here’s how the fees break down: The guest pays $115 ($100 + $15 service fee). You, as the host, will receive $97 after the $3 service fee is deducted. This means Airbnb makes $18 from the transaction, which includes the service fees from both parties. Step 3: Understanding Tax Implications In some regions, Airbnb may also charge taxes on the 3% host service fee. This could be VAT, GST, or HST, depending on your location. It’s important to note that this 3% fee is all Airbnb will take from you, and it covers various protections like liability and damage insurance. Unlike some other platforms, Airbnb does not impose extra card processing fees, which is a significant advantage for hosts. Step 4: When Do You Get Paid? One of the most important aspects of hosting is understanding when you will receive your payouts. Airbnb releases your payment 24 hours after the guest checks in. For example, if your check-in time is at 3:00 PM and the guest arrives at 6:00 PM, you’ll still receive your payment the following day at 3:00 PM. This waiting period serves as a protection for guests, allowing them to report any issues with the property. If there are no problems, you can expect your payout shortly thereafter. Step 5: First Payment Considerations It’s essential to understand that your first payment may take longer than usual due to identity checks and verification processes. Typically, you might wait around 5 to 7 days for this initial payment. After this initial wait, subsequent payments will be processed within 24 hours of the guest’s check-in. Step 6: Payment Methods Available When it comes to receiving your payments, Airbnb offers several options: Direct deposit into your local bank account in your local currency. Payments can also be sent to a foreign account if your property is located in another country. Alternatively, you can opt for payment through PayPal or Payoneer. Most hosts find that receiving payments isn’t an issue after the initial waiting period. FAQs About Airbnb Hosting Fees What is the average Airbnb service fee for guests? The average guest service fee is typically around 14.2%, but it can range from 12% to 18% depending on various factors. How can I calculate my earnings as a host? Your earnings can be calculated by taking your nightly rate, adding any additional fees (like cleaning fees), and subtracting the 3% host service fee. Are there any additional fees I should be aware of? Besides the service fees, you might encounter additional charges like cleaning fees, extra guest fees, or security deposits, which can vary by listing. How often will I receive payments from Airbnb? After your first payment, you will generally receive payments within 24 hours of your guest’s check-in. Conclusion: Maximise Your Airbnb Hosting Experience Understanding Airbnb fees and the payment structure is critical for any host aiming to maximise their earnings. By knowing how much Airbnb charges, when you’ll get paid, and the various payment options available, you can better manage your financial expectations and pricing strategies. Use these Airbnb hosting tips to enhance your hosting experience and ensure a successful venture in the short-term rental market!