Airbnb Photo Day Playbook: Staging, Shot List, and a 60-Minute Timeline
Unlock the full booking potential of your Airbnb listing with a strategic, efficient, and professional photo shoot. This playbook delivers a step-by-step guide to staging, shot selection, timeline management, and post-production workflow—plus actionable tips for leveraging tools like VideoMyListing and Guesty for maximum impact. Whether you're a seasoned host or launching your first property, this comprehensive resource ensures your listing stands out in a crowded marketplace.
Staging & Prop Kit: Preparing for Photo Day
Why Staging Matters
Professional staging transforms your property from “nice” to “irresistible.” According to Airbnb, listings with high-quality, well-staged photos can see up to 40% more bookings and command higher nightly rates. The goal is to create an inviting, aspirational atmosphere that helps guests visualize their stay.
Room-by-Room Staging Checklist
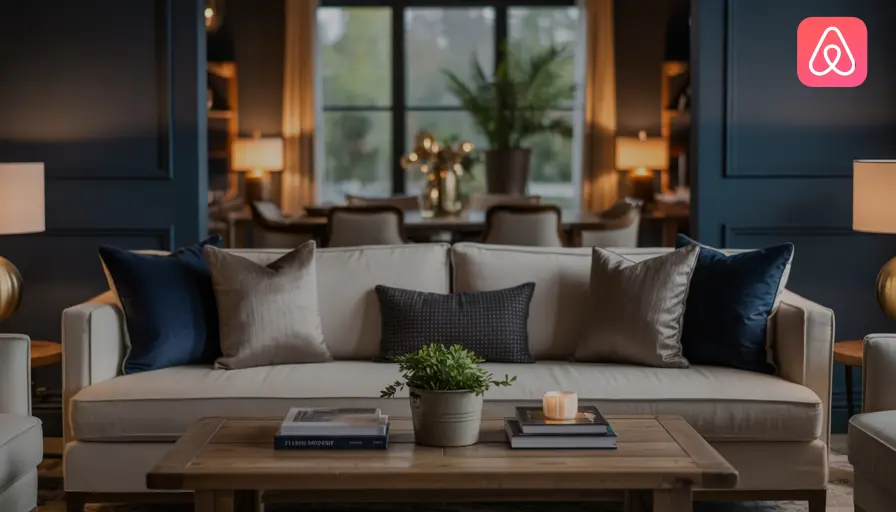
Living Room
- Declutter surfaces; remove personal items and excess decor.
- Arrange furniture to highlight space and flow.
- Add plush throws, accent pillows, and fresh flowers.
- Turn on all lamps and overhead lights for warmth.
- Open blinds/curtains for natural light.
Kitchen
- Clear countertops; leave only a few curated items (e.g., coffee maker, fruit bowl).
- Wipe down all surfaces and appliances.
- Set out a breakfast tray or wine glasses for lifestyle shots.
- Add a small plant or herb pot.
Dining Area
- Set the table with attractive place settings.
- Use neutral or seasonal decor (e.g., candles, centerpiece).
- Ensure chairs are evenly spaced.
Bedrooms
- Make beds with crisp linens, layered pillows, and a folded throw.
- Remove clutter from nightstands; add a book or lamp.
- Place a tray with coffee cups or breakfast items for a cozy touch.
- Open curtains for daylight.
Bathrooms
- Remove personal toiletries; display only essentials.
- Hang fresh towels; add a decorative soap or small plant.
- Ensure mirrors and glass surfaces are spotless.
Outdoor Spaces
- Arrange patio furniture neatly.
- Add cushions, throws, and outdoor tableware.
- Mow lawn, sweep paths, and tidy garden beds.
- Stage a lifestyle scene (e.g., breakfast on the terrace).
Special Features
- Highlight unique amenities: hot tub, pool, fireplace, game room, workspace.
- Stage with props that suggest use (e.g., towels by the pool, laptop on desk).
The Ultimate Prop Kit
A well-stocked prop kit streamlines staging and ensures consistency across shoots. Essentials include:
- Fresh flowers (multiple small bouquets)
- Neutral throw blankets and accent pillows
- Stylish trays (for breakfast-in-bed or coffee scenes)
- Glassware, mugs, and plates
- Candles and small plants
- Books and magazines
- Seasonal decor (e.g., pumpkins, holiday ornaments)
- Cleaning supplies (microfiber cloths, glass cleaner)
- Extra light bulbs (matching color temperature)
- Extension cords for lighting adjustments
For more advanced staging, consider renting decor items or consulting a professional stager (NAR Home Staging Resources).
Hour-by-Hour Schedule: The 60-Minute Timeline
Efficiency is critical—especially if you’re shooting multiple properties or working with limited daylight. This timeline maximizes productivity without sacrificing quality.
| Time | Task | Details |
|---|---|---|
| 0:00 – 0:10 | Final Staging & Lighting | Walk through each room, adjust props, turn on all lights, open blinds. Check for clutter and last-minute fixes. |
| 0:10 – 0:20 | Living Room & Dining Area | Capture wide shots, vignettes, and lifestyle scenes. Shoot from multiple angles. |
| 0:20 – 0:30 | Kitchen & Bathrooms | Focus on cleanliness, details, and unique features. Use close-ups for luxury touches. |
| 0:30 – 0:40 | Bedrooms | Shoot straight-on and angled shots. Highlight bedding, views, and cozy setups. |
| 0:40 – 0:50 | Special Features & Amenities | Photograph pool, patio, workspace, game room, etc. Stage with relevant props. |
| 0:50 – 1:00 | Exterior & Golden Hour | Capture hero shot, curb appeal, garden, and location context. Schedule for golden hour if possible. |
Pro Tip: If you have an assistant, delegate prop placement and quick tidying between rooms to save time.
Essential Shot List: Printable Checklist
A well-organized shot list ensures you capture every space and feature that matters to guests—and helps you avoid missed opportunities.
Airbnb Photo Day Shot List
Living Room
- Wide shot from entry
- Seating area close-up
- Fireplace or feature wall
- Window view
Dining Area
- Table set for a meal
- Wide shot showing connection to living/kitchen
Kitchen
- Wide shot of layout
- Countertop details (coffee maker, breakfast tray)
- Appliance close-up
- Window or view
Bedrooms (repeat for each)
- Wide shot from doorway
- Bed detail (pillows, throw)
- Nightstand vignette
- Window/view from bed
Bathrooms (repeat for each)
- Wide shot
- Vanity and sink detail
- Shower/tub close-up
- Towel and amenity vignette
Outdoor Spaces
- Patio/deck wide shot
- Seating area close-up
- Garden or pool overview
- Lifestyle scene (breakfast, drinks, etc.)
Special Features
- Workspace or desk
- Game room or entertainment area
- Fireplace or wood stove
- Hot tub or sauna
Exterior
- Hero shot (front of property)
- Entryway
- Street view or neighborhood context
- Golden hour shot
Location Context
- Nearby attractions (beach, park, city skyline)
- Walkable amenities (cafes, shops)
Printable Shot List Template
Airbnb Photo Day Shot List

[ ] Living Room: Wide shot
[ ] Living Room: Seating close-up
[ ] Living Room: Feature wall/fireplace
[ ] Living Room: Window view

[ ] Dining Area: Table set
[ ] Dining Area: Wide shot

[ ] Kitchen: Wide shot
[ ] Kitchen: Countertop detail
[ ] Kitchen: Appliance close-up
[ ] Kitchen: Window/view

[ ] Bedroom 1: Wide shot
[ ] Bedroom 1: Bed detail
[ ] Bedroom 1: Nightstand vignette
[ ] Bedroom 1: Window/view

[ ] Bedroom 2: Wide shot
[ ] Bedroom 2: Bed detail
[ ] Bedroom 2: Nightstand vignette
[ ] Bedroom 2: Window/view

[ ] Bathroom 1: Wide shot
[ ] Bathroom 1: Vanity detail
[ ] Bathroom 1: Shower/tub
[ ] Bathroom 1: Towels/amenities

[ ] Outdoor: Patio/deck wide shot
[ ] Outdoor: Seating close-up
[ ] Outdoor: Garden/pool
[ ] Outdoor: Lifestyle scene

[ ] Special Features: Workspace
[ ] Special Features: Game room
[ ] Special Features: Fireplace
[ ] Special Features: Hot tub

[ ] Exterior: Hero shot
[ ] Exterior: Entryway
[ ] Exterior: Street/neighborhood
[ ] Exterior: Golden hour

[ ] Location: Nearby attractions
[ ] Location: Walkable amenities
File Naming & Ordering: Streamlining Post-Production
Why File Naming Matters
Consistent, descriptive file naming simplifies editing, uploading, and organizing across platforms like Airbnb, Booking.com, and Guesty. It also helps you quickly locate and update images as your property evolves.
Recommended File Naming Convention
Use a structure that reflects room, shot type, and sequence. Example:
[PropertyName]_[Room]_[ShotType]_[Sequence].jpg
Example:
- SeasideVilla_LivingRoom_Wide_01.jpg
- SeasideVilla_Kitchen_Detail_02.jpg
- SeasideVilla_Bedroom1_Bed_01.jpg
- SeasideVilla_Exterior_Hero_01.jpg
Ordering for Maximum Impact
- Hero shot first: The most visually compelling image leads your gallery.
- Main living spaces: Living room, dining, kitchen.
- Bedrooms: Master first, then additional rooms.
- Bathrooms: Start with the most luxurious.
- Outdoor spaces: Patio, pool, garden.
- Special features: Workspace, amenities.
- Exterior/context: Entryway, street view, golden hour.
- Location shots: Neighborhood, attractions.
Best Practice: Use the photo order to “walk” guests through the property as they would experience it in person. For more on sequencing, see Touchstay’s professional guide.
Post-Shoot Upload Plan: Fast, Consistent, Multi-Channel
Quick Post-Production Workflow
- Cull & Edit
- Review all images; delete duplicates and out-of-focus shots.
- Use editing software (e.g., Adobe Lightroom) for brightness, contrast, and cropping.
- Apply consistent color grading and straighten lines.
- Rename & Sequence
- Apply your naming convention.
- Organize files in the order you’ll upload.
- Resize & Export
- Export images at recommended resolutions (Airbnb: minimum 1200 x 800px; up to 10MB per image).
- Save web-optimized versions for faster loading.
- Upload to Airbnb
- Log in to your listing dashboard.
- Upload images in your planned sequence.
- Add descriptive captions for each photo, highlighting features and amenities.
- Multi-Channel Distribution
- Use Guesty for bulk uploading and ordering across Airbnb, Booking.com, Vrbo, and other platforms.
- Ensure captions and photo order are consistent everywhere.
- Video Integration
- Upload your VideoMyListing 60-second walkthrough to Airbnb and other channels.
- Place video after the hero shot or in the amenities section.
Pro Tips for Uploading
- Captions: Use clear, benefit-driven captions (“Wake up to ocean views from your king bed”).
- Bulk tools: Platforms like Guesty allow you to upload, caption, and reorder photos across multiple listings in one dashboard (Guesty photo upload guide).
- Video: Short walkthroughs boost engagement and booking rates. See VideoMyListing for easy creation and integration.
Leveraging VideoMyListing and Guesty: Advanced Tools for Hosts
VideoMyListing: The 60-Second Walkthrough
Video is rapidly becoming a must-have for competitive listings. A concise, well-produced walkthrough:
- Increases guest confidence by showcasing flow and scale.
- Highlights amenities and unique features in context.
- Can be used across Airbnb, Booking.com, Vrbo, and social media.
How to Create:
- Use your printable shot list as a storyboard.
- Film in landscape mode, walking through the property as a guest would.
- Keep clips short (2-5 seconds per room/feature).
- Edit for pacing and clarity; add background music if desired.
Integration:
- Upload to Airbnb’s video section or include in your gallery.
- Share on social media and direct booking sites.
For more, see VideoMyListing’s official guide.
Guesty: Bulk Upload & Photo Ordering
Guesty streamlines photo management for hosts with multiple properties or channels:
- Bulk upload images to all platforms.
- Drag-and-drop to reorder photos for each listing.
- Add captions and tags for SEO and guest engagement.
- Sync updates automatically across channels.
Best Practices:
- Use Guesty’s dashboard to preview how your gallery appears on each platform.
- Ensure hero shots and key features are prioritized everywhere.
- Update photos seasonally to reflect current amenities and decor.
Explore Guesty’s features and photo upload documentation.
Real-World Scenario: The 60-Minute Shoot in Action
Case Study: Urban Loft, Downtown Seattle
- Preparation: Host arrives 30 minutes early, stages each room with prop kit, opens blinds, and turns on all lights.
- Shoot: Photographer follows the shot list, capturing wide, detail, and lifestyle shots in sequence. Golden hour exterior scheduled for last 10 minutes.
- Post-Production: Images culled, edited, and renamed on-site. Photos uploaded to Airbnb and synced via Guesty. Video walkthrough created with VideoMyListing and added to gallery.
- Result: Listing receives 25% more views and books out weekends for the next two months.
Advanced Concepts & Best Practices
Lighting Techniques
- Golden Hour: Schedule exterior shots for the hour after sunrise or before sunset for soft, flattering light.
- Interior Lighting: Use a mix of natural and artificial light. Turn on all lamps, avoid harsh shadows, and match bulb color temperature.
- Wide-Angle Lens: Essential for making rooms feel spacious; use with care to avoid distortion.
Composition & Storytelling
- Rule of Thirds: Position key elements along grid lines for balanced images.
- Eye-Level Shots: Shoot from a natural perspective to mimic a guest’s view.
- Lifestyle Scenes: Stage moments (e.g., breakfast in bed, drinks on the patio) to help guests imagine their stay.
Editing & Retouching
- Use software like Lightroom or Canva for quick edits.
- Avoid over-editing; maintain realistic colors and lighting.
- Straighten lines, crop for clarity, and remove distractions.
Updating Your Gallery
- Refresh photos seasonally (e.g., cozy winter scenes, summer outdoor dining).
- Update hero shot to reflect current amenities or improvements.
- Add new location/context shots as neighborhood evolves.
Pros & Cons: DIY vs. Professional Photography
| Approach | Pros | Cons |
|---|---|---|
| DIY | Cost-effective, flexible scheduling, personal touch | May lack polish, requires time and skill, risk of poor lighting/composition |
| Professional | High-quality, expertly staged, optimized for bookings | Higher cost, scheduling required, less control over creative direction |
For most hosts, a hybrid approach—DIY with professional editing or occasional pro shoots—offers the best balance. For tips on hiring a photographer, see Airbnb’s official guide.
Actionable Tips for Hosts
- Prepare in advance: Stage and clean before the shoot; use your prop kit for consistency.
- Follow your shot list: Print or save the checklist to your phone.
- Leverage natural light: Schedule shoots for daytime and golden hour.
- Sequence strategically: Lead with hero shots, follow with living spaces, then bedrooms, bathrooms, and amenities.
- Use bulk tools: Guesty and VideoMyListing save time and ensure consistency.
- Update regularly: Refresh photos and captions to reflect upgrades and seasonal changes.
- Tell a story: Use captions and photo order to guide guests through the experience.
For more best practices, explore Professional Holiday Homes’ photo guide and GrowHost’s complete guide.
Resources & Further Reading
- Airbnb: How to Take Great Photos
- Touchstay: Professional Guide to Airbnb Photos
- Guesty: Multi-Channel Management
- VideoMyListing: Video Walkthroughs
- Smoobu: Guide to Airbnb Photos
- NAR: Home Staging Resources
- Canva: Photo Editing
- Adobe Lightroom
Transform your Airbnb listing with this playbook—maximize your visual appeal, streamline your workflow, and boost your bookings with every photo day.